Idea Generation
For my character, I decided I wanted to create a wizard, as I felt that it would be an interesting concept with a lot of traditional, stereotypical themes I could choose from, while having a lot of room for unique design decisions and ideas. To start, I looked for various different styles of wizard characters from different sources, to get a wide range of inspiration.
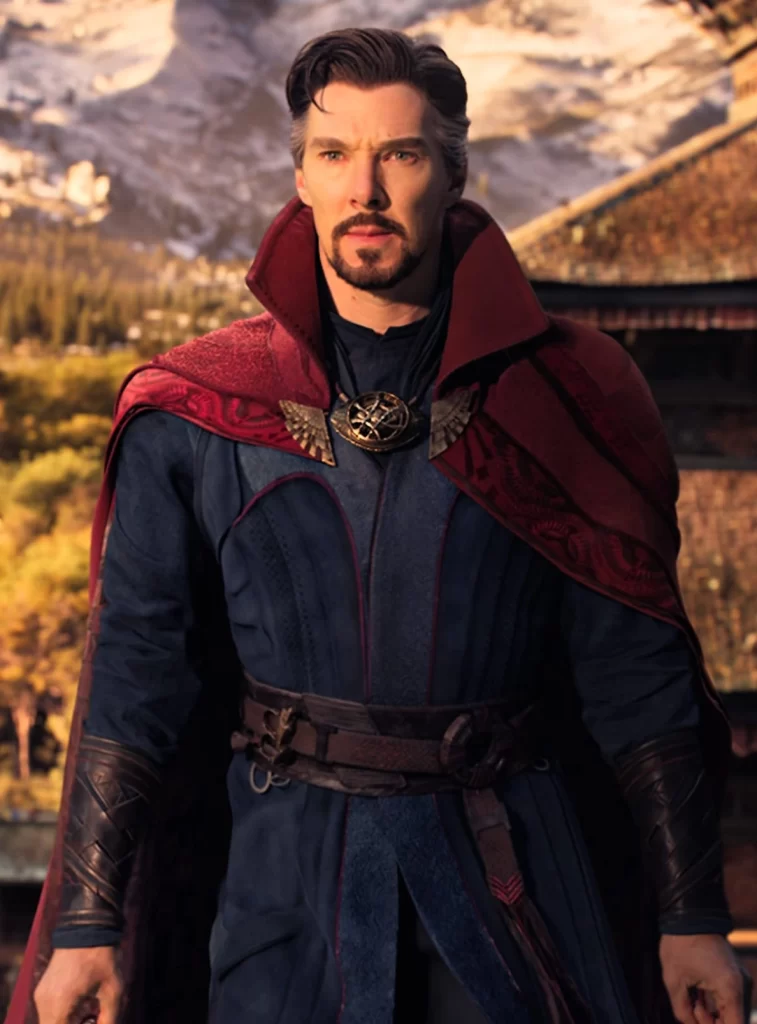
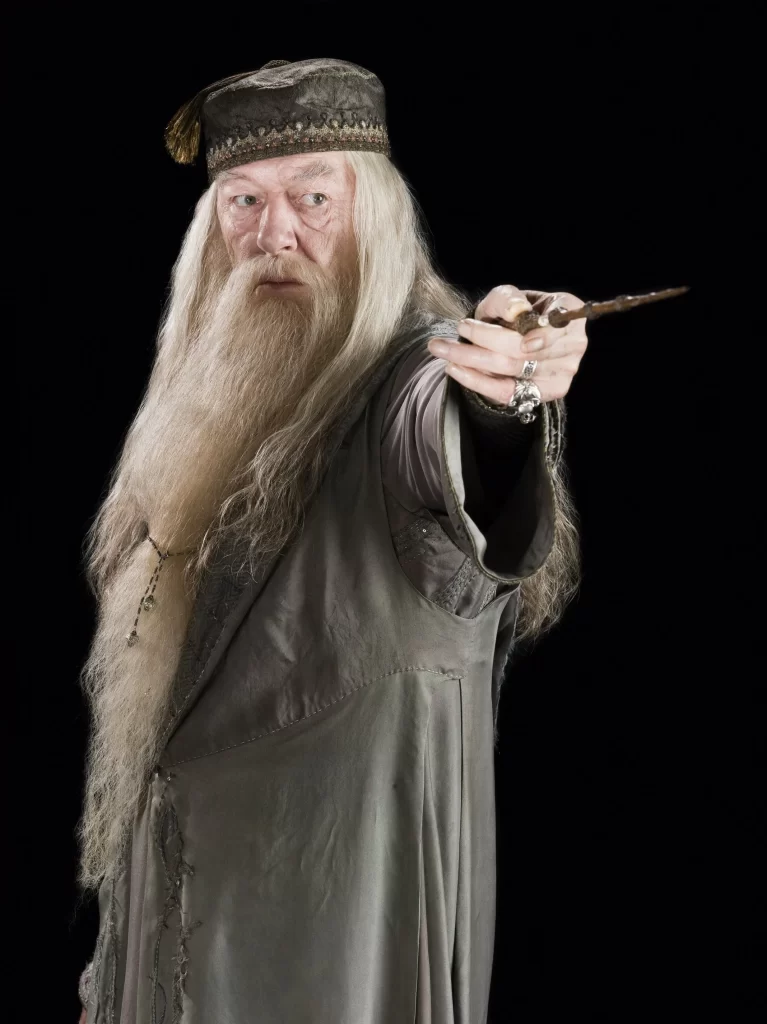
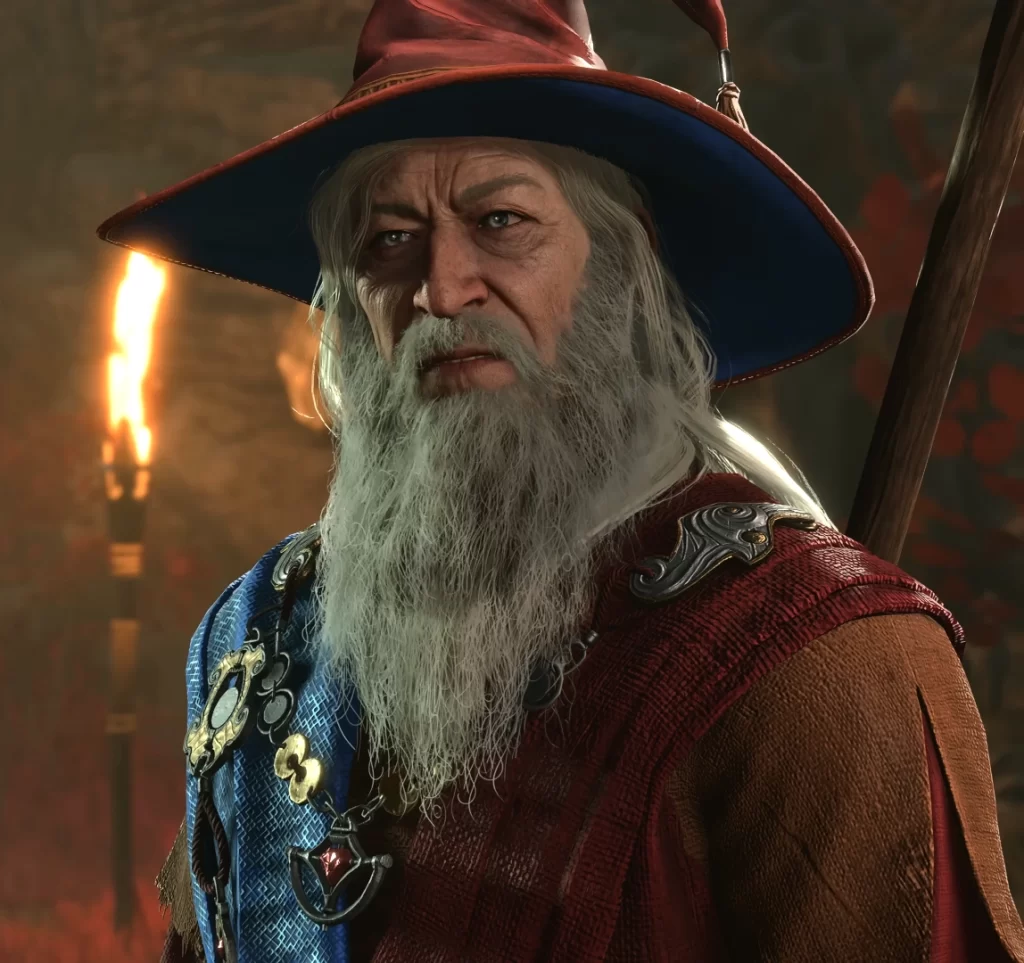
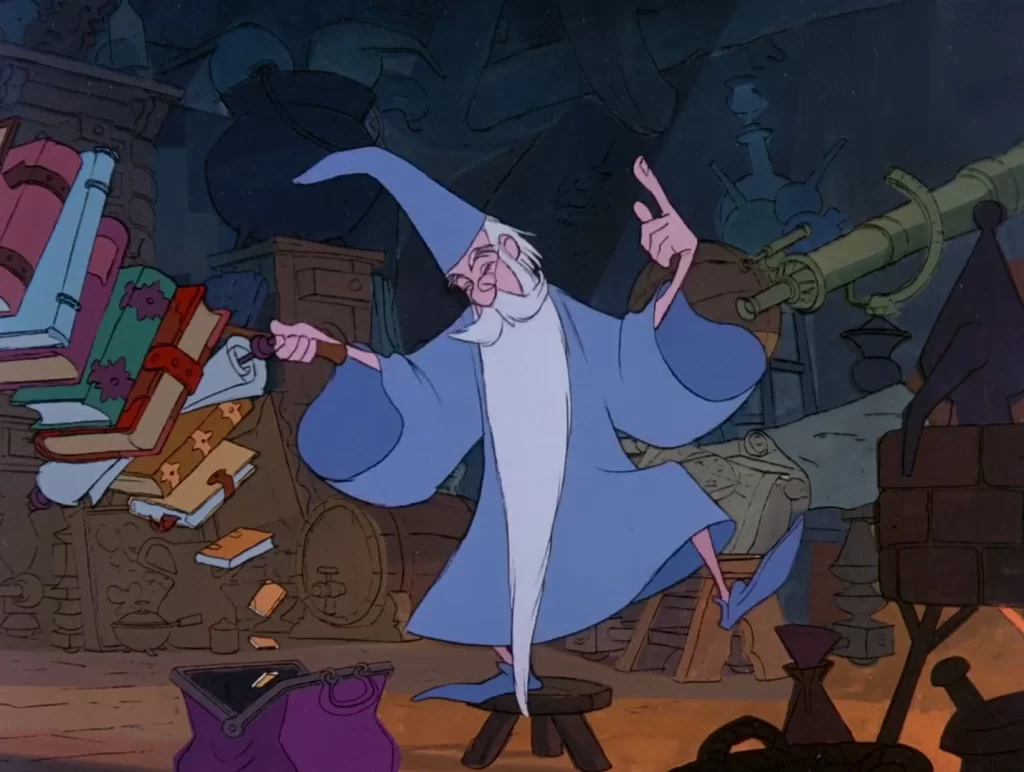
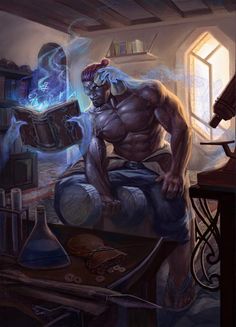
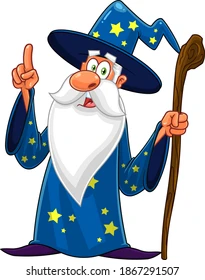
From these, I decided that Merlin’s and Elminster’s designs were the ones I wanted to take most inspiration from – however, I also wanted to make my character unique. I decided that, instead of the common “old man” design wizards often have, I wanted to create a strong, muscular wizard, who used physical strength in combination with magic – as opposed to the older, more frail wizard designs that use magic. I went and found some references based on that.
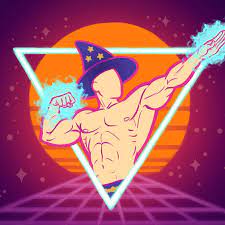
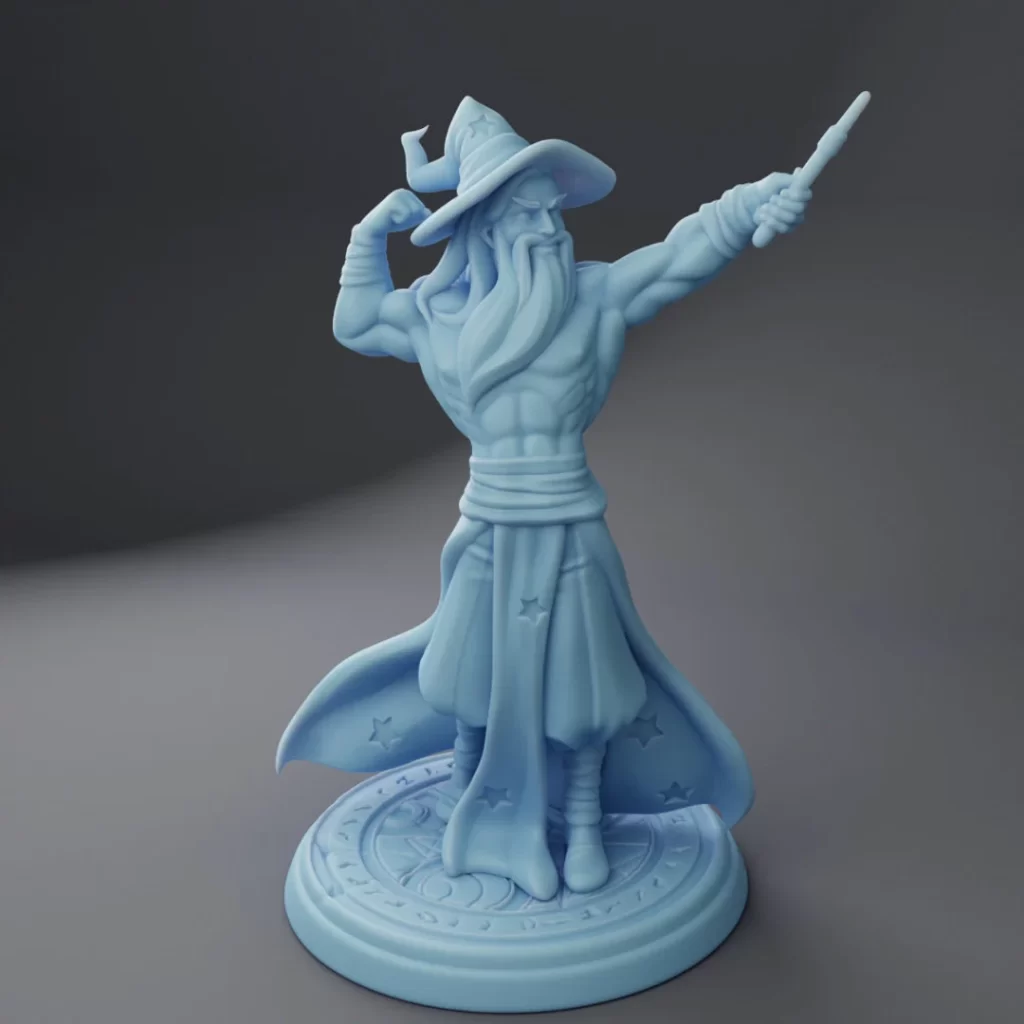
Since I was changing one of the major basic designs of wizards, I wanted to make sure it was obvious that the character was a wizard. To do this, I decided that using the blue colour theme of cartoony wizards would make sure that my character was easily recognizable as a wizard despite their unconventional build.
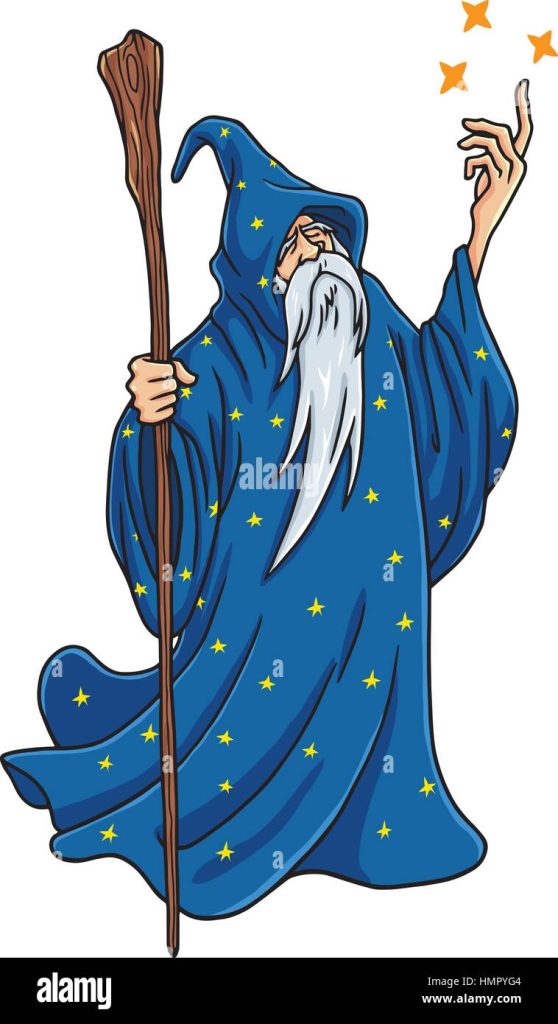
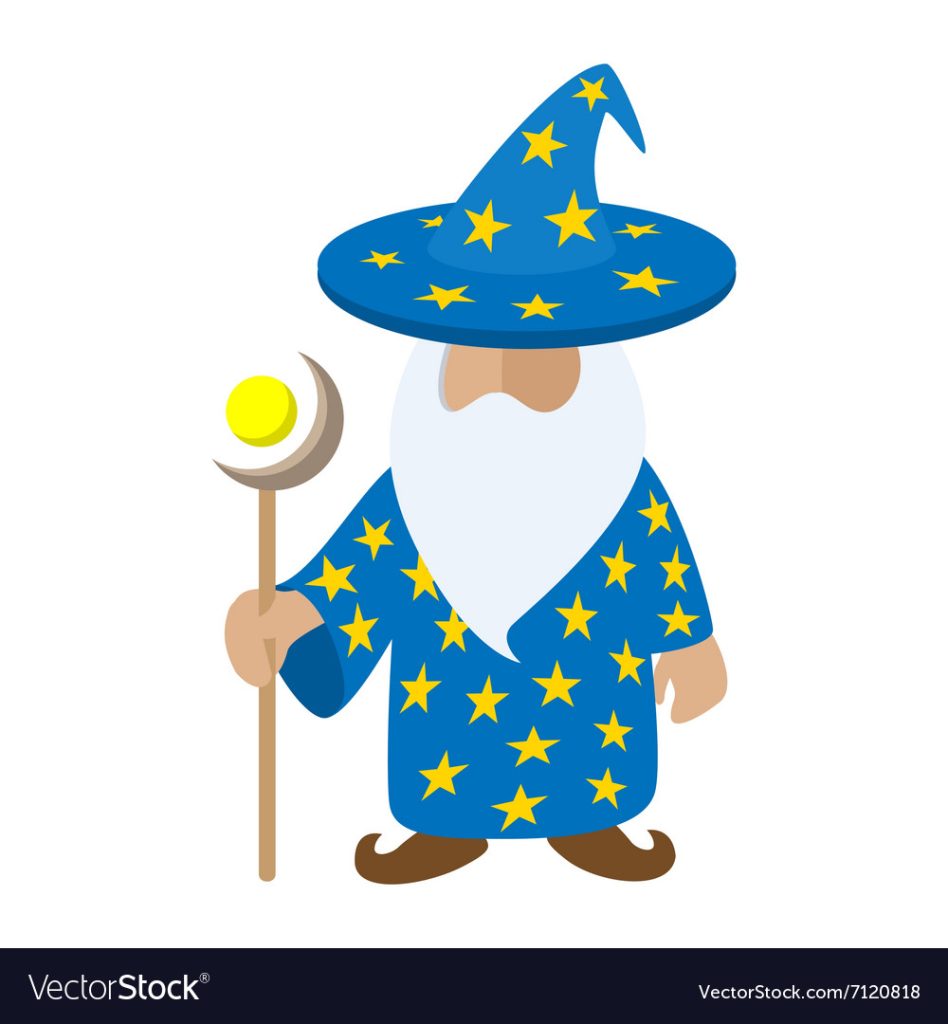
Combining the various ideas I had come up with inspired by these images, my plan was to create a muscular wizard with a blue pointy hat with yellow stars, shirtless to show off the muscles, white hair and a beard, and either a blue robe, or regular trousers for the bottom half.
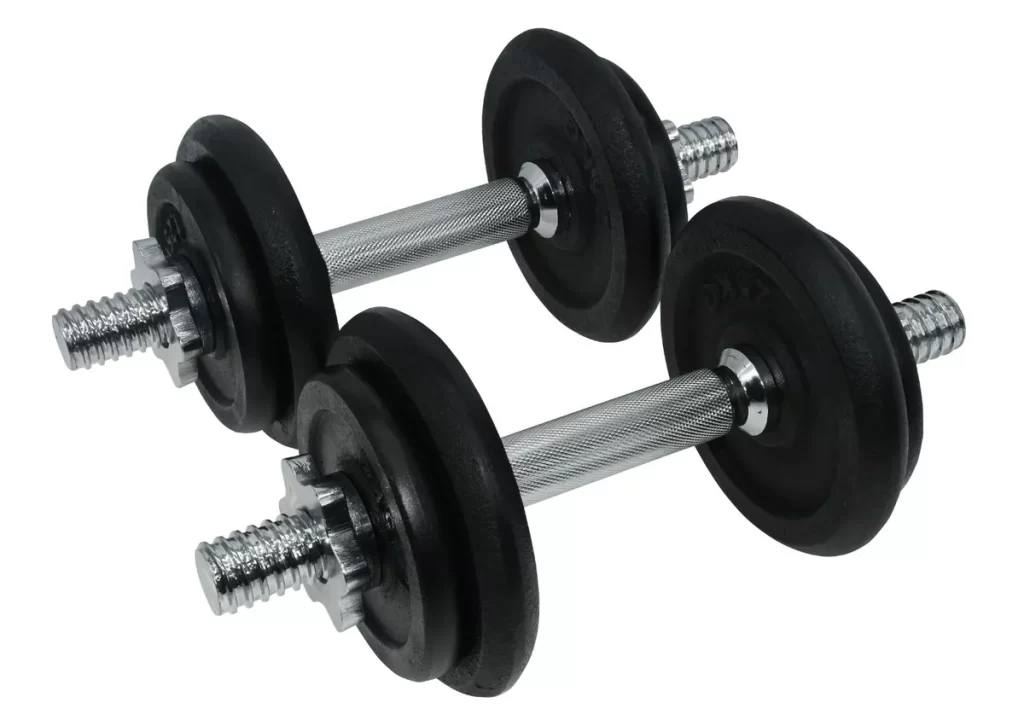
Next, I thought about different accessories I could add on to the model to make it more interesting. These are things that would improve my character design, but are not absolutely necessary, meaning if I do not have time, I can cut them from the model. First, instead of a wand or a staff that wizards often have, I decided a magical dumbell would be interesting, fitting with the muscular theme.
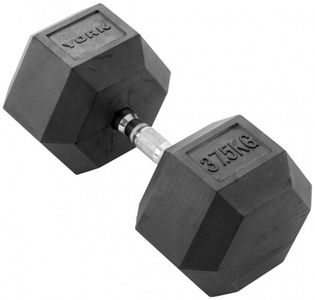
I would replace the weight numbers on the dumbells with magical runes to make them more wizardly.
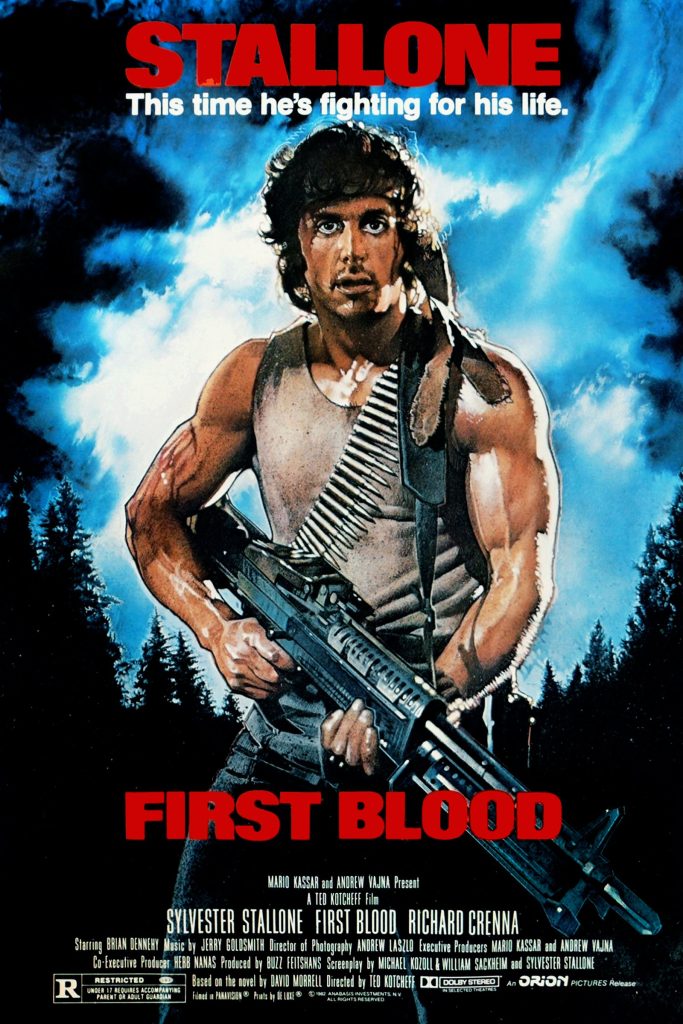
Another idea I had was to give my character a scroll or potion belt across the chest, inspired by the ammo belt worn by Rambo, to add more detail and make the character’s design more interesting to look at.
Body Blockout
Before I started blocking out the body in ZBrush, I found some references to help me model. First, I looked online for a figure drawing that looked similar to the build I had in mind for my character.
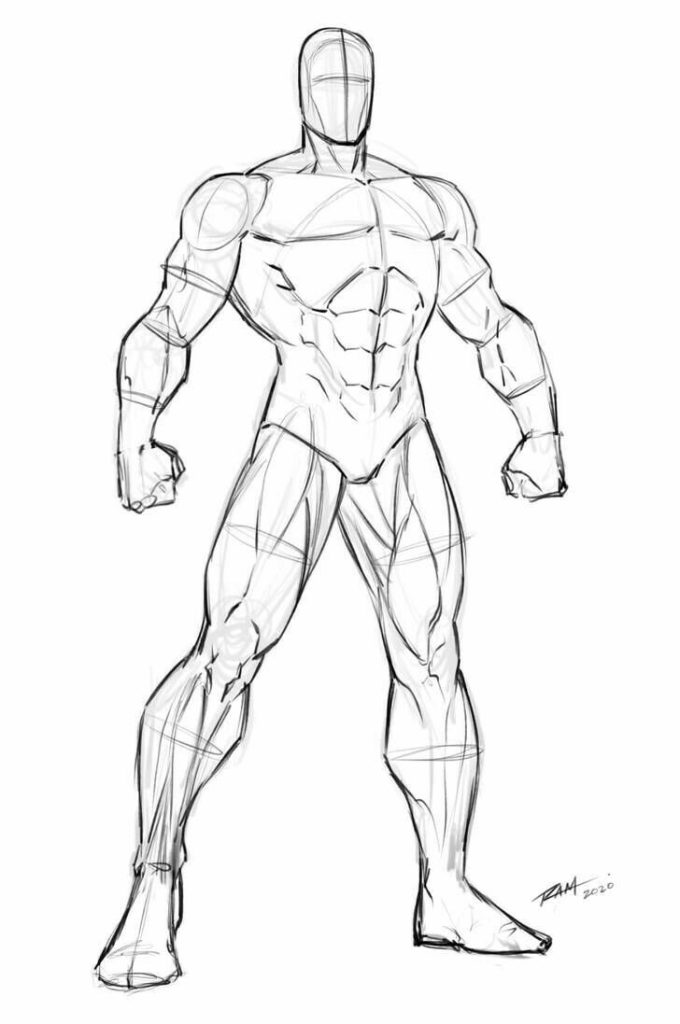
I then drew out the shapes of the different body parts, to help me envision the proportions and how the anatomy fit together more easily.

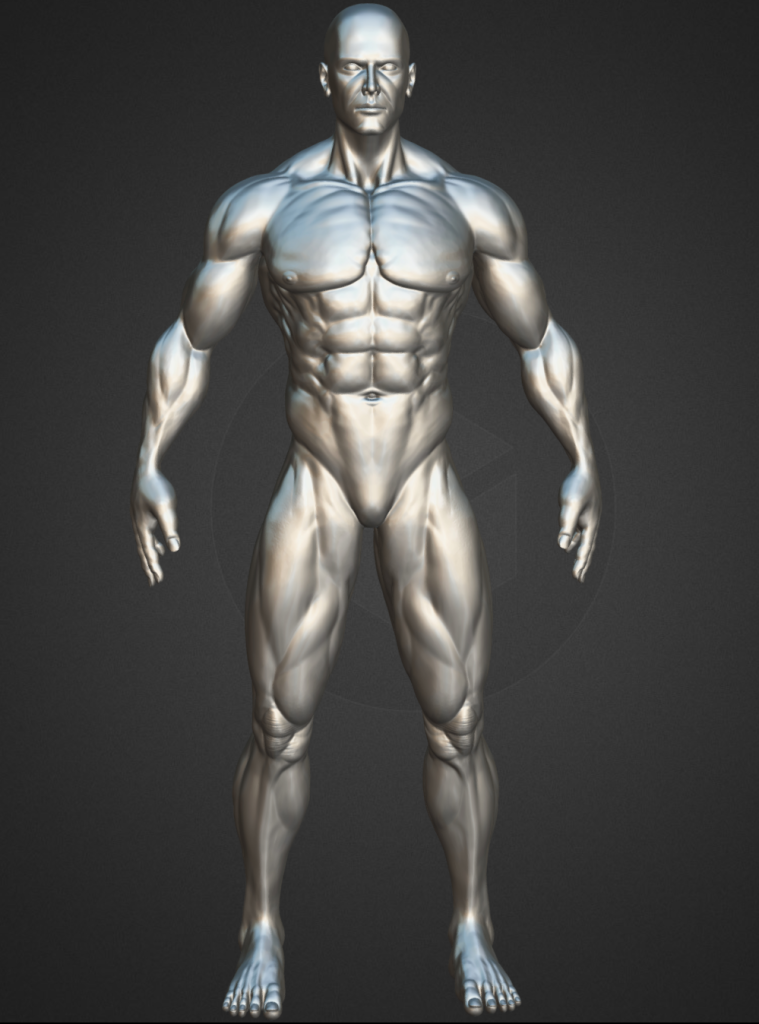
Then, I found a 3D model on Sketchfab that I could use to more clearly view the anatomy at different angles, so I could more accurately sculpt the entire character.
Now that I had reference images, I opened ZBrush and modelled the initial blockout of the character.
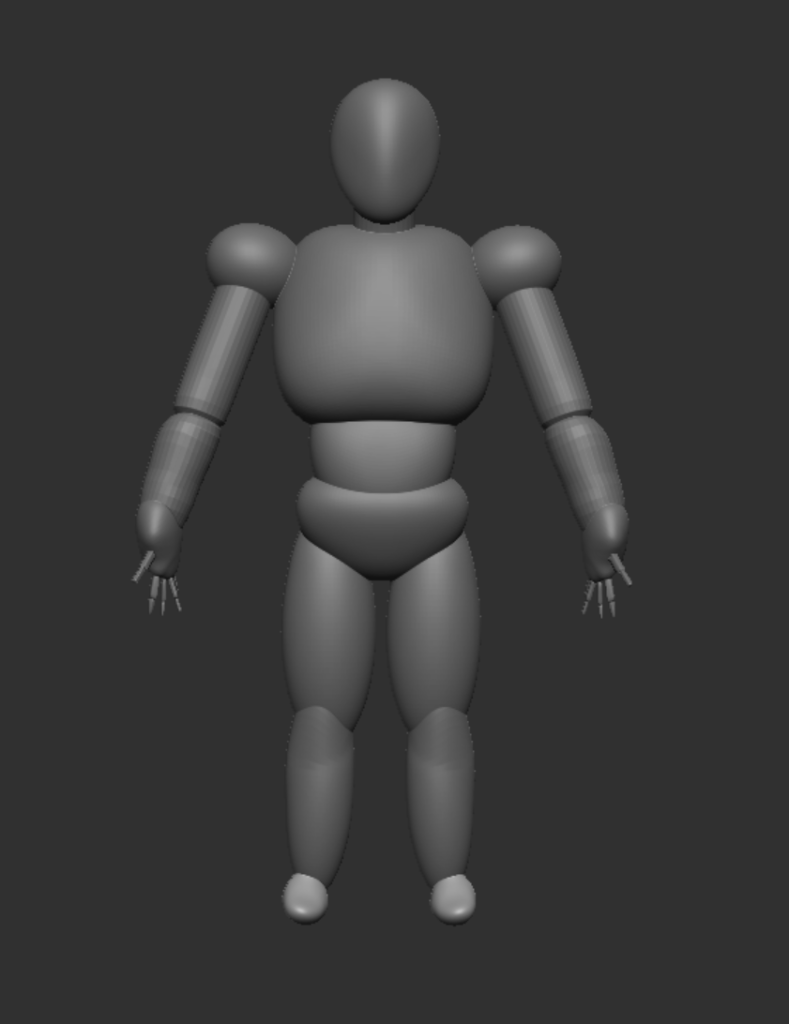
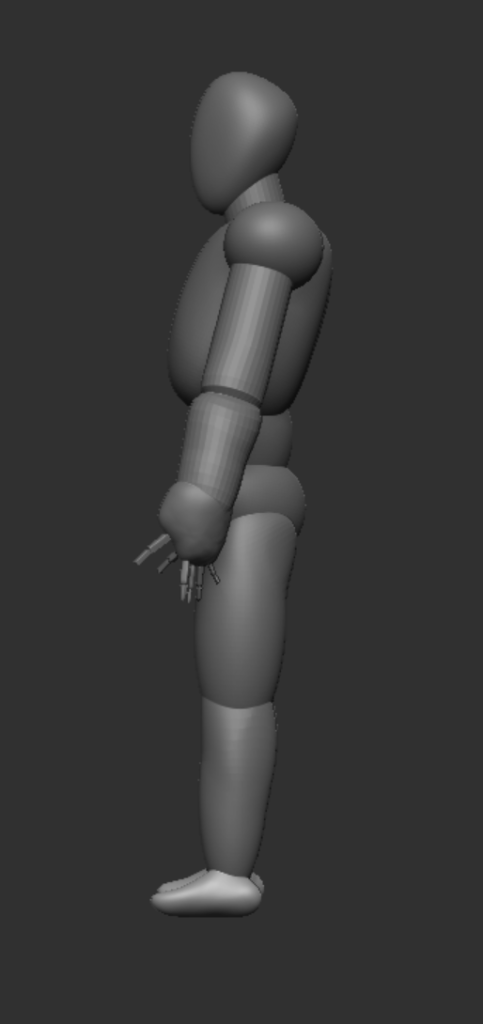
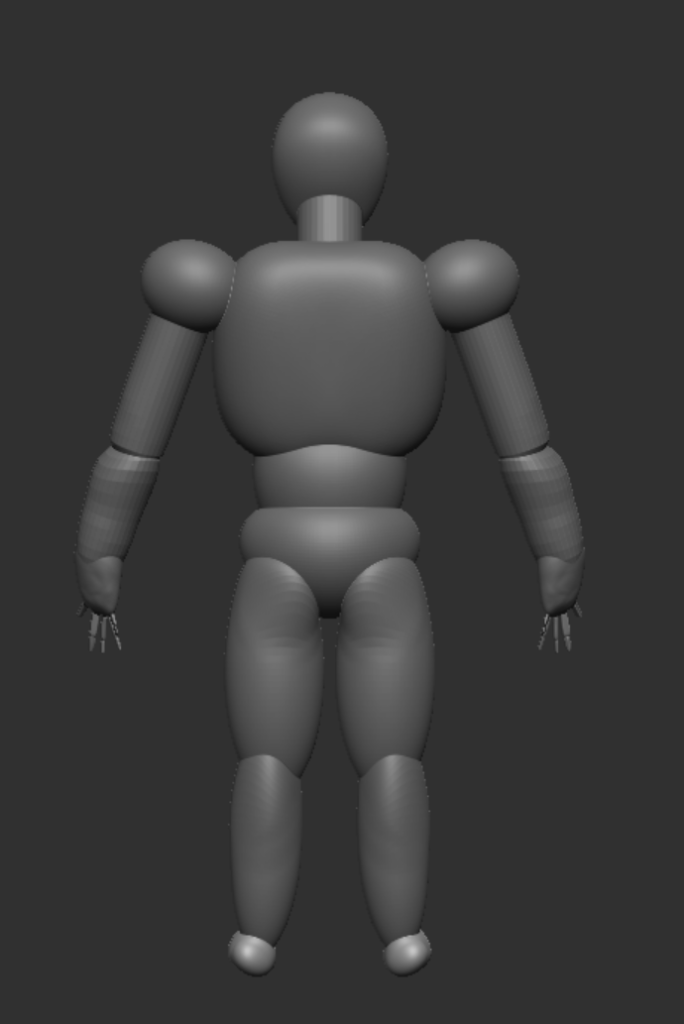
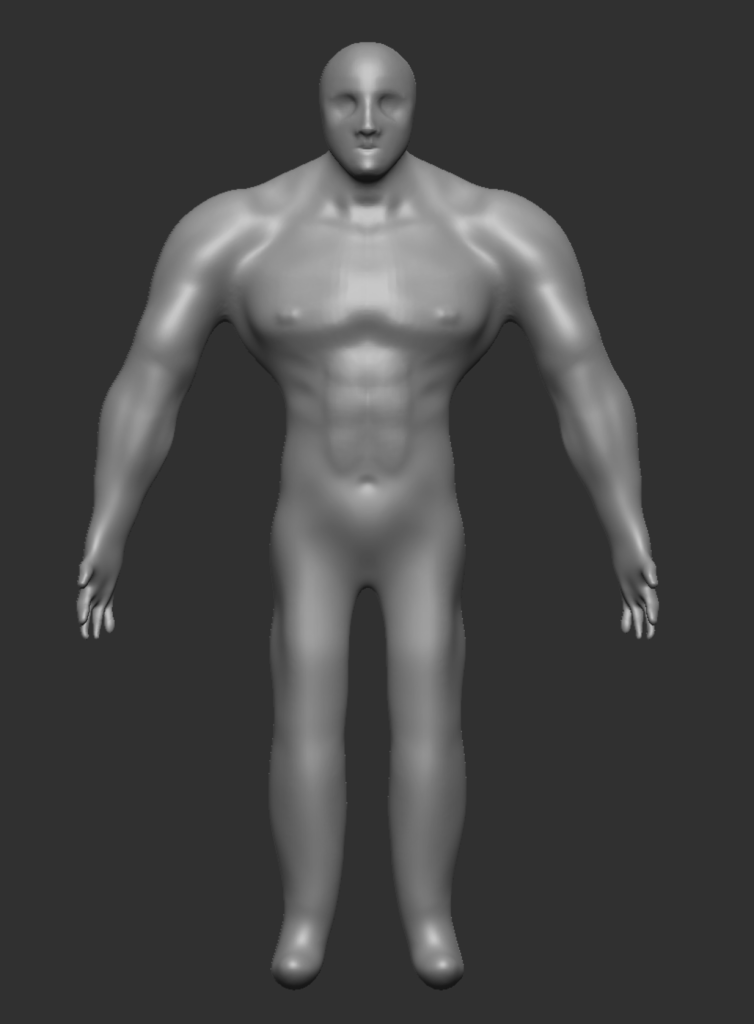
I started with two spheres, one for the chest and one for the stomach. I used the clay buildup tool to sculpt the vague shape of the torso, then the move tool to properly shape and refine it, using the smooth stool to avoid any bumpy parts. Then, I added a cylinder above the chest for the neck, and another sphere on top of that which i shaped into the head.
I added a sphere for the shoulder, using the mirror and weld function to make it symmetrical. Then, using the IMM Primitives brush, I created a cylinder coming off of the shoulder for the upper arm, and again from the end of that cylinder from the lower arm, along with a sphere at the end to shape a hand. I used the IMM Primitives brush again to make the fingers.
For the legs, I made a series of spheres, using the mirror and weld function to ensure symmetry, and the clay buildup, move, and smooth tools for the shape.
Once I had the full body shape blocked out, I combined all of the subtools into one, then used the Dynamesh and ZRemesher functions to properly combine them all into a single mesh.
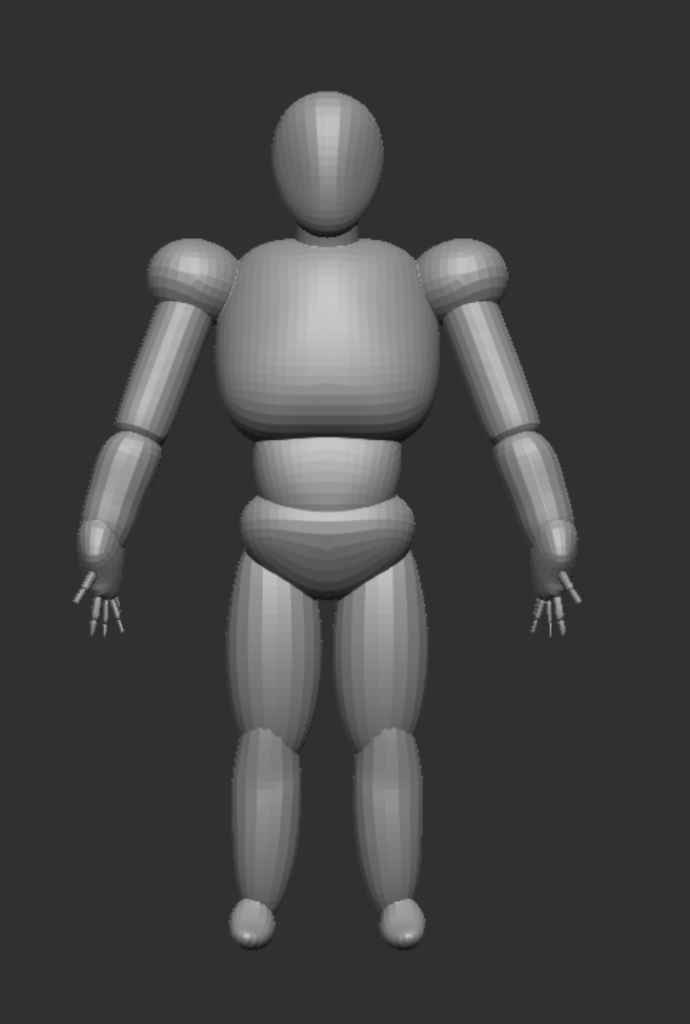
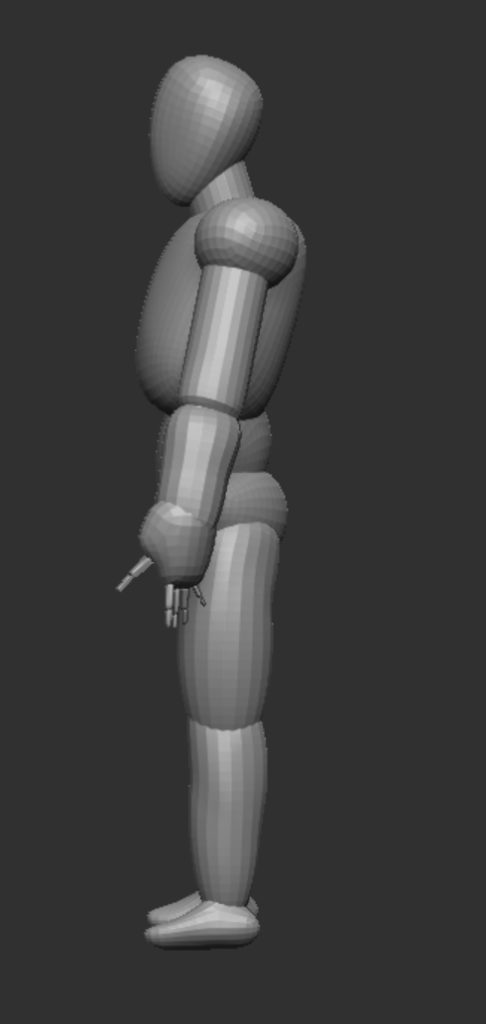
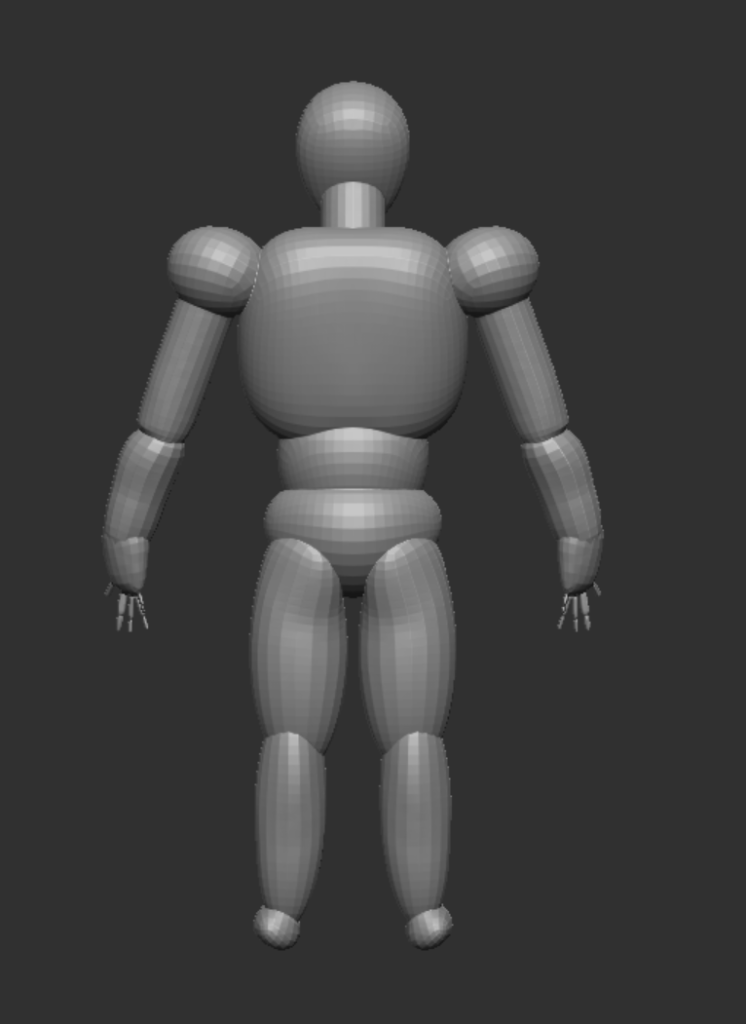
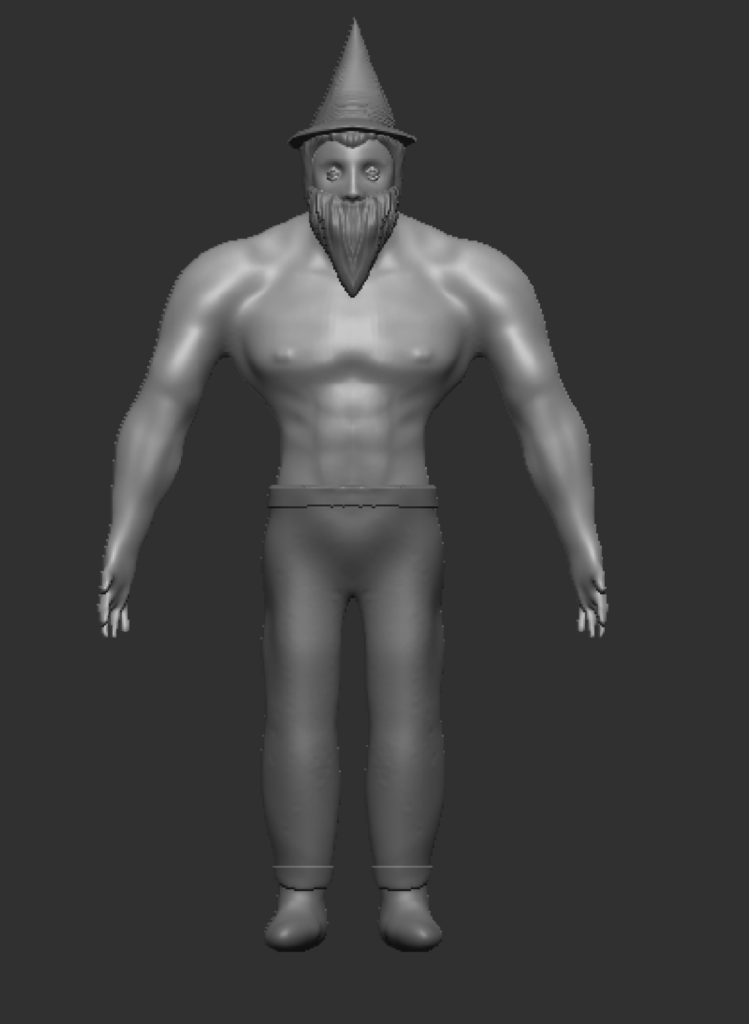
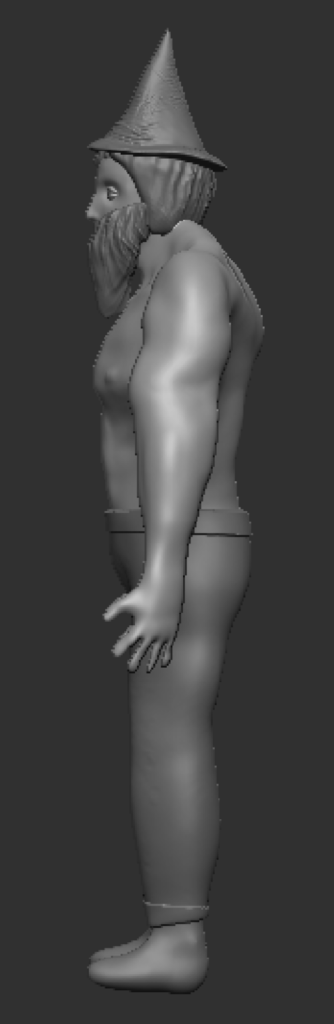
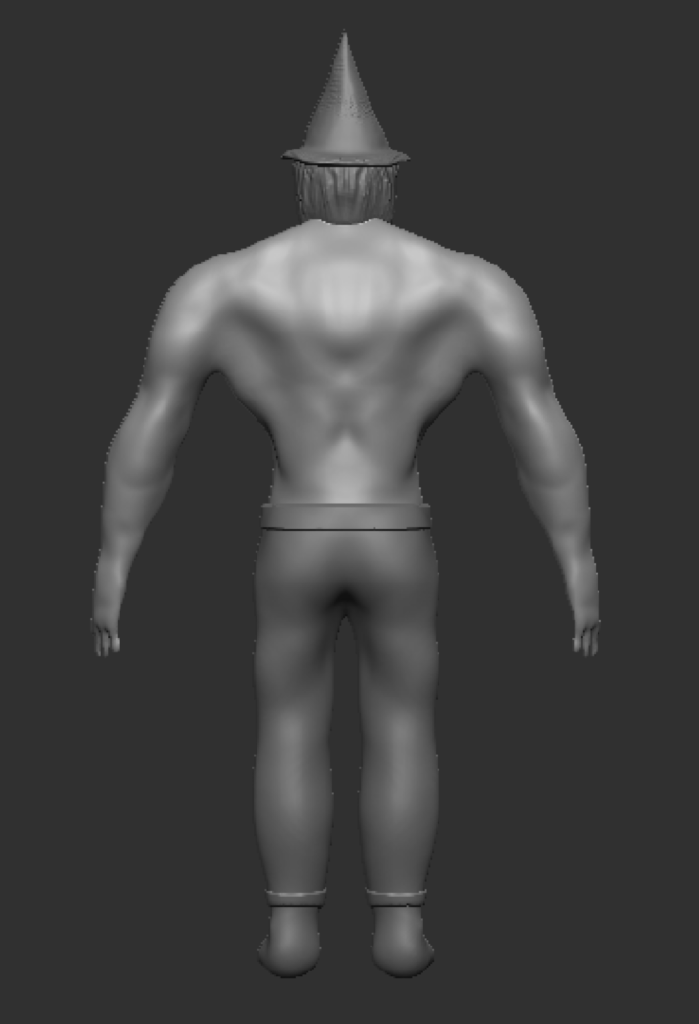
Now that I had the whole body in one mesh, I began properly sculpting my character. This was almost entirely done using the clay buildup, move, and smooth tools to sculpt, shape, and refine the model into the form I wanted. I also used the dam standard brush for some small details, mostly on the face. Most of my focus was on the chest and arms, as the character would be wearing trousers and boots to cover the legs and feet, and the beard and hat would cover the majority of the face. I used the reference model I found earlier to help make sure the anatomy was as correct as I could make it, while still making some tweaks to emphasise certain parts, like making the chest and shoulders wider.
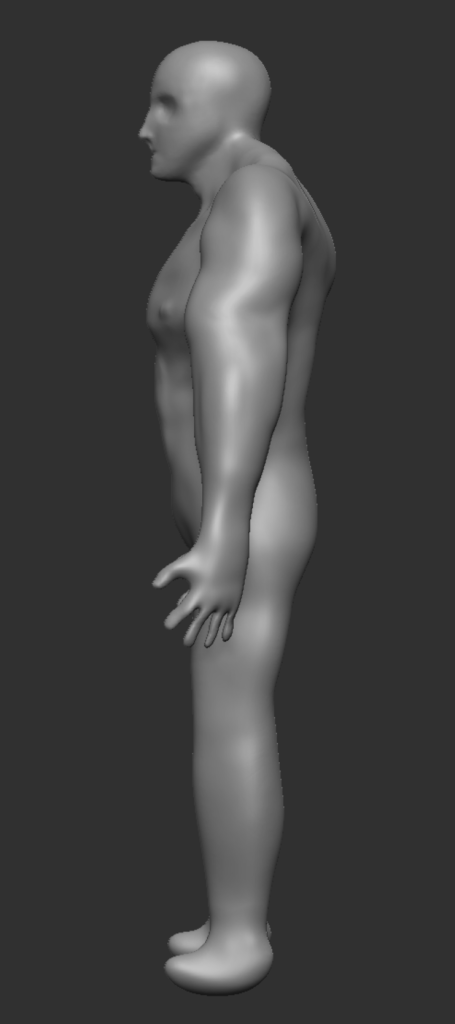
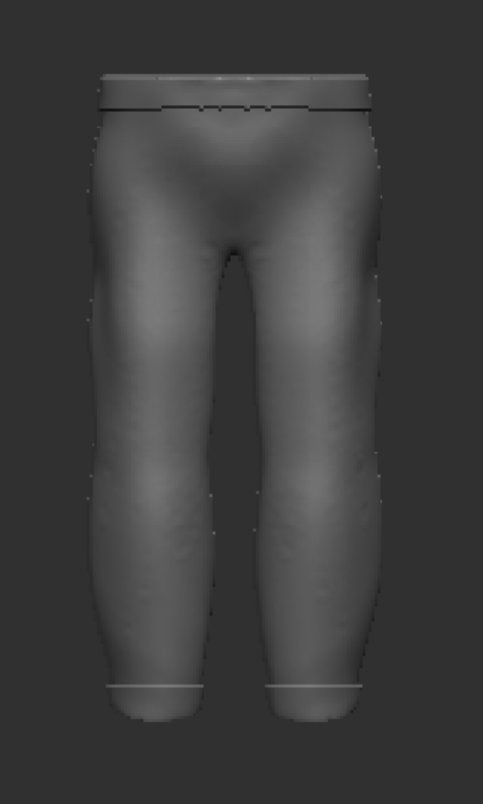
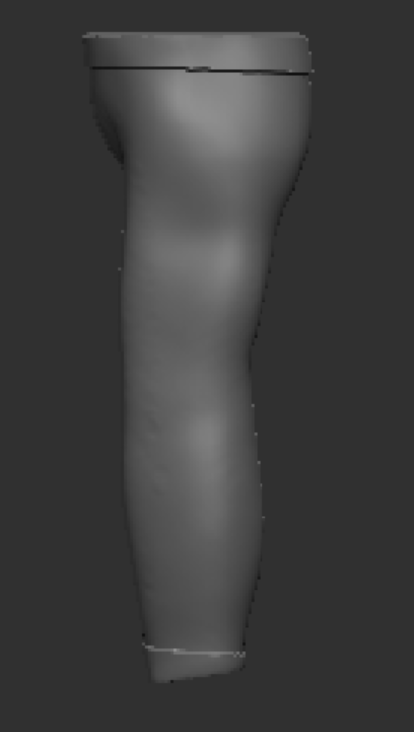
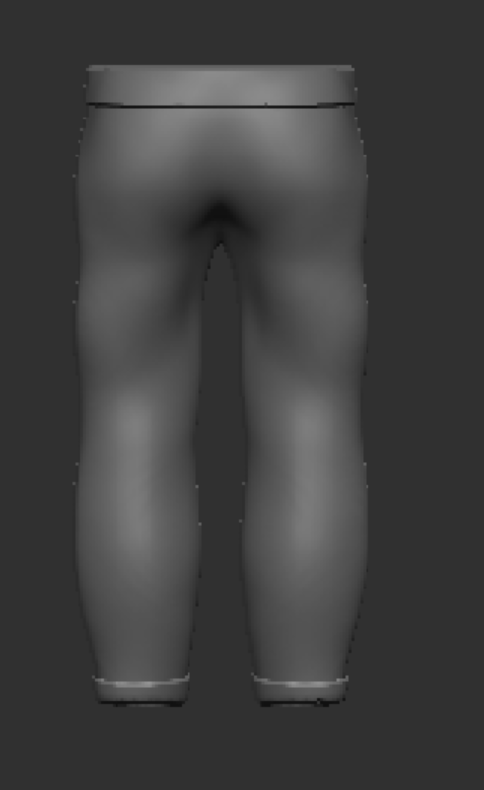
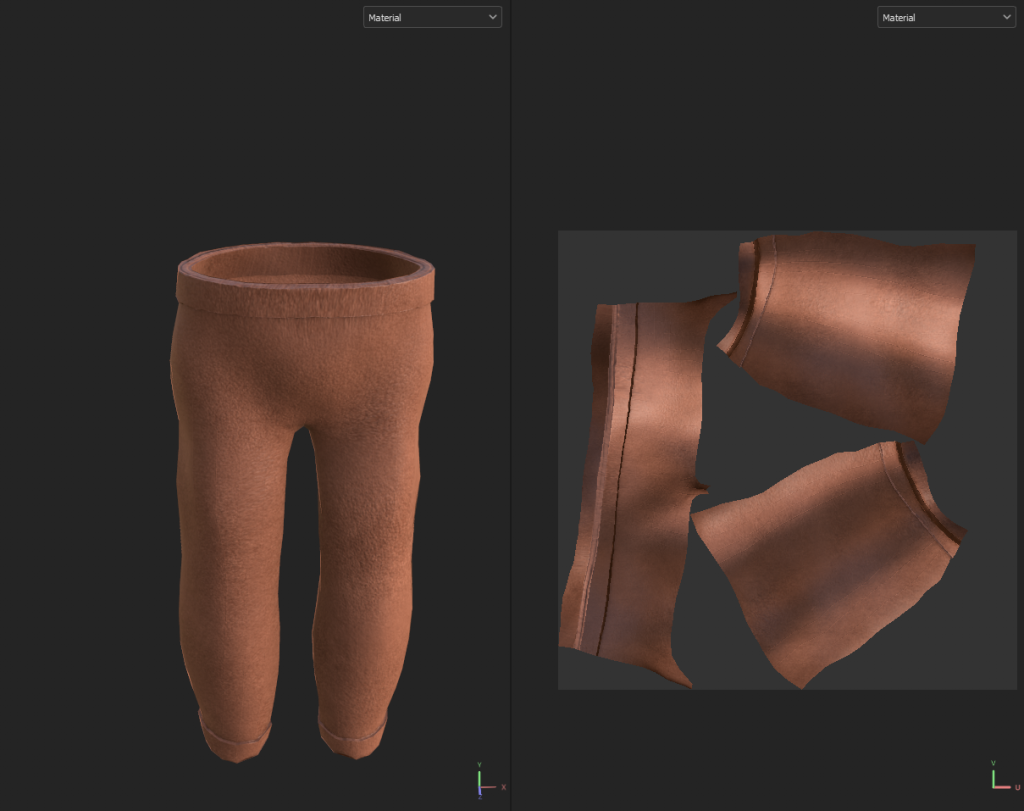
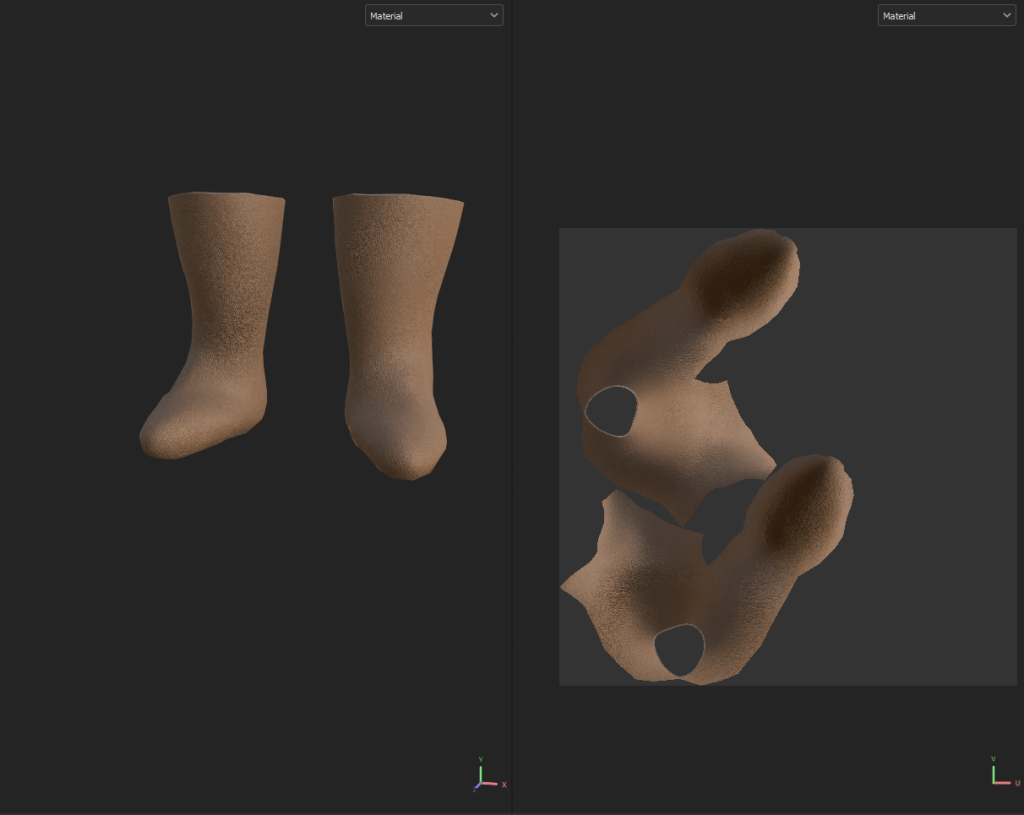
With the body sculpted, I then began work on the clothing, hair, and beard. I started with the trousers and boots – these were both created by masking of a section of the legs, then using the extrude function to create a new subtool with the same shape, but larger. I also extruded the top and bottom of the trousers an extra time to make it appear to be folded over, adding some depth and detail, and combined those extrusions with the original trousers subtool.
Next, I created a sphere for the hair, and another for the beard, which I sculpted into shape with the clay buildup and move tools, before using a brush I found online to create the hair texture.
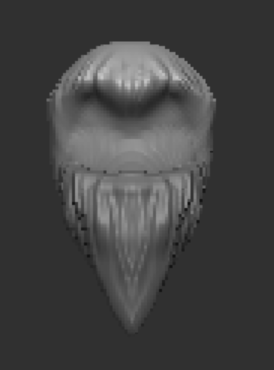
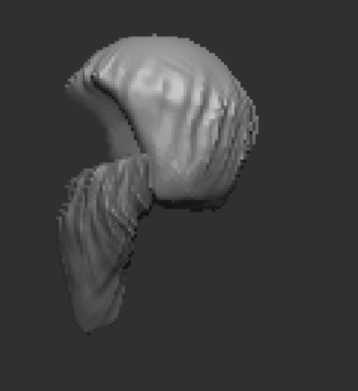
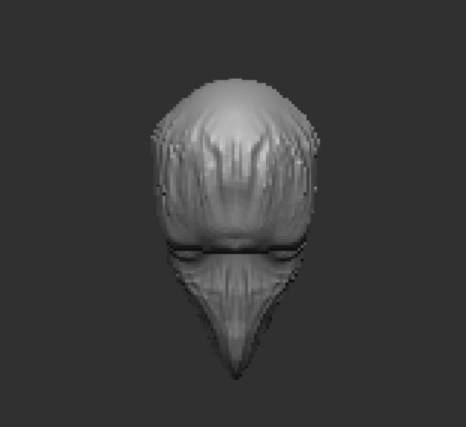
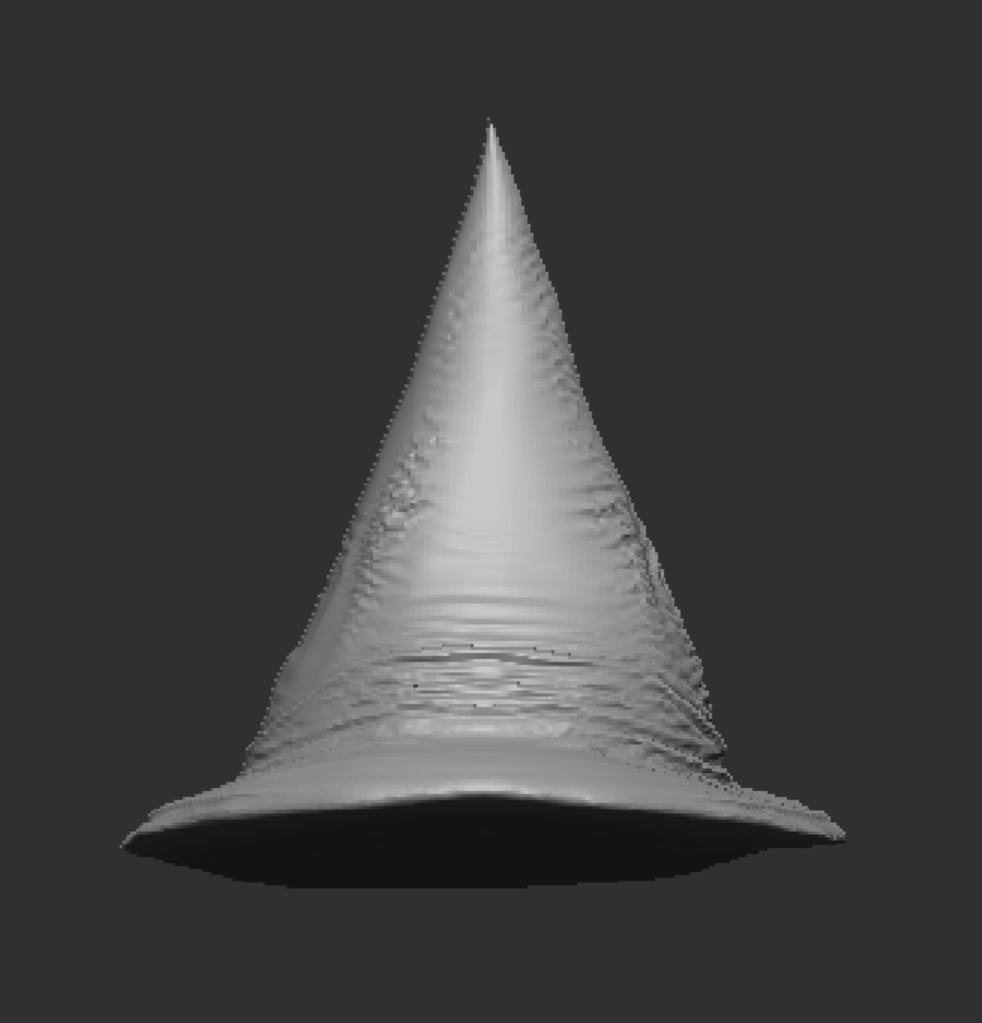
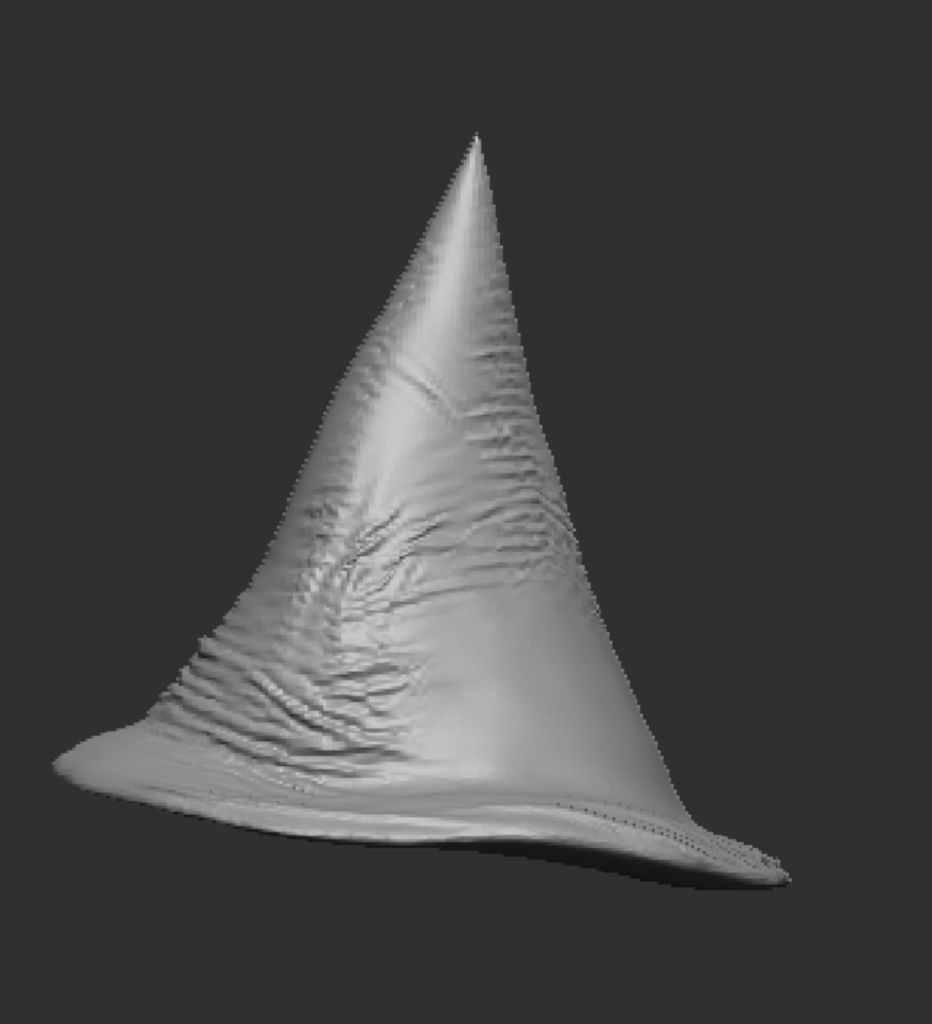
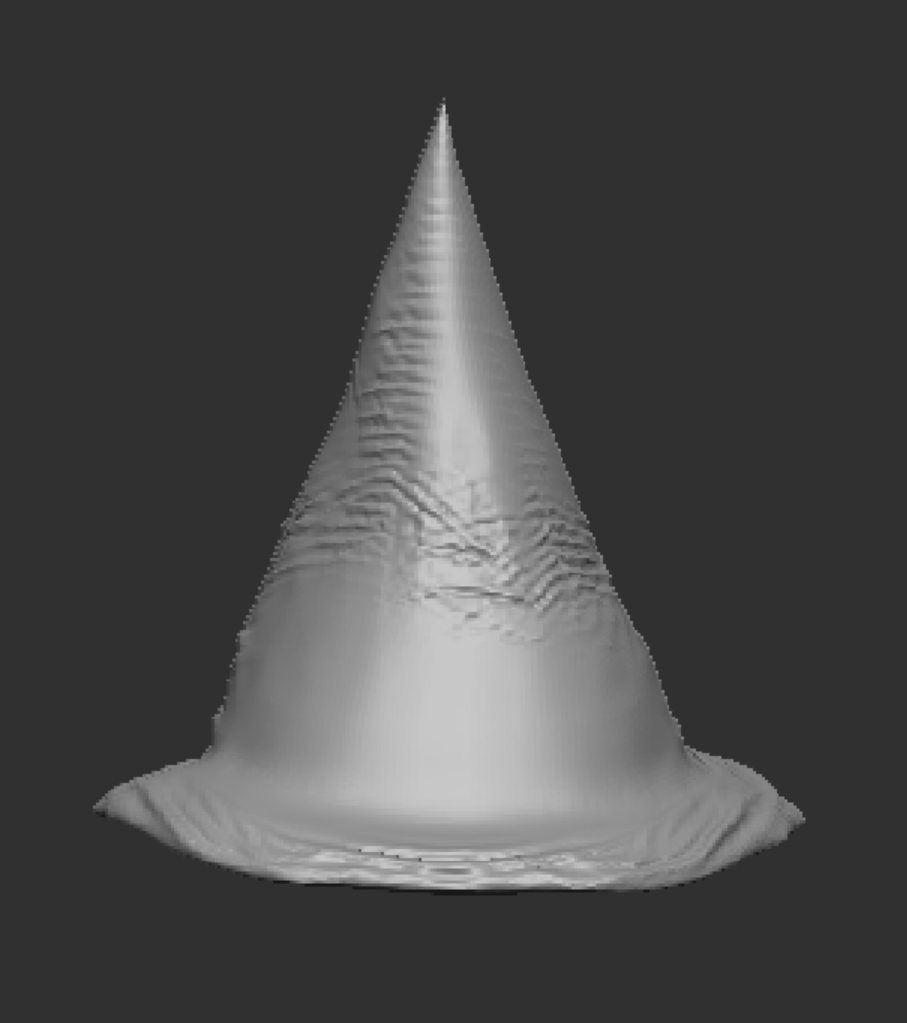
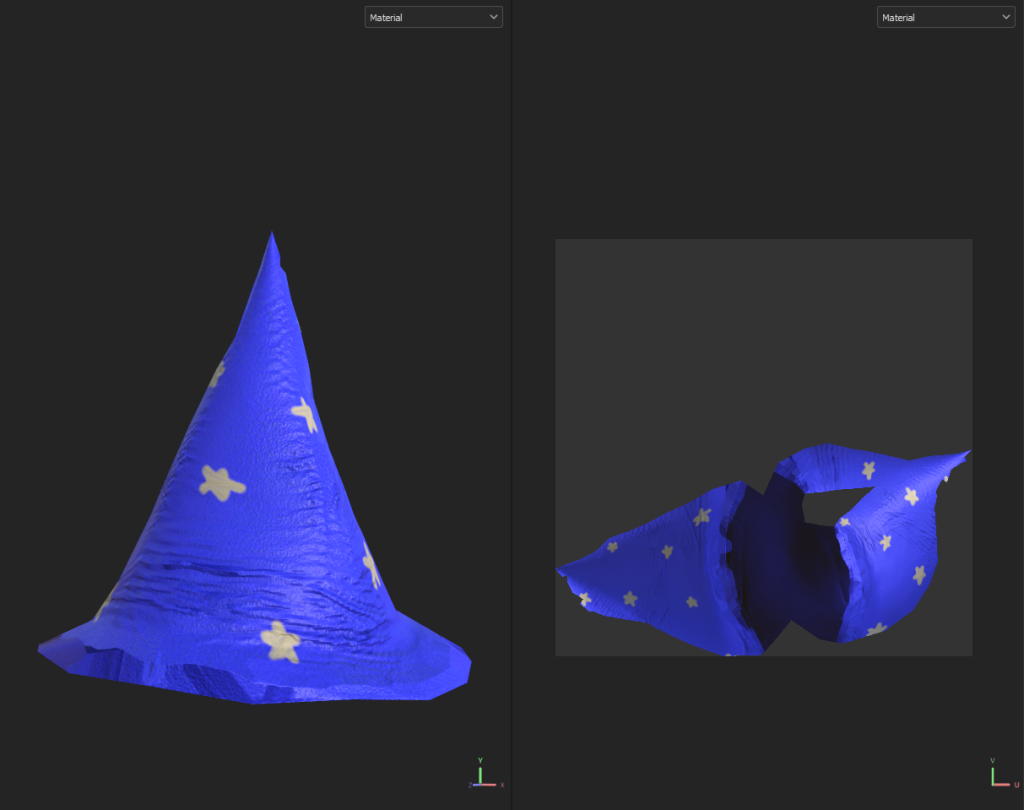
Finally, for the hat, I created two subtools – a sphere, which I flattened down to create the brim of the hat; and a cone, to form the pointy section. I combined the two subtools together, smoothed over the joint between them with the clay buildup and smooth tool, along with dynameshing, then used the cloth move tool to create some wrinkles and folds to make the hat more realistic, rather than just being a perfect smooth cone.
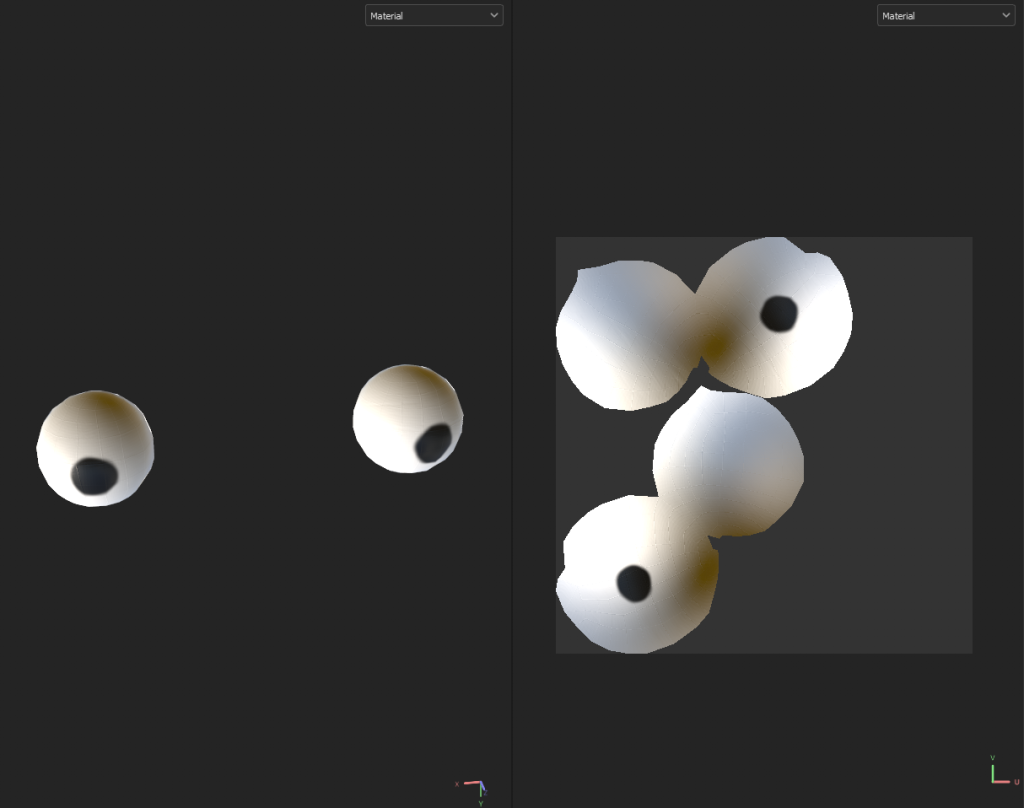
The last part to create was the eyes, which were simply a sphere sized down, moved into place, and then mirrored and welded to make it symmetrical. After combining the hair, beard, and body subtools together, I had the character model completed in ZBrush.
Maya Retopology and UV Unwrapping
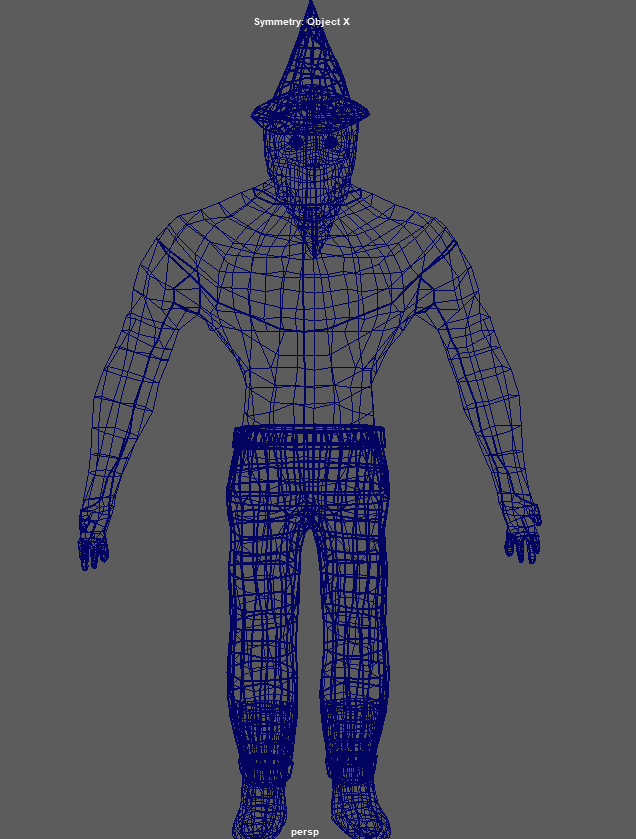
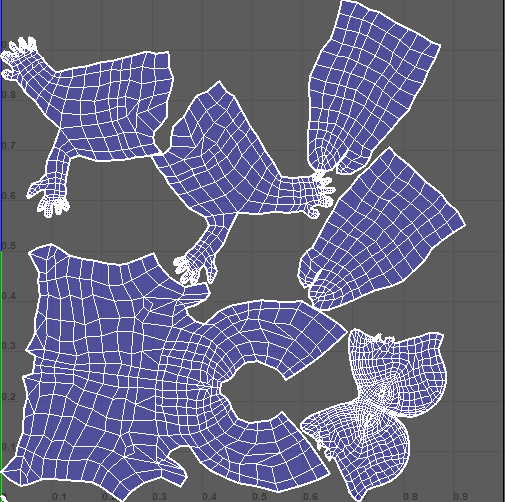
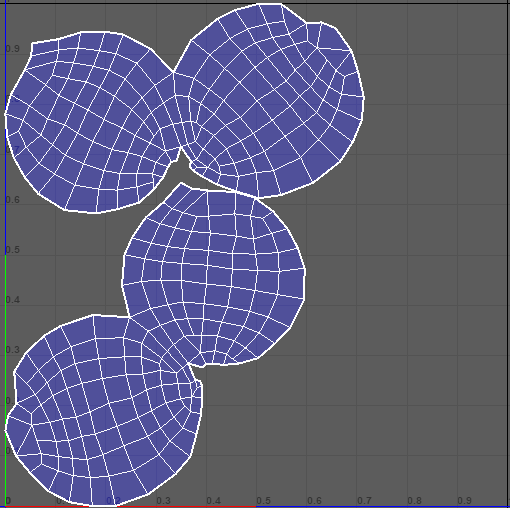
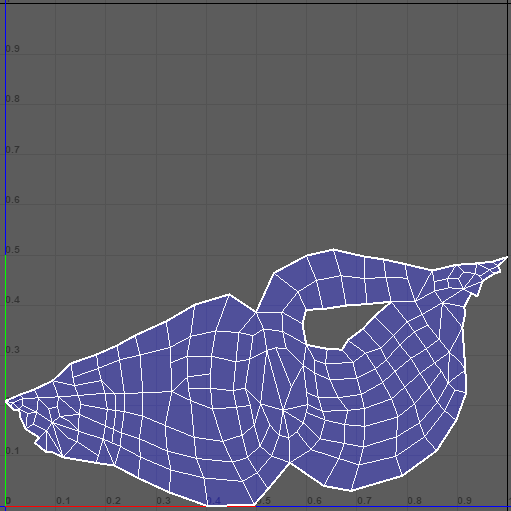
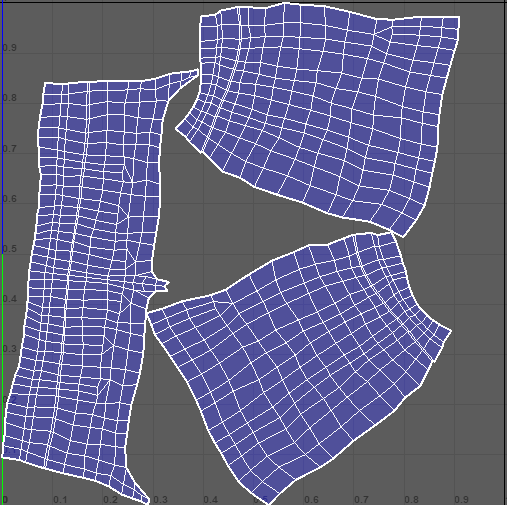
Before I exported the model from ZBrush to load into Maya, I used the decimate feature to lower the number of points, to improve its performace in maya, as too many points can cause lag. After reducing it to below 500,000 points, I exported the model from ZBrush, and loaded it into Maya to begin retopologising it, which makes the UVs much more simple and easy to unwrap, as well as keeping the poly count lower to improve performance if used in a game. Using the quad draw tool, I went around the model and created the lower poly version of the model.
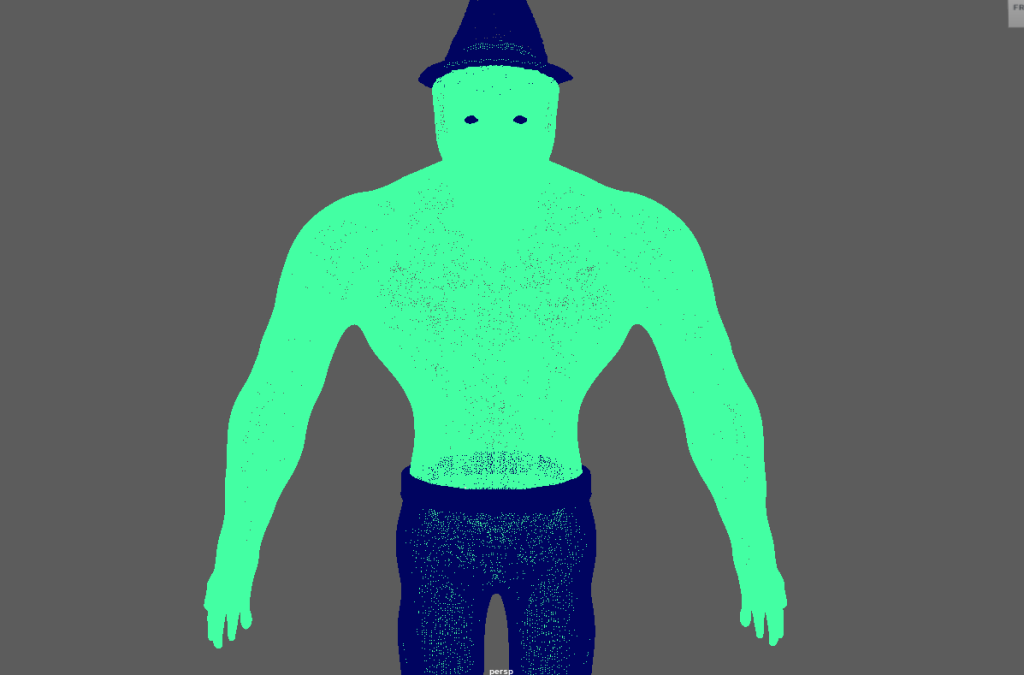
Now that I had retopologised the model, I could unwrap the UVs, which would then let me add textures to the model in Substance Painter. I used the UV Cut and Sew tool to separate the body into sections, and then added the seams that would allow the UVs to unwrap properly, for each different part of the model.

Substance Painter
With the UVs unwrapped, the next step was to create the textures. I exported each of parts of the model as both a low poly and high poly version. Then, using substance painter, I baked the high poly version onto the low poly model for each part, allowing me to have more detailed textures while still having a low poly model, improving performance.
After baking the high poly versions onto the low poly versions, I used the various different material assets in substance painter to draw the textures I wanted onto the different parts of the model.

With all of these textures created, I exported them from substance painter and loaded them back into Maya to finish my model.
Conclusion
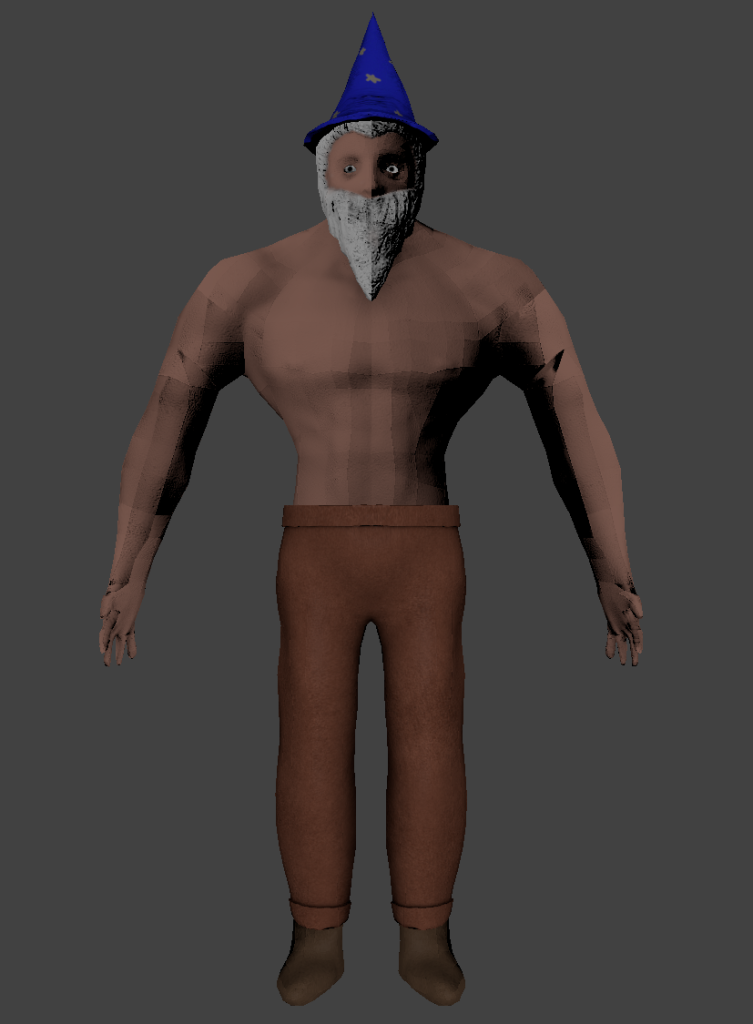
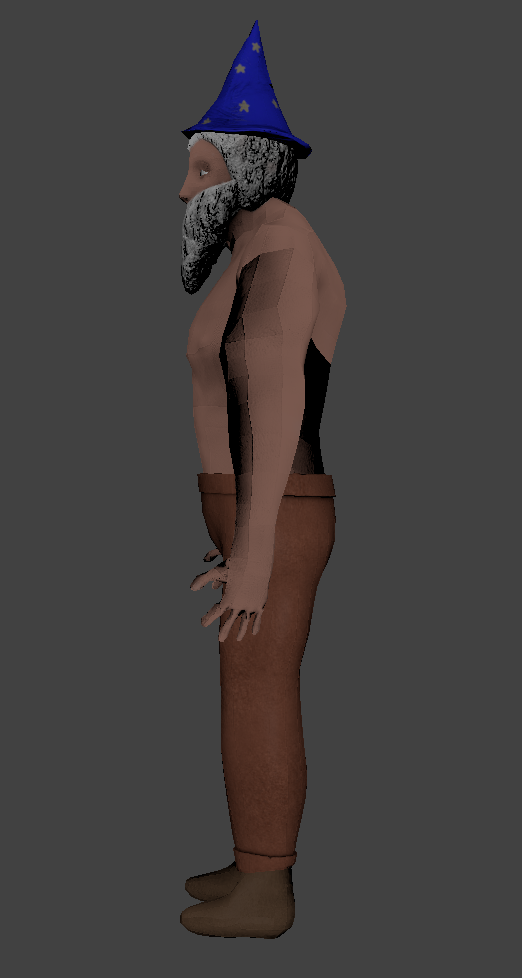
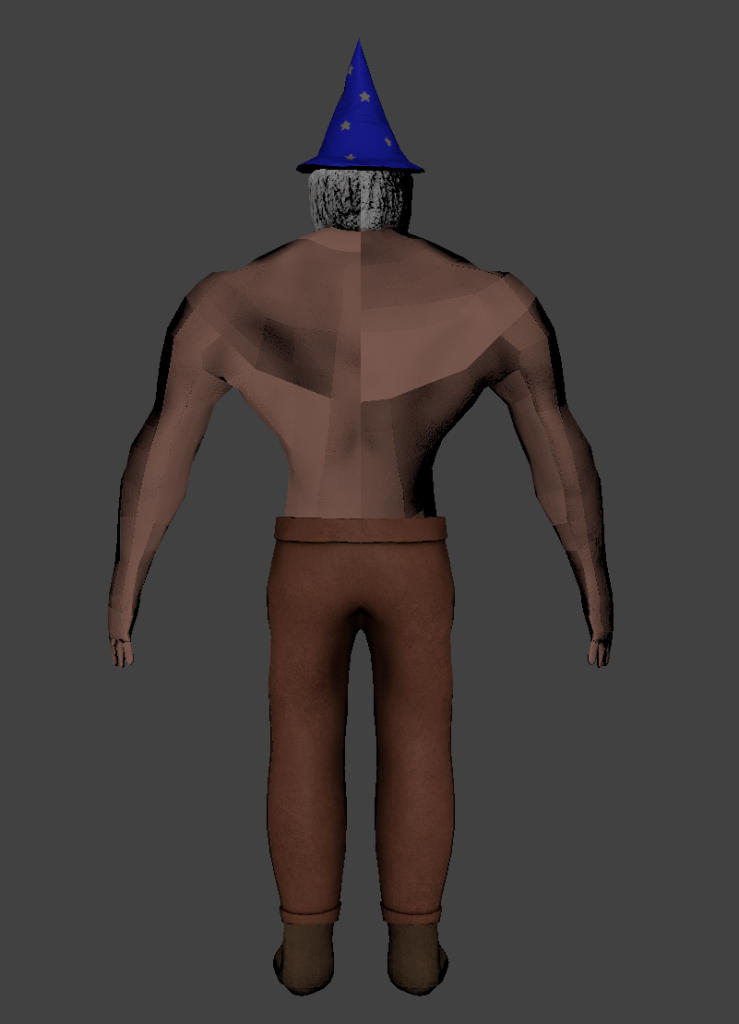
Overall, I think the character came out well for what it is – I unfortunately did not have enough time to create the extra accessories I wanted to add, such as the dumbell wand or the potion belt. However, I think that the major parts of the character do convey the idea and theme I was going for.
There are definitely some parts of the process that could be improved – specifically, the retopology on the arms was very blocky, which is quite clear in the final product. To improve the model, I would go back to the retopology section and put more detail into the retopology to avoid those obviously low poly segments.
Another part that could use improvement is the texturing – it came out looking quite flat and plain, which may be a result of the lighting, but improving the textures would definitely have a positive effect on the end model.
References
Pinterest. (n.d.). Image result for gandalf full body | Гэндальф, Властелин колец, Средиземье. [online] Available at: https://www.pinterest.co.uk/pin/546483736018241411/ [Accessed 23 Jan. 2024].
Forgotten Realms Wiki. (n.d.). Elminster. [online] Available at: https://forgottenrealms.fandom.com/wiki/Elminster [Accessed 23 Jan. 2024].
Who Is Albus Dumbledore (2017). Albus Dumbledore. [online] Harry Potter Wiki. Available at: https://harrypotter.fandom.com/wiki/Albus_Dumbledore.
Disney Wiki. (n.d.). Doctor Strange. [online] Available at: https://disney.fandom.com/wiki/Doctor_Strange.
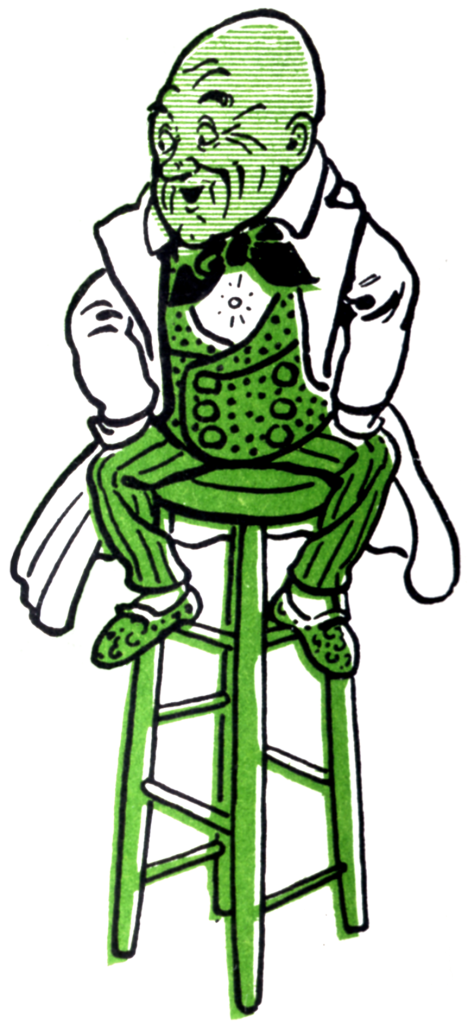
Wikipedia. (2020). Wizard of Oz (character). [online] Available at: https://en.wikipedia.org/wiki/Wizard_of_Oz_(character).
Disney Wiki. (n.d.). Higitus Figitus. [online] Available at: https://disney.fandom.com/wiki/Higitus_Figitus [Accessed 23 Jan. 2024].
www.youtube.com. (n.d.). A Buff Wizard – YouTube. [online] Available at: https://www.youtube.com/c/ABuffWizard/channels?app=desktop&view=56&shelf_id=0 [Accessed 23 Jan. 2024].
www.etsy.com. (n.d.). Buff Wizard Medium DND Twin Goddess Miniatures – Etsy UK. [online] Available at: https://www.etsy.com/uk/listing/1380130424/buff-wizard-medium-dnd-twin-goddess [Accessed 23 Jan. 2024].
Imgur (n.d.). Buff wizard will imperil you. [online] Imgur. Available at: https://imgur.com/gallery/xUJUBRH [Accessed 23 Jan. 2024].
Pinterest. (n.d.). [OC] Muscular Wizard, art by me | Concept art characters, Dark fantasy art, Fantasy wizard. [online] Available at: https://www.pinterest.co.uk/pin/796996465317240408/ [Accessed 23 Jan. 2024].
Shutterstock. (n.d.). Old Wizard Cartoon Character Cane Pointing Stock Illustration 1867291507. [online] Available at: https://www.shutterstock.com/image-illustration/old-wizard-cartoon-character-cane-pointing-1867291507 [Accessed 23 Jan. 2024].
Limited, A. (n.d.). Wizard Cartoon with Blue and Stars Clothes Character Design Mascot Vector Illustration Stock Vector Image & Art – Alamy. [online] www.alamy.com. Available at: https://www.alamy.com/stock-photo-wizard-cartoon-with-blue-and-stars-clothes-character-design-mascot-133270260.html [Accessed 23 Jan. 2024].
VectorStock. (n.d.). Old wizard cartoon character vector image on VectorStock. [online] Available at: https://www.vectorstock.com/royalty-free-vector/old-wizard-cartoon-character-vector-7120818 [Accessed 23 Jan. 2024].
GymRatZ. (n.d.). Rubber Hex Dumbell 37.5Kg (x1). [online] Available at: https://www.gymratz.co.uk/rubber-hex-dumbell-375kg [Accessed 23 Jan. 2024].
eBay. (n.d.). Urban Fitness 20KG Dumbell Set. [online] Available at: https://www.ebay.co.uk/itm/293928017224 [Accessed 23 Jan. 2024].
Pinterest. (n.d.). Пин от пользователя Egor TBF на доске Buff | Рисунки фигур, Рисование эскизов, Рисовать. [online] Available at: https://www.pinterest.co.uk/pin/858709853948522892/ [Accessed 23 Jan. 2024].
sketchfab.com. (2022). Muscular Human Anatomy (Human base mesh) – Buy Royalty Free 3D model by Yacine BRINIS (@Yacinebrinis). [online] Available at: https://sketchfab.com/3d-models/muscular-human-anatomy-human-base-mesh-dbaef4ef1d3641f68eec4540ca50e18b [Accessed 23 Jan. 2024].