Concept and Planning
For my video, I planned to create the intro cutscene to a game set in the level I created for my Level Design module. The level is designed as traditional fantasy dungeon, where the player – instead of playing the hero venturing through – plays as the final boss, and has to progress backwards through the dungeon to reset the puzzles before returning to the final boss room to end the level. For the video, I wanted to create a cutscene of the original hero traversing through the dungeon the correct way, ending at the final boss room – where the real level would begin.
With the concept in mind, I started by writing out a list of all the different VFX I wanted to include in the cutscene, and a brief description of each one, along with where/how they would be incorporated into the cutscene.
- The various torches in the dungeon needed a fire effect, along with some smoke. These would be placed throughout the entire dungeon, in the background of almost every scene, so they were important to get right.
- A sparkling effect to each of the two orbs used in a puzzle – one red, and one blue – to make them look more magical.
- A dust cloud effect for when a floor tile falls as it is walked on.
- Some necromantic magic effects for the coffin at the end of the level – this will be something like green fire or mist.
With the ideas of the different VFX I would use in mind, I went into the Unreal Engine project of my level, and took some screenshots to create a simple storyboard for the video.
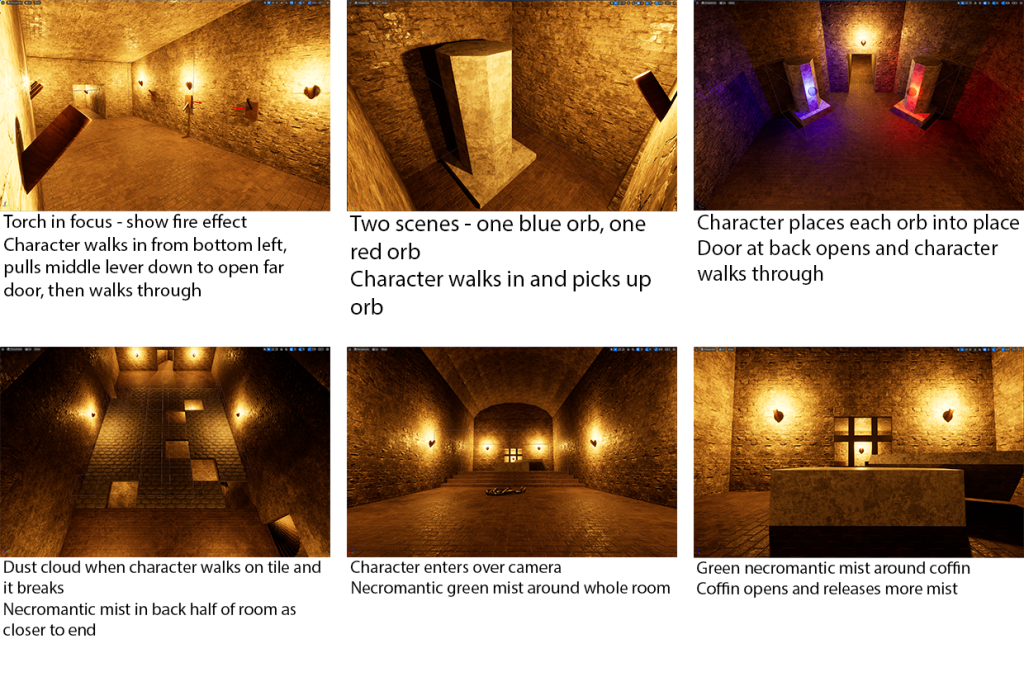
Creating VFX
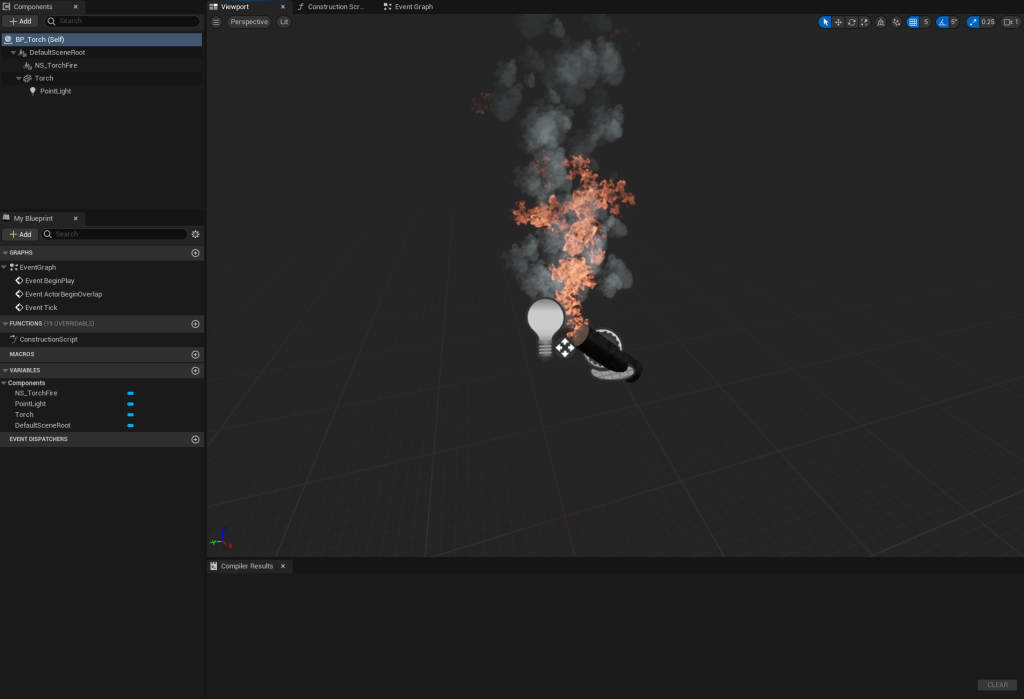
Now that I had a plan, I began to create the VFX for the video. I started by following the tutorials on canvas to create the fire and smoke effects for the torches throughout the map.
Then, I added the Niagara particle system into the blueprint I had already made for the torches throughout the level, so that the particle effects would be present on all of them.

Next, I began to work on the sparkling effect for the two orbs. These are in the second puzzle of the game, where the hero has to find two of them in a maze and bring them back to the end room of the maze, in order to open the door to progress further. There is a red orb and a blue orb, so I would make the particle system for one, then copy it and change the colour for the other orb.
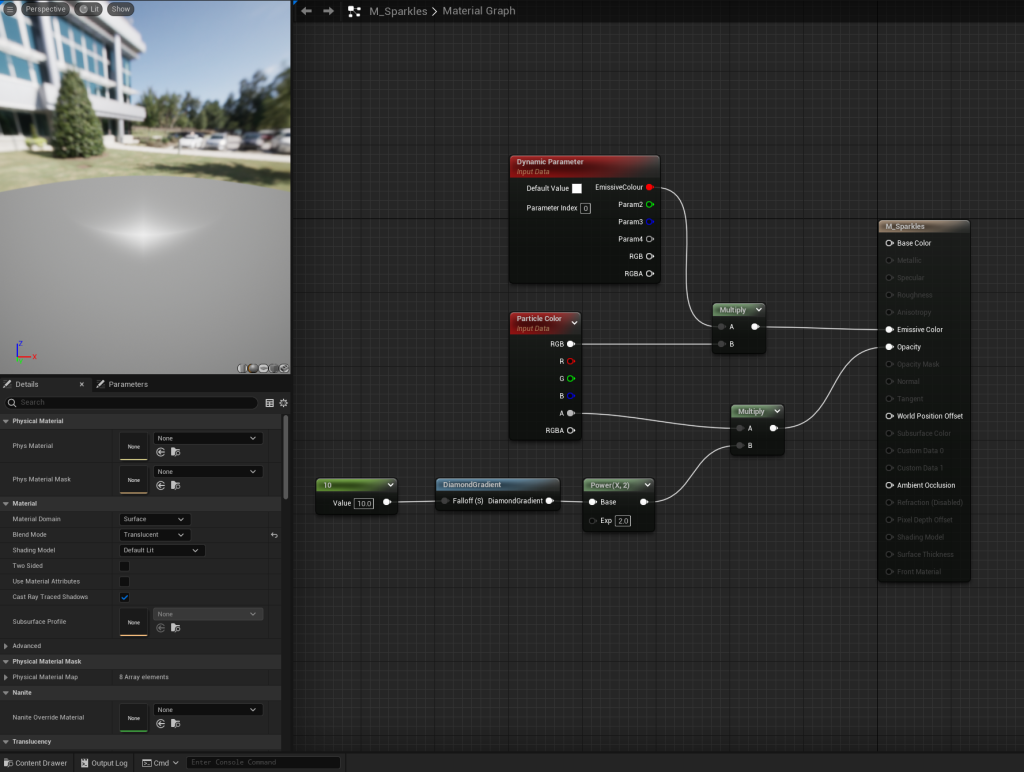
First, I created a material for the particles, in order to create the star/diamond shaped particles I wanted. This was mainly done with the DiamondGradient node, which would shape the particles when the material was added to the Niagara system.
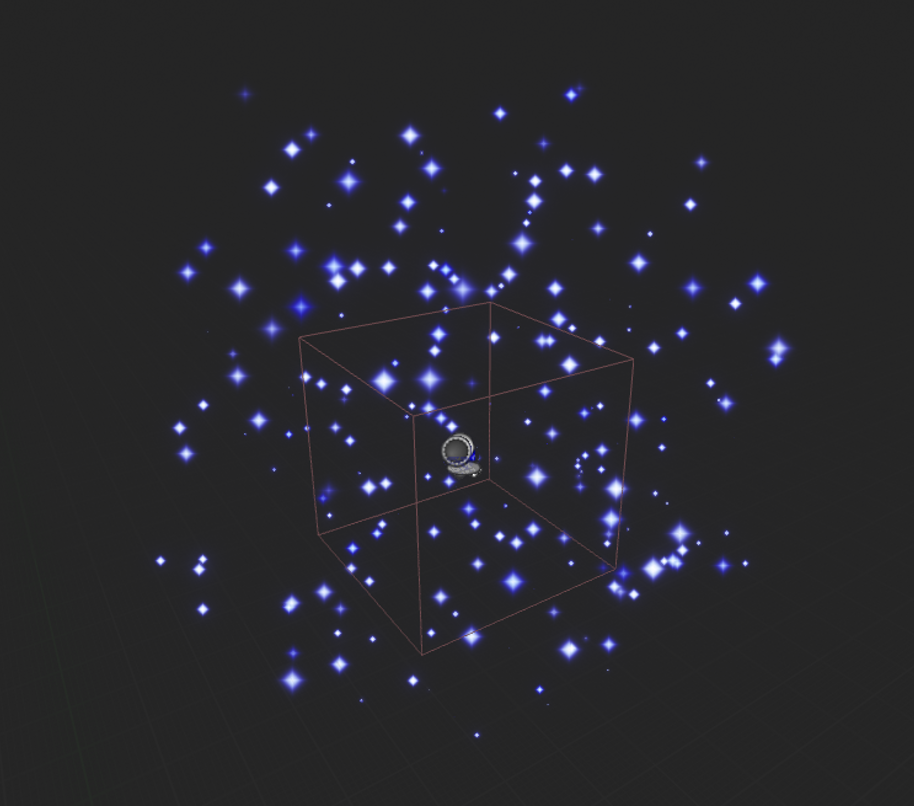
Then, I created the Niagara system for the sparkle effect, beginning with a fountain emitter.
The first step of creating the particle effect was applying the material I had just made to the sprite renderer. I then increased the spawn rate, to increase the number of sparkles that would appear. In the Particle Update section, I added a Dynamic Material Parameter in order to edit the Emissive Colour parameter I had added to the material, setting it to 100, and then increased the sprite size to make the sparkles bigger. I increased the radius of the sphere the particles could spawn in to 400, to spread them out more so they would appear around the orb instead of just from one spot inside it.
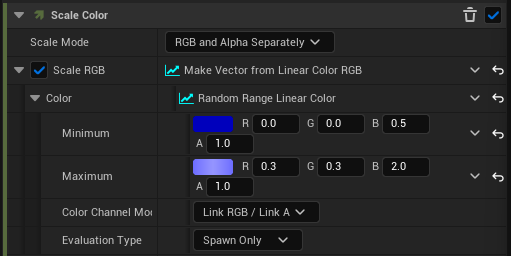
Next, I removed the Gravity Force so the particles wouldn’t fall, and reduced the velocity down to 50-100 so they wouldn’t fly upwards as fast as they initially did. This made them seem to hover and linger in the air more, rather than launching upwards. I also made the particles no longer rotate as they spawned, so they would spawn as the regular diamond without turning. Then, for the colour, I added a random range from light to dark blue that the particles would spawn as.
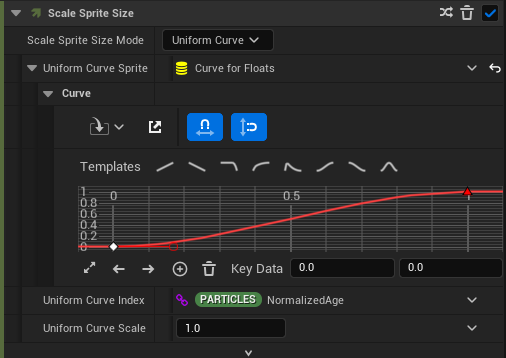
Finally, I added Scale Sprite Size to the Particle Update section, modifying the graph to make the effect look more sparkly.
After adding the effect into the blueprint for the blue orb, it was clear that the effect covered much too large of an area, so I went back into the Niagara system and reduced the area the particles could spawn in, the size of the particles slightly, and the spawn rate, so that there would be fewer, smaller particles in a tighter area around the orb.
The blueprint for the orb already had a coloured light attached, which added to the effect. With one orb created, I simply copied the Niagara system and changed the colour of the particles from blue to red to create the sparkles for the red orb.
Next, using an Upward Mesh Burst emitter, I created an effect for a cloud of dust bursting upwards. This was for the breaking tile puzzle in my level – when the character steps onto an incorrect tile, it breaks, dropping them down below. The cutscene will have this happen once, where the character will fall, playing this dust cloud effect to show the tile breaking. After replacing the mesh renderer with a sprite renderer, I reused the smoke subUV spritesheet that I had previously used to create the smoke for the torches, changing the colour to a lighter brown/gray colour to match more closely with the tiles, so it appeared that the dust cloud actually came from the tile breaking. I also increased the angle of the cone of the burst, so that the particles spread out slightly more.

The last type of VFX I wanted to create was some green necromantic mist and magical effects, which would appear towards the end of the level to emphasise that the dungeon had some magical effects to it, as well as imply that the boss will be some form of undead.
I started with the two fog effects I wanted to make – both mostly the same, but with one having a higher spawn rate for the particle sprites, to create the effect of a more powerful, thicker fog. I created a Niagara system using the Hanging Particulates emitter, to make the sprites float and linger in the air. I once again used the Smoke SubUV spritesheet, changing the colour to green. I played around with the alpha value, but settled on leaving it as 1, as the sprite itself has some transparency to it already.
Next, I duplicated this system and increased the spawn rate from 20 to 80, to create a much thicker and more obvious fog effect. This would be placed around the coffin in the final room of the dungeon to make it seem more powerful and magical.
The last Niagara system I made was the burst of mist that would appear from the coffin at the end of the cutscene. I did this using a Directional Burst emitter, removing the Gravity Force, and rotating the burst to fire the sprites upwards. Then, I once again used the Smoke SubUV spritesheet with green colouring to make the same mist effect as before, and tweaked the sizes, lifetime, and velocity of the particles to get the burst effect I was looking for.
Cameras and Animation
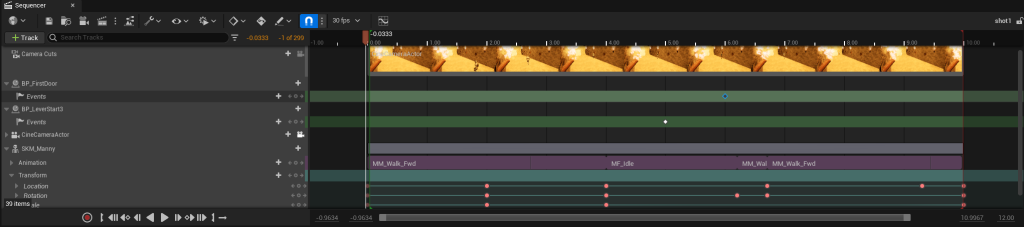
Now that I had all of my VFX created, it was time to work on making the cutscene itself. I started with the shot in the first room of the dungeon. This involves the character walking to a lever and pulling it, opening a door that they will walk through. The room has several torches, which I positioned the camera to be able to show. I used the built-in Unreal Engine 5 “Manny” skeletal mesh and animations to make the very basic animations for the character.
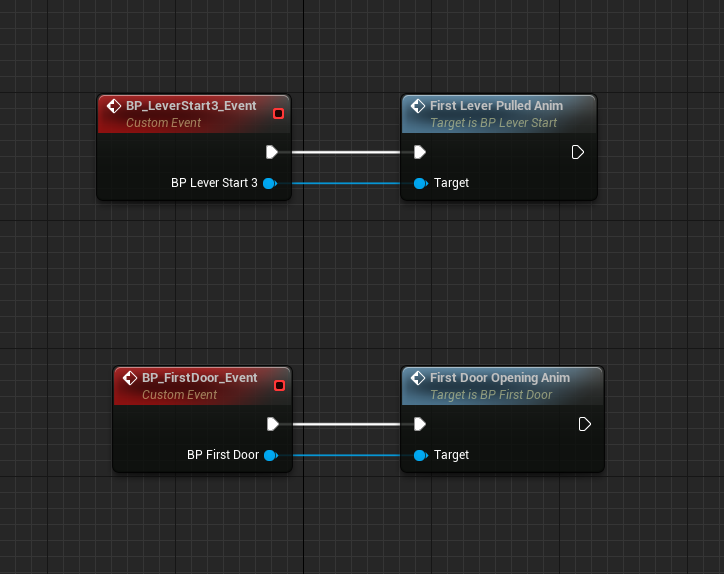
I also modified the blueprints for various parts of the level, such as the doors and levers, so that they could be fully triggered by custom events. Thanks to this, I could add a keyframe into the Unreal Engine sequence which would trigger the event at the right time in the animation.
Now that I had figured out how to make the shots and animations, I went through each of the 6 storyboard shots, using the same process of animating the character and parts of the level, placing the VFX I created where they needed to be.
While doing this, I realised that the mist particles I had made were very hard to see. I increased the alpha value from 1 to 2 to make it less transparent, so it would be more obvious and easy to see.
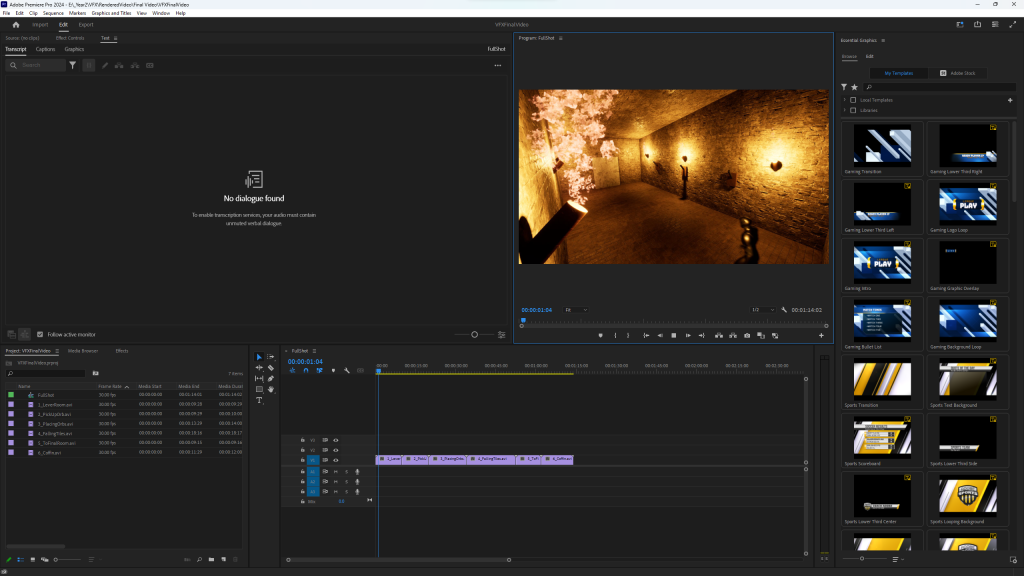
After creating all 6 of the shots for the final video, I rendered each one out individually as a separate file. Then, in Premiere Pro, I combined them all together into my final video.

Review
Looking back at my finished video, I think that the fire/smoke from the torches, the sparkles on the orbs, and the dust clouds from the breaking tiles all fit the standard and idea I was picturing in planning – however, the different green mist effects ended up being quite messy and not fully how I pictured them. Going back, I would try to spend more time editing them, perhaps trying different kinds of emitters or finding a more fitting sprite sheet for the effect I was going for.