Initial Planning and Concepts
The first thing I did was to consider my character and their design. While I was not going to use the model I had created in the Character Design assignment due to various issues with it, I still wanted to base my animations off of that character, as I had various ideas and felt the concept was interesting enough to explore.
The character is a muscular wizard, which I felt was an interesting twist as wizards are often depicted as frail and physically weak. This concept also gave me various ideas for possible animations, as I could combine ideas for both the physical strength of the character, as well as the magical nature.
I spent some time coming up with basic concepts for what my three sequences could be. A walk cycle was one of the first ideas, as it is quite simple, but has room to show a lot of the character’s personality. I also wanted one sequence that would show off both of the main aspects of the character – I decided on having the character lifting a dumbell with one arm, while holding a book to read in the other. For my third sequence, I went back and forth on a few options – including lifting a barbell, using a magical staff to cast spells, or throwing fireballs – but the option I settled on was a sequence of the character flexing.
Next, I spent some time considering the style of animating I wanted. I decided that I would try to have a more cartoony, exaggerated kind of animation, to emphasise the more comedic aspects of the character. This also meant that I could focus a little less on realism with the movements, instead opting for more interesting and cartoony movements.
References for Sequences
Now that I had my three ideas, I looked online to find some references that I could use to help me animate my sequences.
Firstly, the walking animation reference I found is a clip from a cartoon version of the book “Treasure Island” of the character Dr Livesey walking.
I felt that this had the right level of cartoony exaggeration, and fit well with the design of the character.
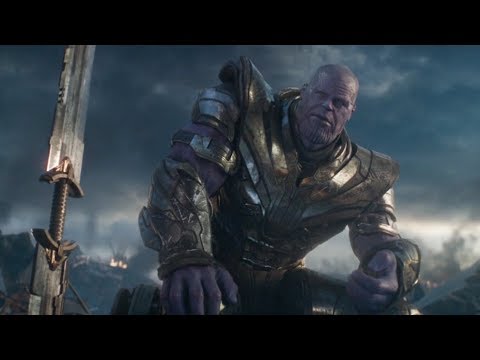
Next, for the scene of the character lifting while reading, I looked at a specific pose that Thanos had in Avengers: Endgame for the way the character would be sitting, and then found a video of someone curling a dumbell for referencing the animations for the arm.
Finally, for the flexing, I used an emote from the game Overwatch of the character Reinhardt, as seen in the following video.
Choosing a Model
As mentioned previously, I decided to find a model to use from online, as the model I had created in the character design module had a few issues with the topography and overall design. After looking through a few options that had a similar build to the character I had created, I settled on the following model on Sketchfab.
I chose this model for three main reasons – first of all, the physique was very similar to what I had in mind with my original character design, so it would work well as a replacement. Secondly, the more cartoony style also fit with the theme of the animations I had planned. Finally, the model was quite simple, which meant I could focus more on the animations than worry about any smaller details of the model itself that might cause difficulties, such as clothing or accessories.
Rigging the Model
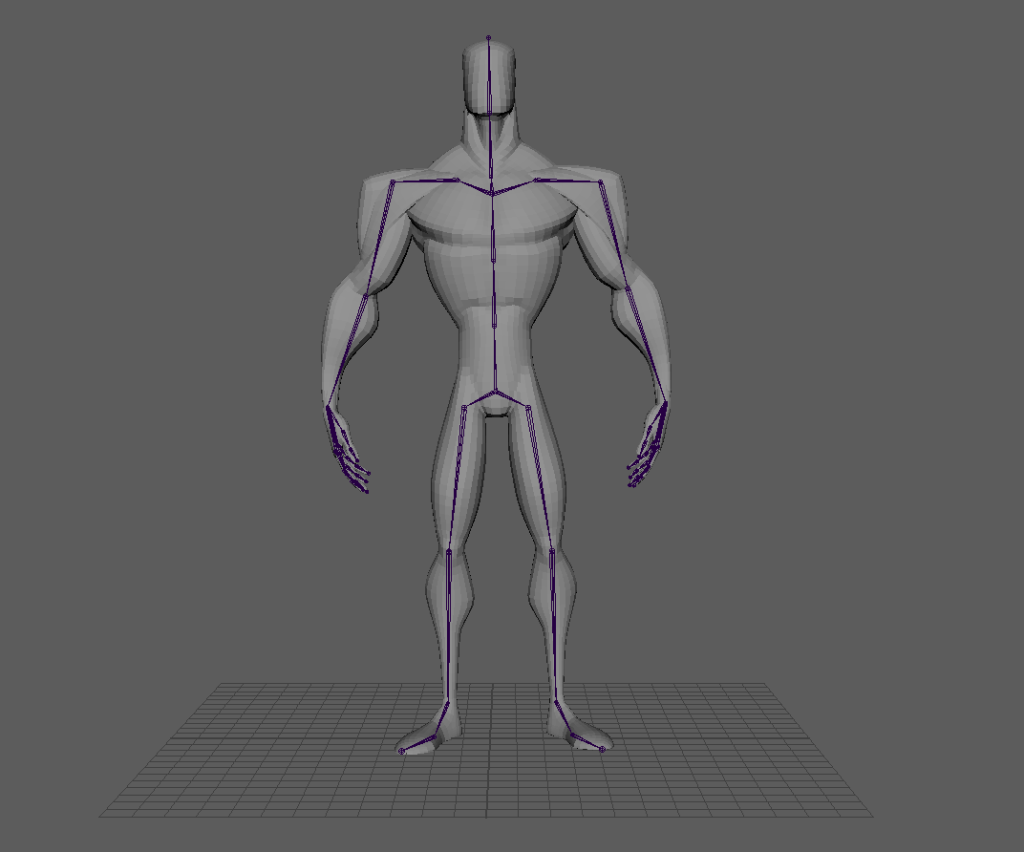
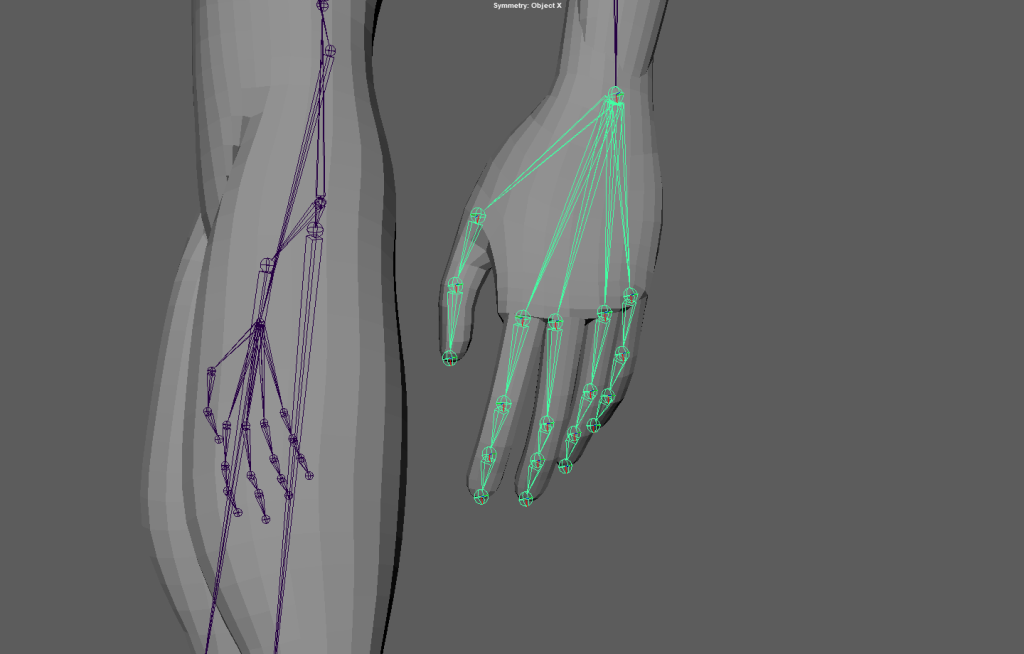
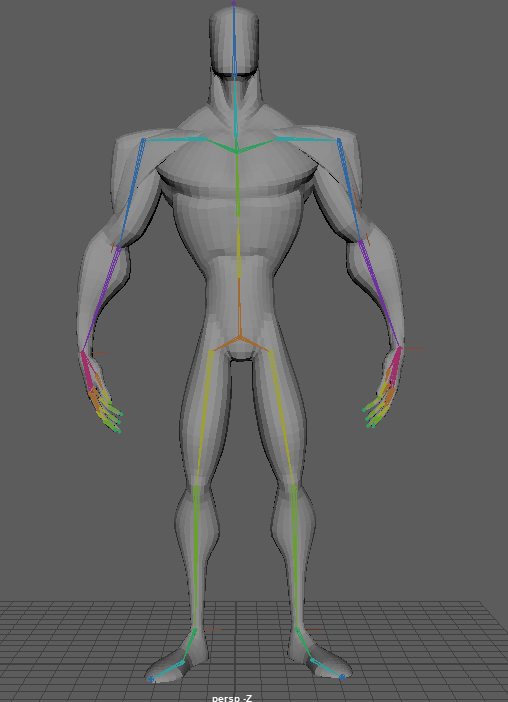
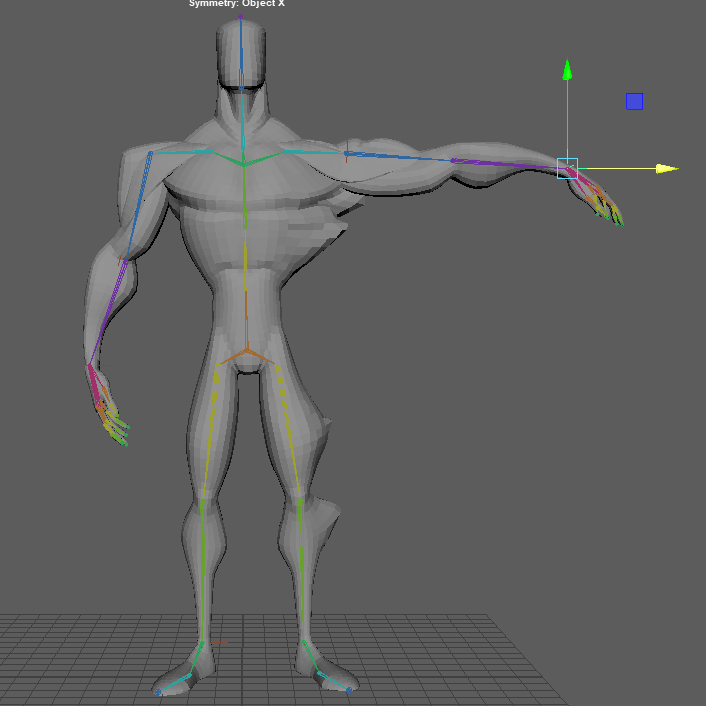
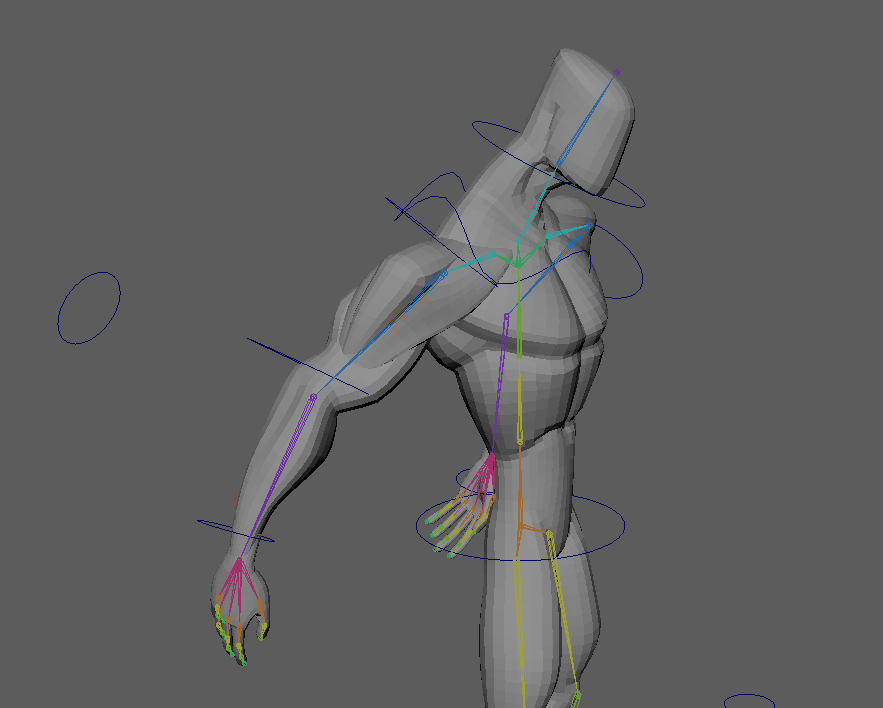
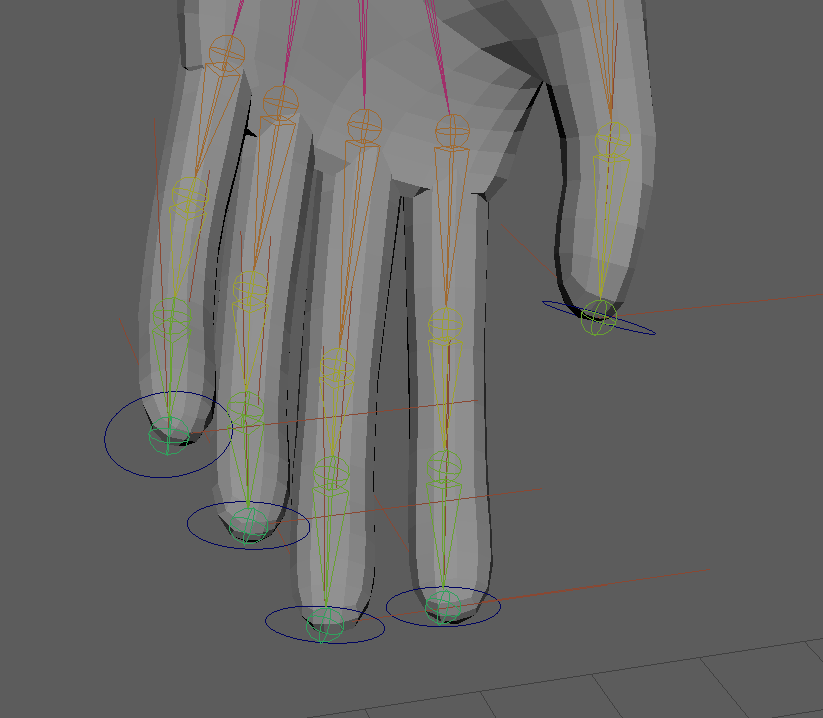
After loading it into Maya, the first step was to rig it with a skeleton. Using Maya’s rigging system, I added the joints that I would need. The most complex part was the joints for the fingers, which I needed control of for the weightlifting sequence in particular.
It was during this process that I realised that the model I had download was not fully centered in Maya – this lead to a couple of issues with mirroring the joints, and meant that the skeleton may not be perfectly centered. However, as I had already made a good amount of progress by the time I realised, I decided it was not worth restarting in order to fix it – especially since the movements I would be doing for the animation would be controlled by the various controls that I’d set up, which all work off of the relative position of the model, rather than based off of the origin point.
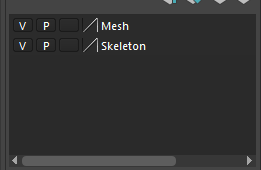
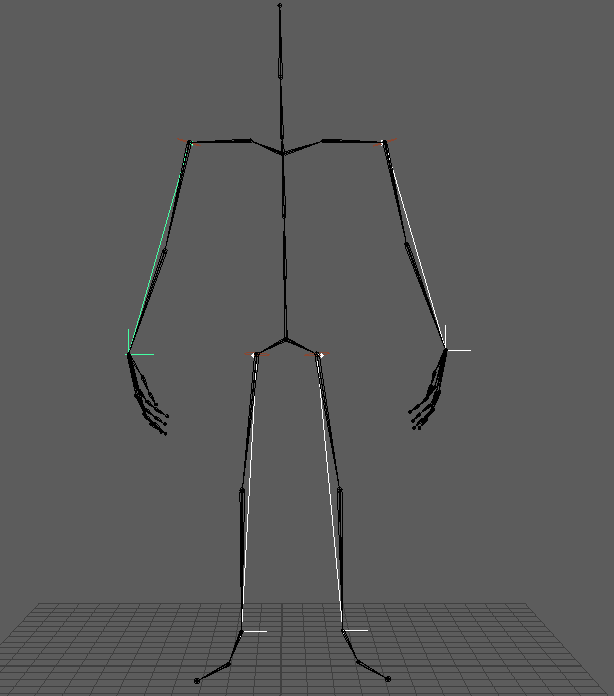
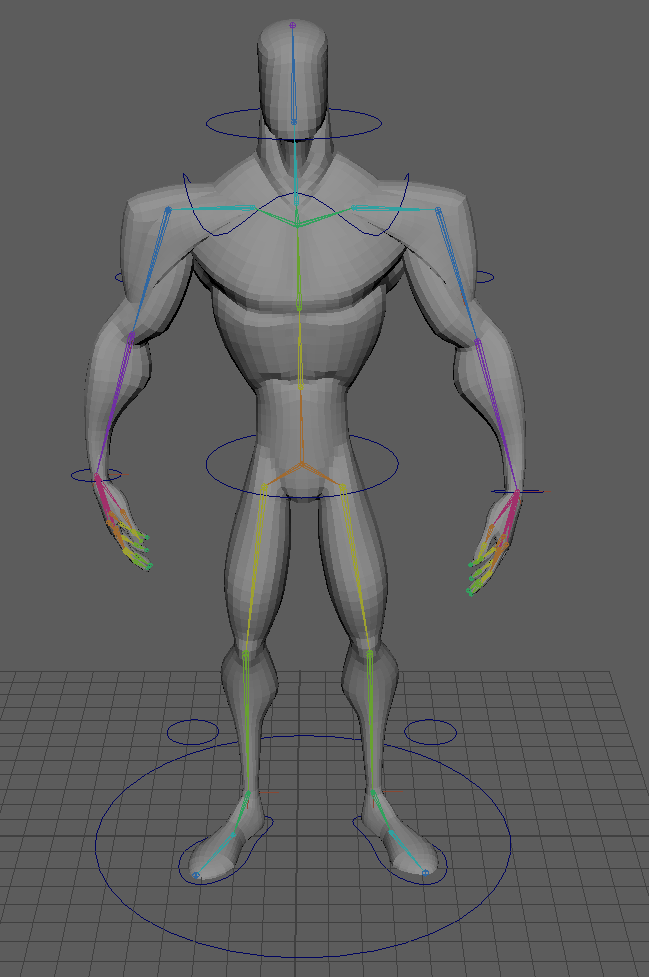
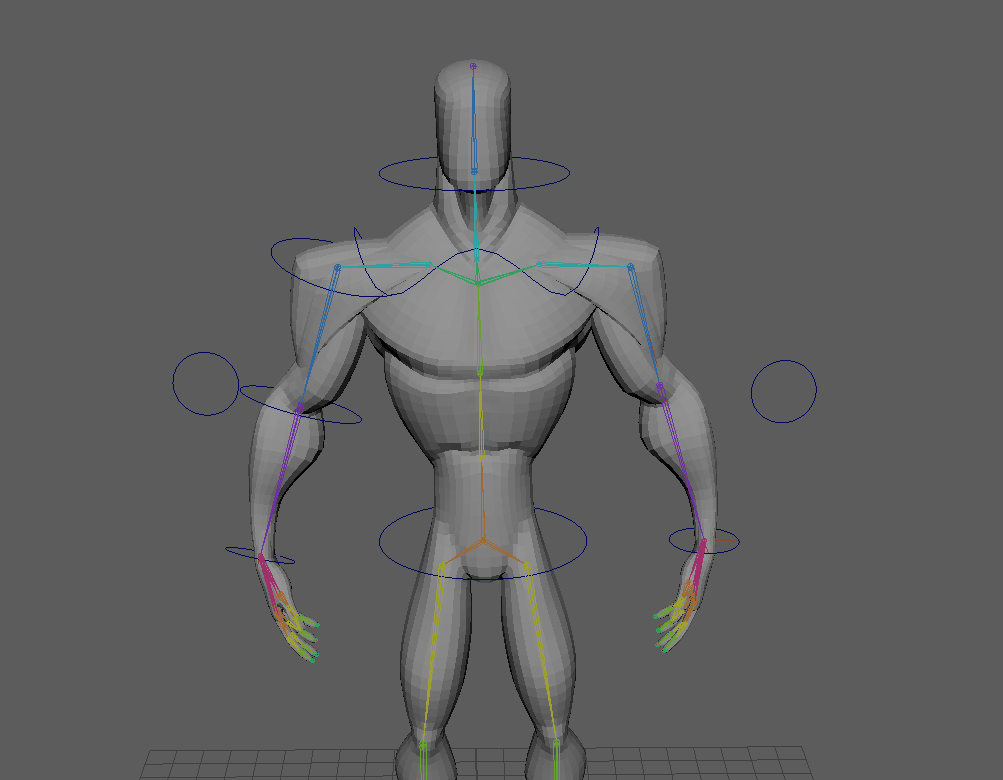
With the skeleton created, I next added some basic IK handles to be able to adjust the arms and legs of the model. IK handles work by linking the movement of several joints together, so that when the end point of a limb – in this case the wrists and ankles – is moved, the rest of the connected joints will also be moved, up to the other selected joint – the shoulders and tops of the legs. Setting these up also involved skinning the model, and binding it to the skeleton, so that the actual mesh of the character would move when the skeleton did. I also created a layer each for the skeleton and the mesh, so I could more easily modify and configure the seperate parts of the model.
The IK handles had a few issues with moving different, unconnected parts of the model. This is because I had not yet done the weight painting for the model – however, these IK handles are simply to help for when I do do the weight painting, and are not the final controls that I will have for the model. After weight painting, I will be switching these out for better versions, including handles that can be switched between IK – where the movement of the “child” node, such as the wrist, affects the nodes before it – and FK, where the movement of the “parent” node, like the shoulder, affects the nodes after.
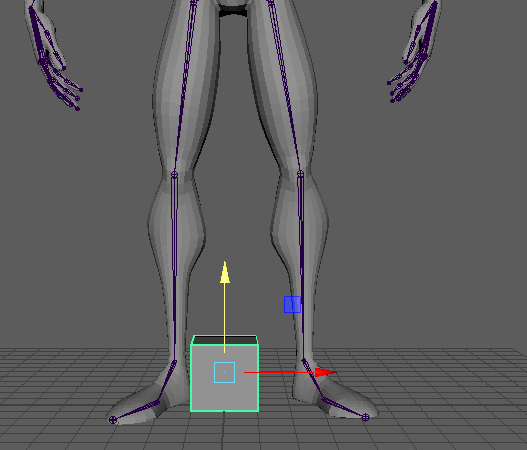
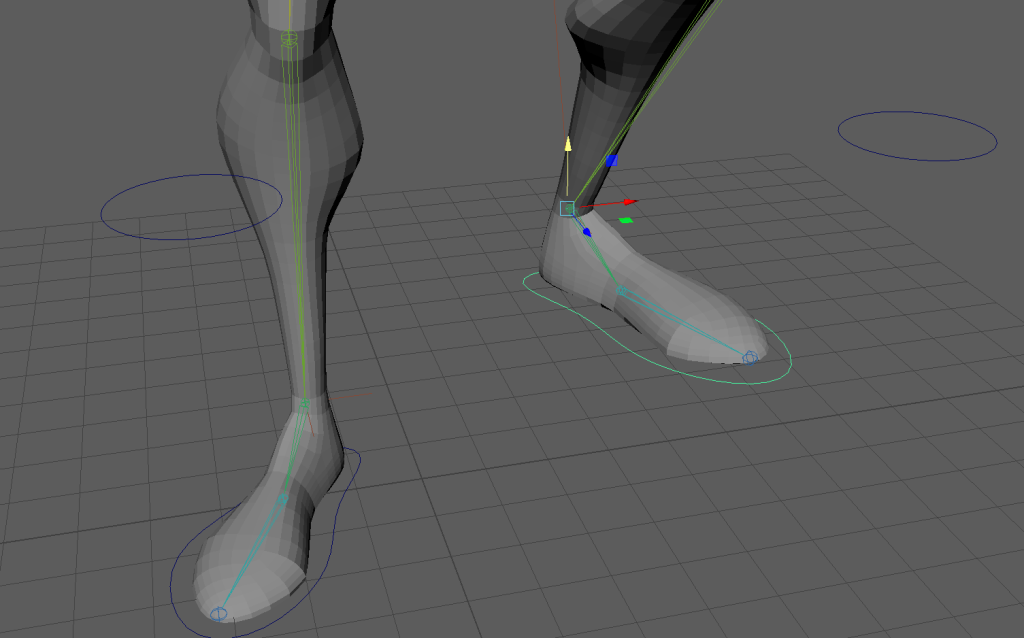
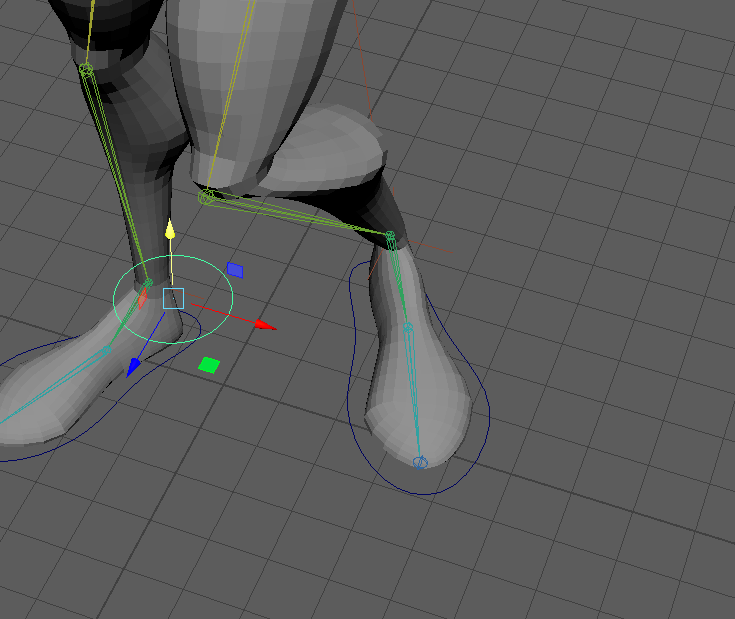
The final step before weight painting was to add controllers and constraints in order to make moving the model around much easier. I began with creating controllers for the feet, which I linked to the joints with point constraints, and then pole vector constraints to the knees and elbows. The point constraints on the controllers made it much easier to use the IK handles I had set up, and the pole vectors allowed me to rotate the knees and elbows to point in a direction I wanted.
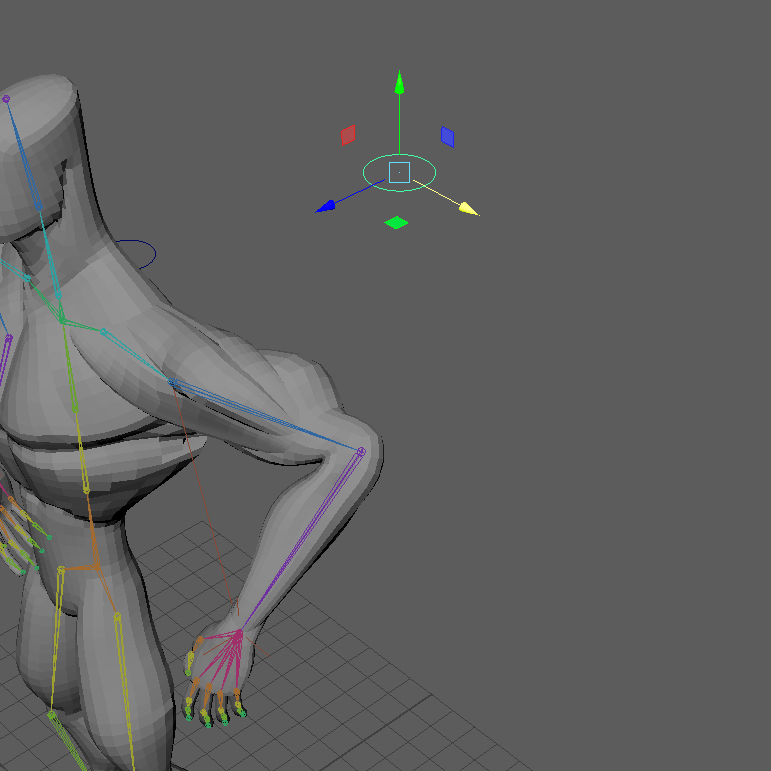
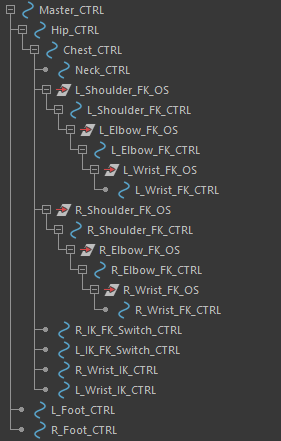
Next, I created an IK handle for the spine, with three controllers attached – the hips, the chest, and the neck – which I made children of each other so that when one part of the model was moved, the other controllers would also move with the model, instead of remaining in their original positions. I also added controllers for the hands, and then created a master controller, which I made all of the other controllers children of, so that I can move the entire model at once, with all of the parts connected.
Weight Painting
Now that I had some controls set up for my model, it was time for weight painting. This let me edit which parts of the model are affected by each individual joint. The main parts that I had to edit were the arms and legs. There were several parts of the arms that were affecting the side of the leg on the same side, and the legs would also affect the other leg slightly when moved. By removing the weight painting on those parts, it ensured that only the parts of the model that I wanted to be moved would be affected when moving different joints.
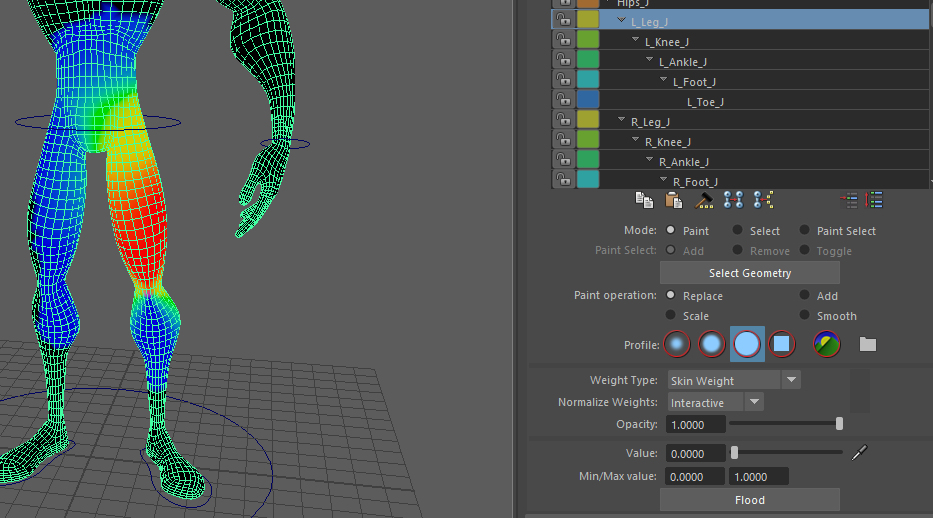
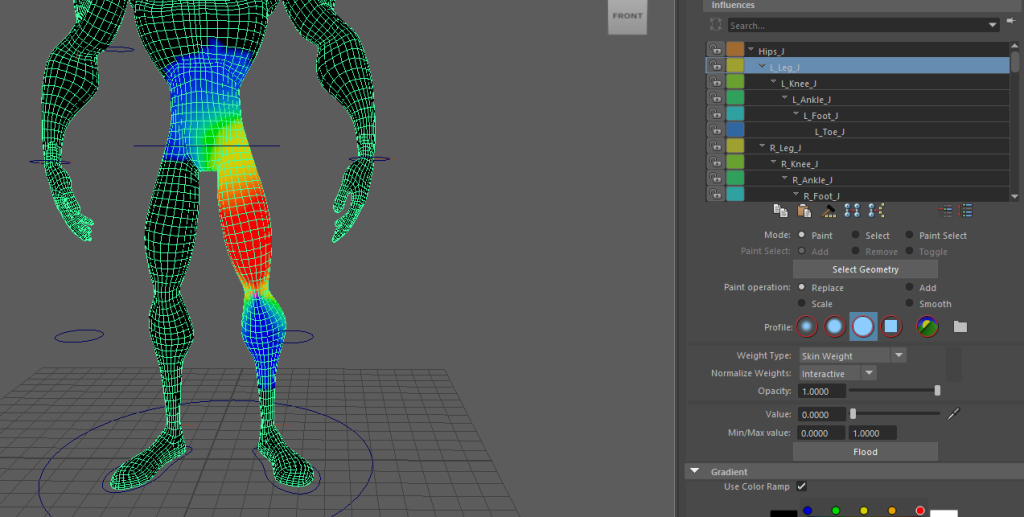
This process took a decent amount of time, as it was very important to ensure there were no errors with the weight painting. Even a small problem with an area being highlighted where it shouldn’t could cause large distortions in the animations, which would make the final product look much worse. There were some sections I was not certain about, such as how high up on the body the legs should be able to influence – however, I eventually reached a stage that I was happy with.
There were a few other small issues I had to fix during this stage of the process – the main one was that I had forgotten to add the orient constraing onto the controller for the wrists, meaning I couldn’t rotate them. This was quite easy to fix, but I spent some time checking the rest of the controls to make sure there wasn’t anything else that could become an issue later in the process.
IK/FK Switches
Once I was confident that the progress I had made so far was in a good state, I moved on to creating FK/IK switches for the arms. This gives a much greater level of control, and will make animating a lot easier.
The first attempt at this did not work out very well – when I unbound the skin, the model reset to its original position and meant the skeleton was now not aligned, which led to issues when I tried to reconnect this. I spent some time trying to fix this, but eventually decided it would be easier to simply redo this part and fix the issue with the skeleton before trying to make the switches.
I unbound the skin from the model, then readjusted the skeleton back to the model’s original positions. After testing it by rebinding the skin, and ensuring the controllers all still worked, I once again began work on making the FK/IK switches for the arms.
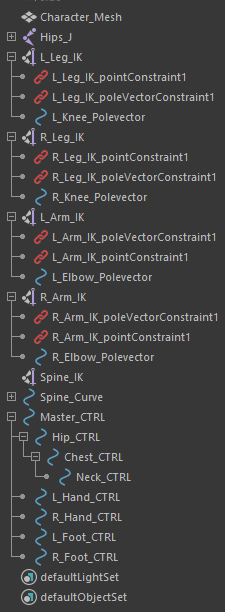
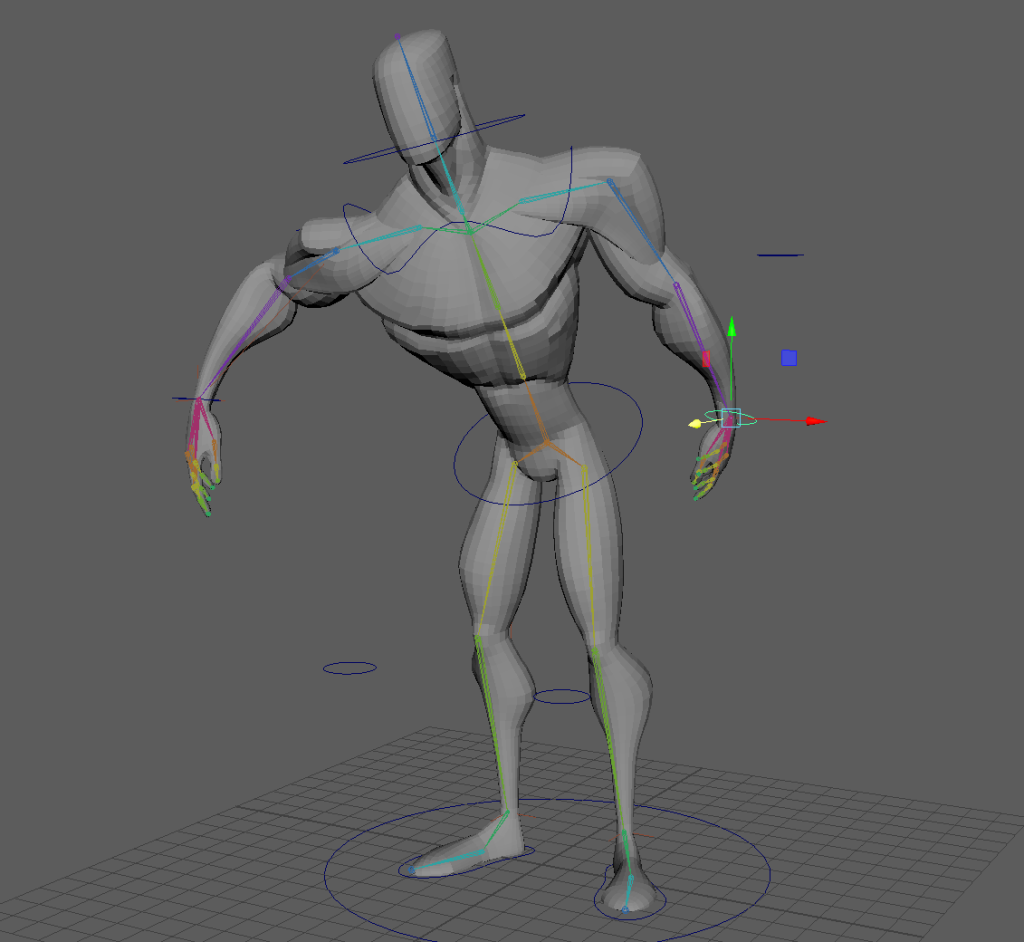
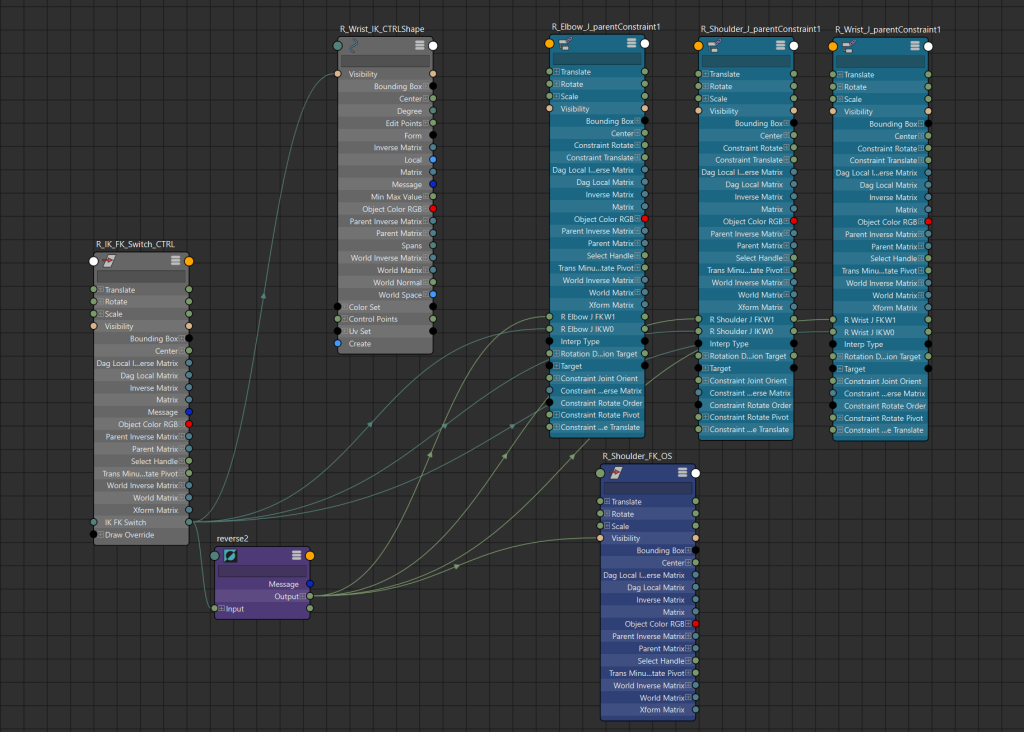
Using the node editor in Maya, I set up a seperate object with a variable that can switch between IK and FK. I linked this to the different controllers in order to allow me to swap between the two, so that when animating I could use whichever kind of controller would make it easier at the time. Although I could have simply had both IK and FK available at all times, this would have gotten very cluttered and confusing, which would make animating a lot more difficult. By making them swap between and hiding the controllers not currently in use, the model was much cleaner and easier to move and position as I wanted.
The last step of setting up the model was to move all of these new controllers into the right place in the outliner. It took a bit of trial and error to position them correctly – they had to be made the children of the correct controllers so that they would move as the other parts of the model did. Eventually, I found that it worked best when making these arm controllers children of the chest controller. The one downside with this was that tilting the chest forward also pushed the arms backwards – however, this was not a big issue as I did not plan to make much use of that particular motion.
Animating the Walk Cycle
First, I spent a little time examining the reference GIF I had found, to figure out exactly how the character walked. It was a little difficult to figure out exactly how to translate the motions from 2D to 3D, but eventually I felt I had a good idea of exactly how the movements needed to look.
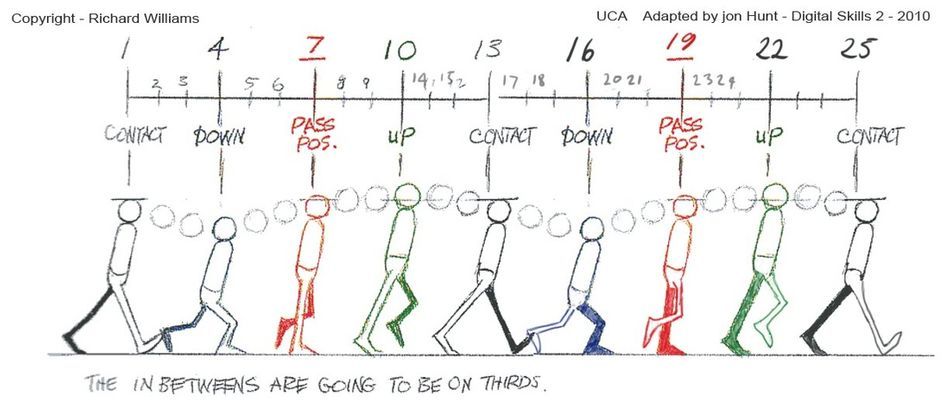
For the basic walk, I used this reference image from the Animator’s Survival Kit by Richard Williams. I used this to get the general movements of the legs and hips, which I then modified to try and fit more to the reference GIF – mainly by making the feet stay flatter to the ground for longer, and making the hip movements faster and stay at full height for longer. This looked a little odd, but my hope was that once the chest and arm movement was added, it would look more natural.
Next, I tweaked this basic cycle to resemble the reference GIF more. I flattened the feet to the ground more, to make the walk feel more grounded and sturdy. I also changed the arc of the vertical movement, making it faster and having the character spend more time at their full height.
Now that I was happy with the movements of the legs and hips, I moved on to the chest and arms. I went with a lot of exaggerated movements, swinging from side to side with each stride, making the character look confident and strong.
After some final tweaks to make everything flow better, the walk cycle was complete. I feel like this is the weakest of my sequences, as a lot of it was a learning experience, but I think it is still a good animation that shows the personality I wanted it to.
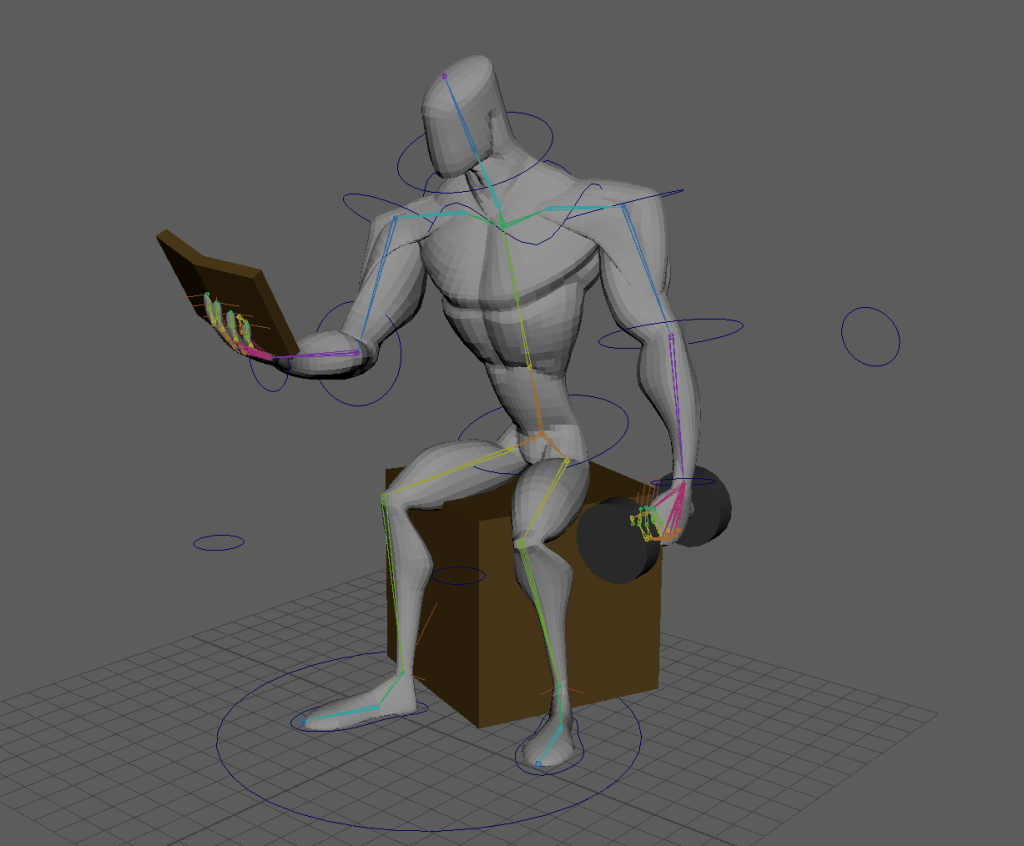
Animating the Weightlifting
I began this animation by moving the character to a starting position, and creating some very simple shapes for a seat, a book, and a dumbell. While positioning the dumbell, I realised I had forgotten to add any controllers for the fingers – however, as I did not need any detailed movements for them, I simply added some basic IK handles and controllers to the hand I wanted to have holding the dumbell, and positioned the fingers around it. If I had more time, I would go back and add proper, more detailed controls to the hands, but as I had already completed one animation and was low on time, I decided this would be a good enough solution. I also made the dumbell a child of the hand, so that it would automatically follow it and I wouldn’t need to manually track it to the hand movements. I spent a good amount of time focusing on the arc of the dumbell, as it was the key part of this sequence, and having clean arcs is an important principle of animation.
I had initially wanted to have the character hold the dumbell in the air on its own for a moment using magic, turn a page in the book, then go back to lifting it – however, I had a lot of trouble with detaching the dumbell from the mesh during the animation and reattaching it, and eventually decided that it was not something I could achieve within the deadline.
Animating the Flexing
For the final animation, I animated a sequence of various flexing poses for the model, trying to focus on transitioning between them smoothly and cleanly with good timing. I also added a small amount of follow through to various motions, to make it feel more natural instead of the limbs simply stopping immediately after a motion.
Final Product and Thoughts
Overall, I feel that my animations captured the essence of the character well, and while I did run into various problems during the process, I am happy with my final product.