Planning
As mentioned in my research project, I decided on creating the first 5 pages of an AR alphabet picture book, with an object for each letter. The objects I decided on creating were:
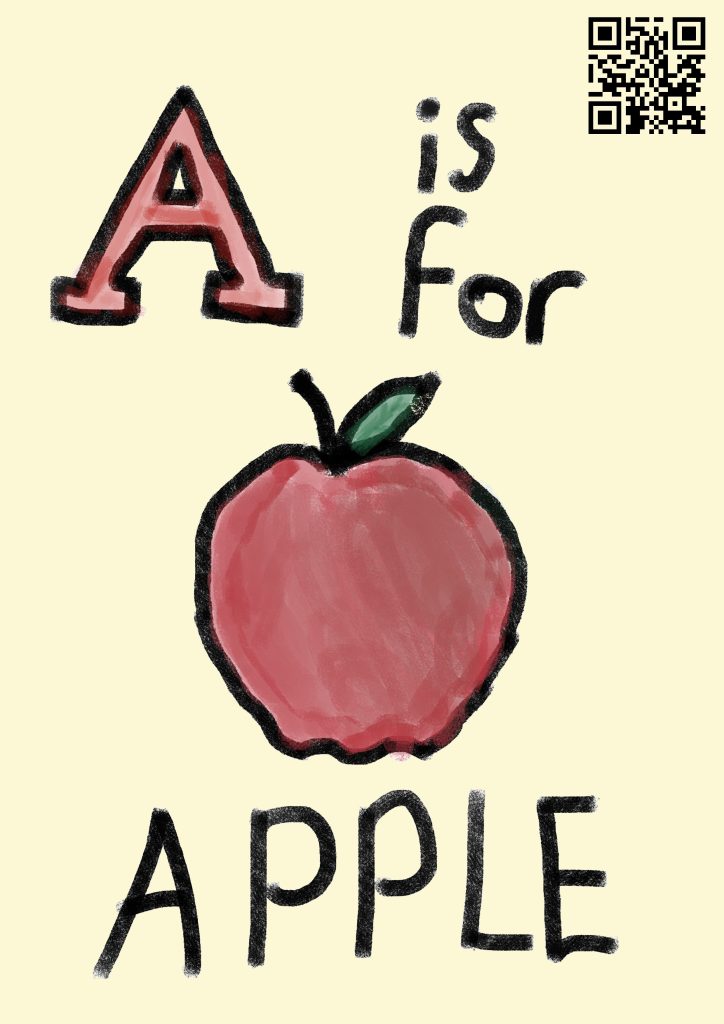
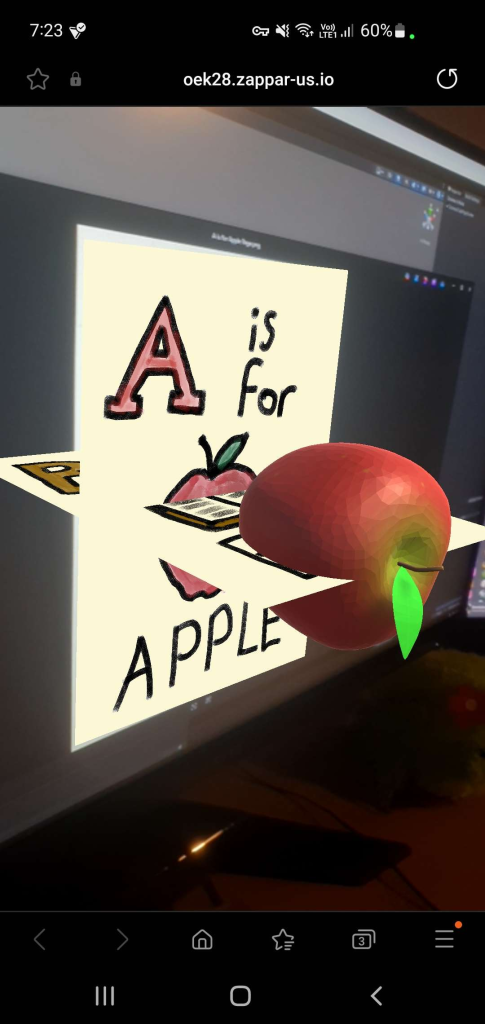
- A is for Apple
- B is for Book
- C is for Cup
- D is for Dice
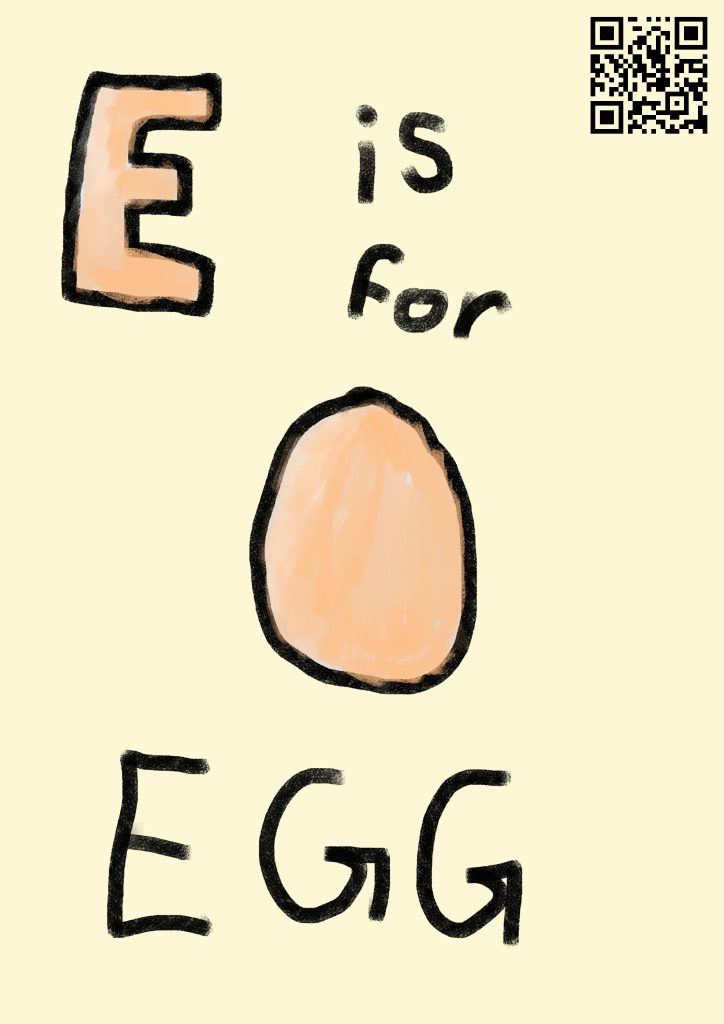
- E is for Egg
I had several other ideas over the course of planning – for example, trying to make all of the options food, such as B for Banana and C for Cherry – however, I couldn’t think of good options for further foods, and felt that it would be too restrictive for ideas. I also considered something like D for Dog, but felt that modelling an animal would be too complex and time consuming, especially if I did something on that level for every item. I decided that the items I have chosen were a good mixture of interesting visually, while being simple enough to be able to model them all within a reasonable time frame.
My goal is to have one QR code at the beginning of the book, which will activate the AR camera through ZapWorks. Then, that camera will be usable on any of the pages to see the AR model. However, I am not certain whether or not this will be viable. I have done some research into the ZapWorks Unity documentation, and cannot find any information about how to have multiple models linked to a single QR code. While I would like to have only one QR code, if I am unable to get the project working with only one, I will instead have a QR code on each page, which will open the ZapWorks project camera for that specific page’s object. This would be more inconvenient for the user than only having a single QR code, but I feel that it would still provide a good proof of concept for the idea.
Modelling
I decided to create the models in Blender, as I have some experience with the software, and had some ideas on how to use it to help make the models I had in mind.
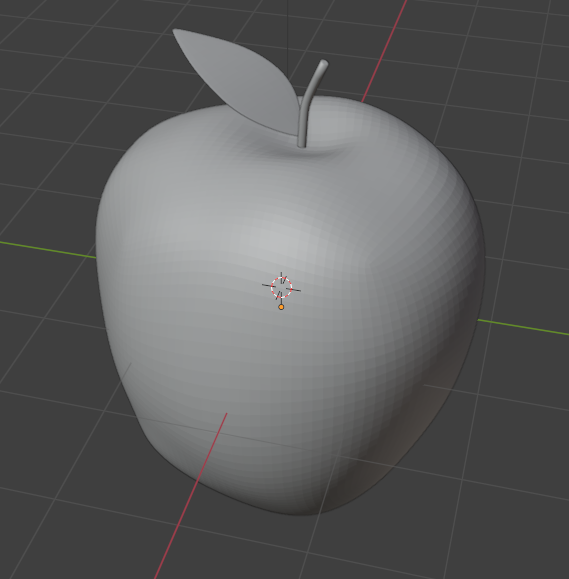
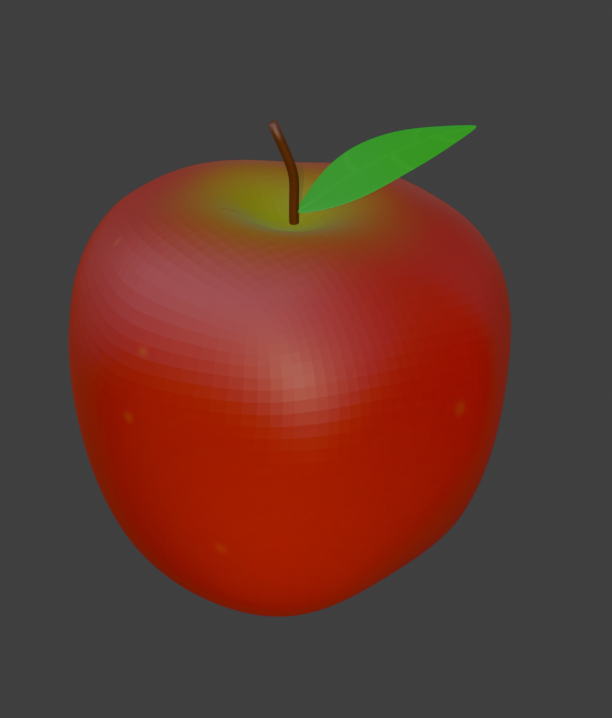
Apple
I started with the apple, as I wanted to create the models in the order they would be on the pages. To start, I used the default blender cube, and subdivided it into a more spherical shape.
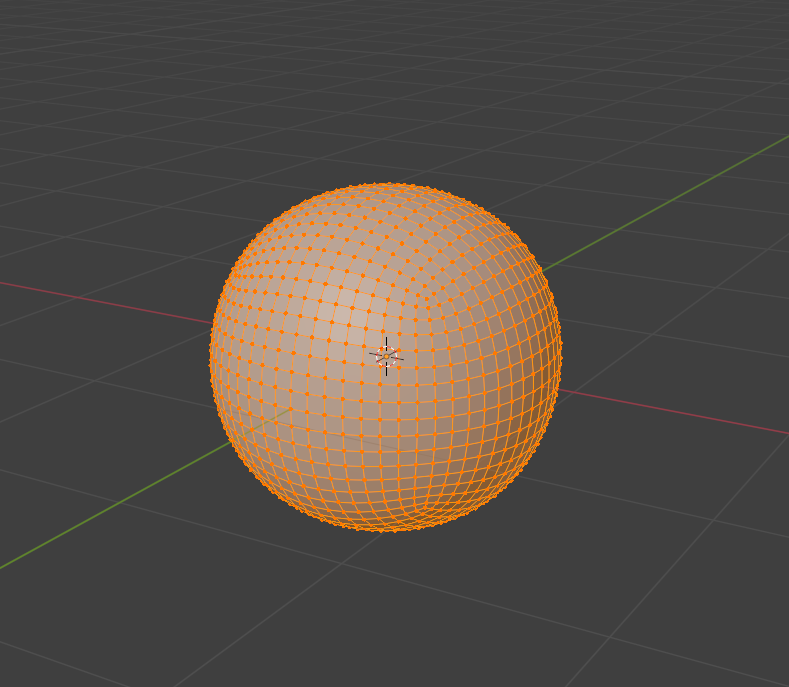
While I could have simply added in a sphere object, which would have been slightly easier and better for sculpting, it would have been more complicated to UV unwrap, and require retopology. I decided that the model I was making was not going to be detailed enough for the difference to matter, and that I would rather have an easier process texturing than a slightly more detailed sculpt.
I then used the sculpt tool on the sphere to form the shape of the apple, using Blender’s reference system to shape it to the basic shape, then modifying it until it looked better for my more low resolution model.
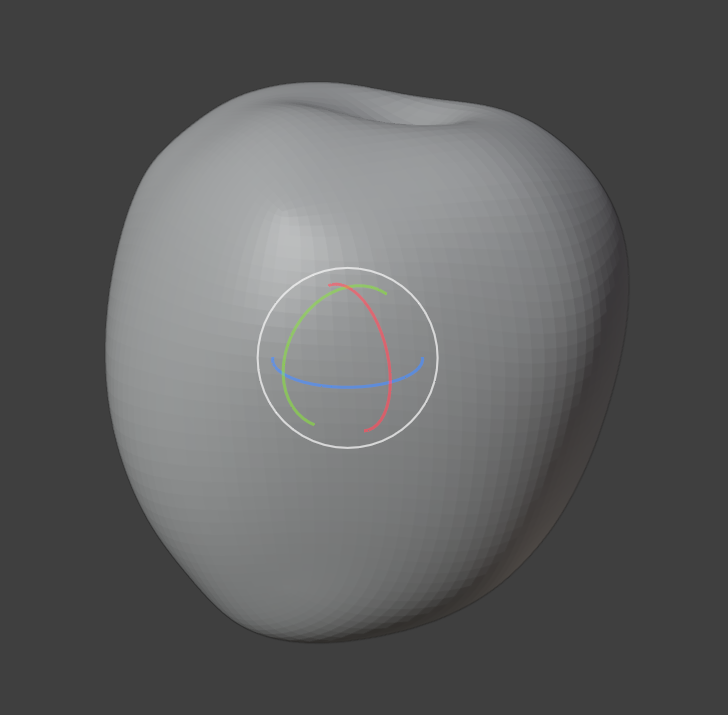
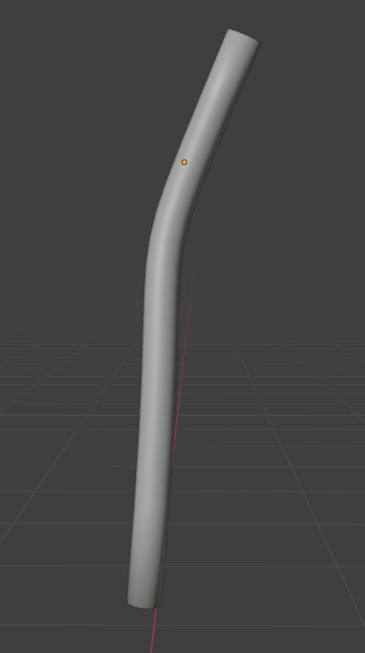
Next, I added the stem. I did this by creating a curve, adjusting it to the correct shape, and then adding a thickness modifier to make it a solid object. I deleted the ends of the newly made cylinder, and refilled them with a face fill so that they were more rounded and fit the topology of the model better.
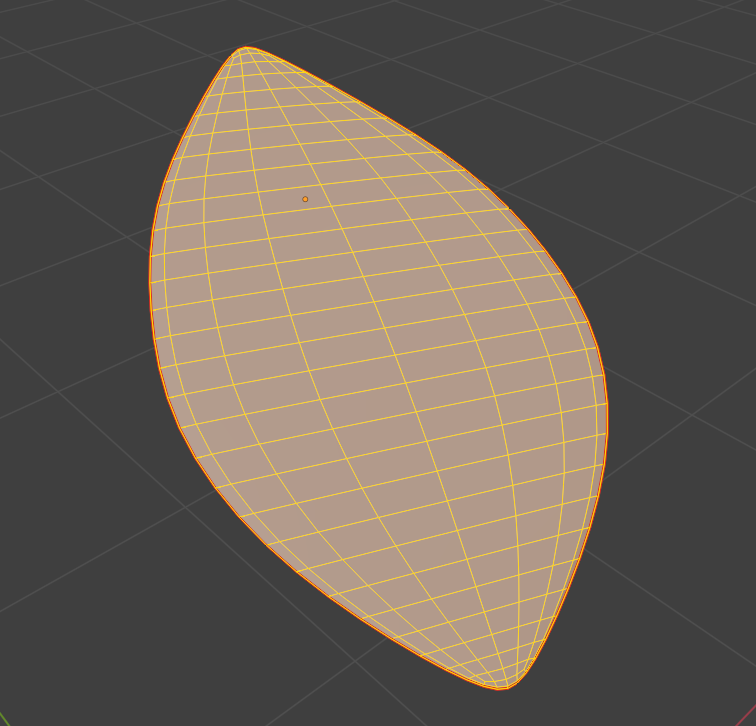
The last part to create was the leaf, which I made by creating a plane, adding some loop cuts to it, and adjusting the edges of the loop cuts to make the shape of the leaf. I then added a very slight thickness modifier, and subdivided it.
Finally, I positioned all three parts together to create the full model.
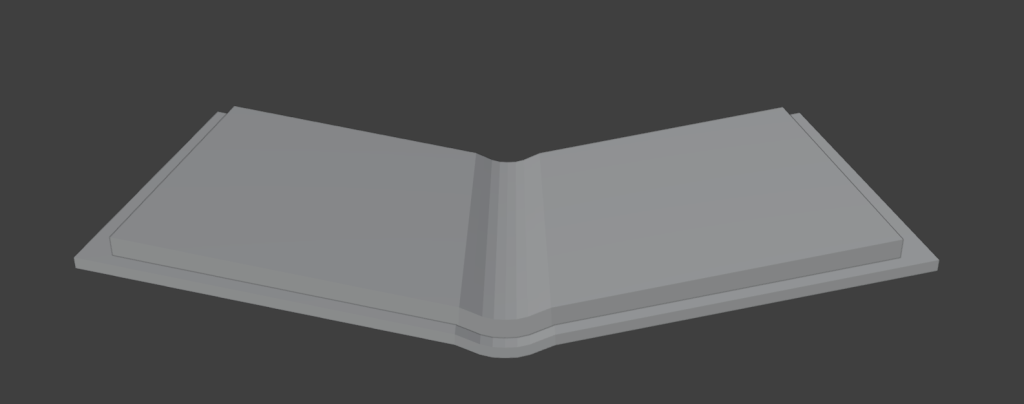
Book
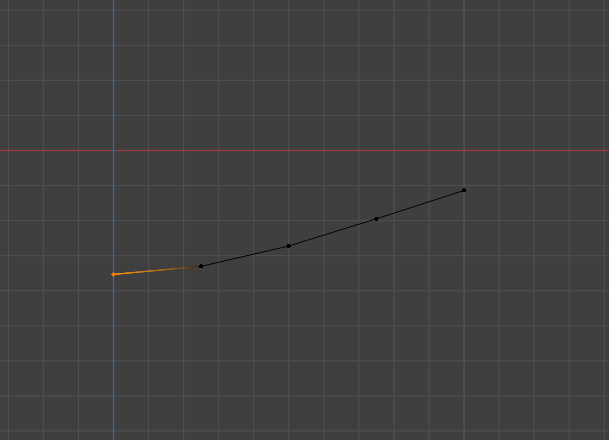
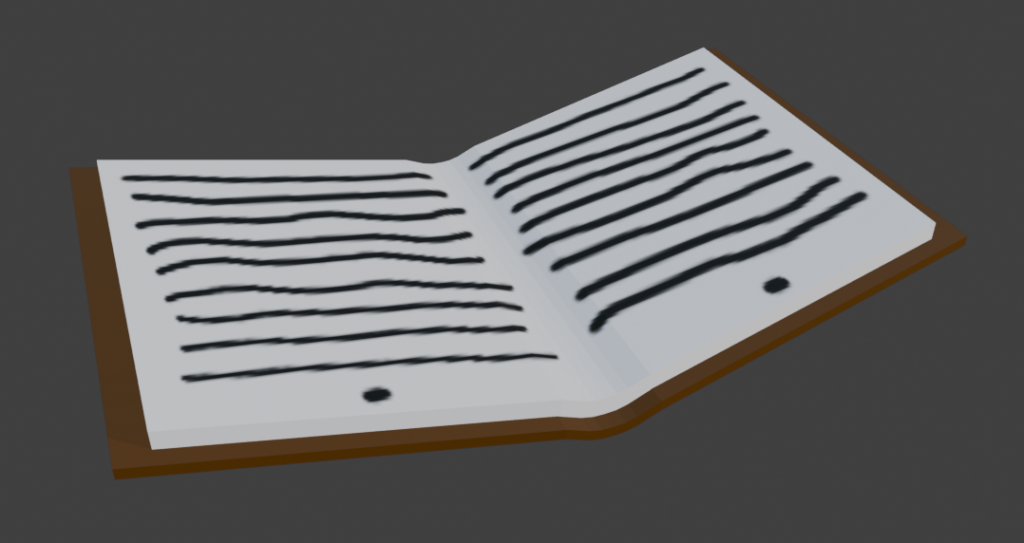
For the book, I began by creating a plane, and splitting it in half.
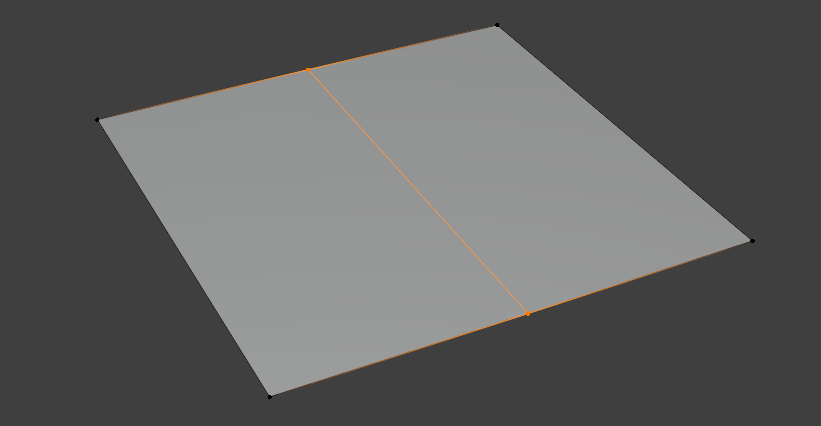
Next, I deleted the left half of the plane, before adding a mirror modifier to it. This meant that any changes I made to the right side would be copied to the left, which would ensure the book was symmetrical, and that I wouldn’t need to model both sides individually.
After creating a few more loop cuts, I used the Proportional Editing Falloff setting to make a curve in the plane, which would become the spine of the book.
With the spine curve created, I extruded from the edge of the plane in order to make the larger page and cover of the book, and once I had the shape correct, I added a thickness modifier in order to add depth to the book.
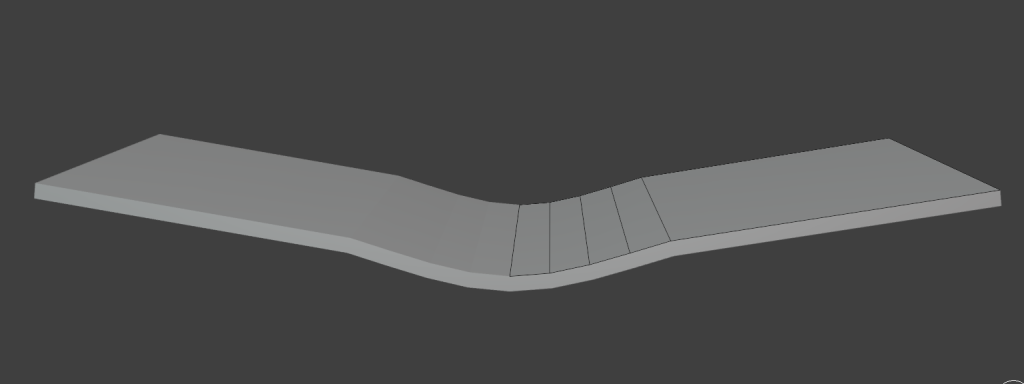
With the cover created, I adjusted the size of the spine and the height of the book until I was happy with it.
Finally, in order to add the pages, I duplicated this object, shrunk it so it would fit within the cover while making it slightly thicker, and moved it upwards.
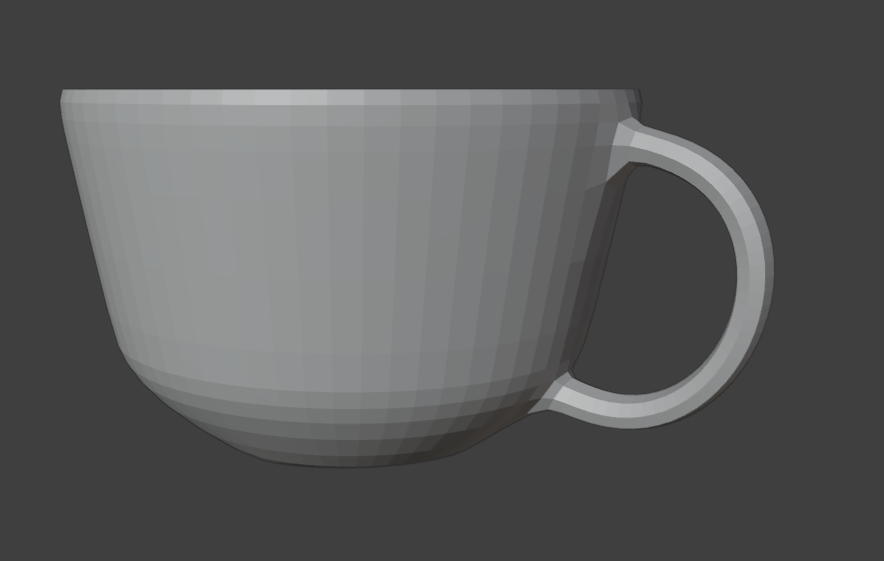
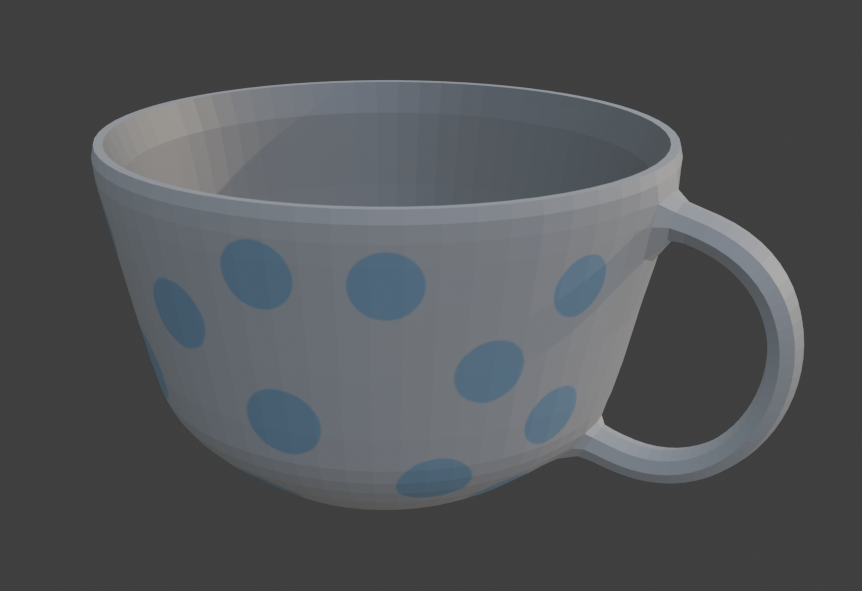
Cup
To create the cup, I started by creating a basic cylinder object, and using the loop cut tool to add a few extra edges around the sides.
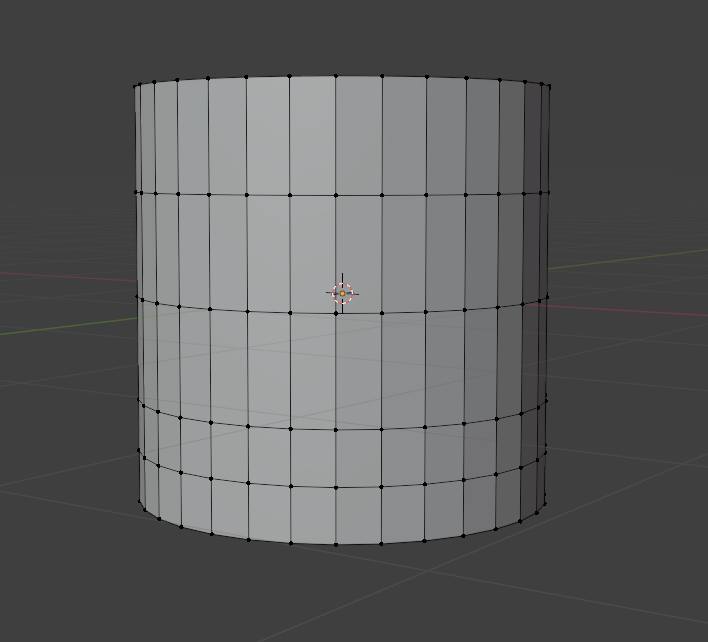
Then, I resized the different edge loops, adjusting them to different heights to form the general shape of the cup.
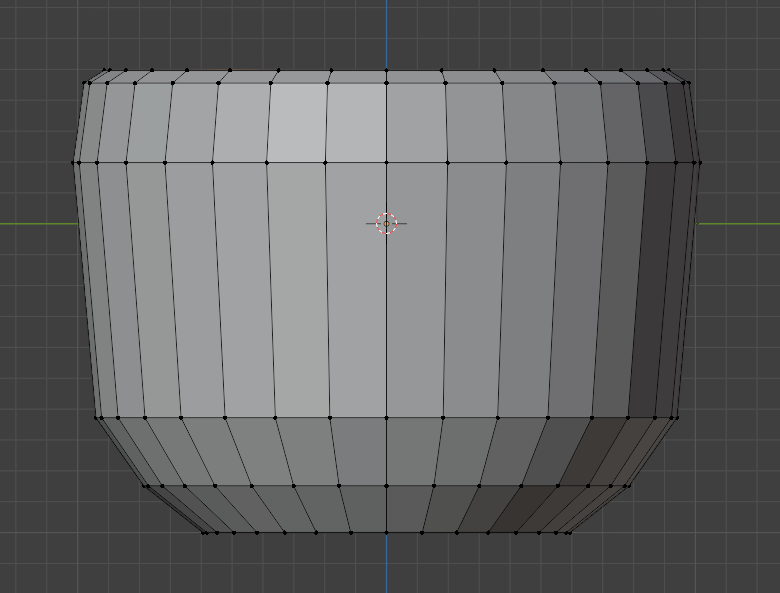
With the shape created, I inserted a face into the top of the cylinder, with a small space around the edge to make the sides of the cup have some thickness. I then extruded the new face downwards into the cup, to hollow it out and create the inside. I resized the face at the bottom and extruded again in order to add a varying level of depth and slope to the inside of the cup.
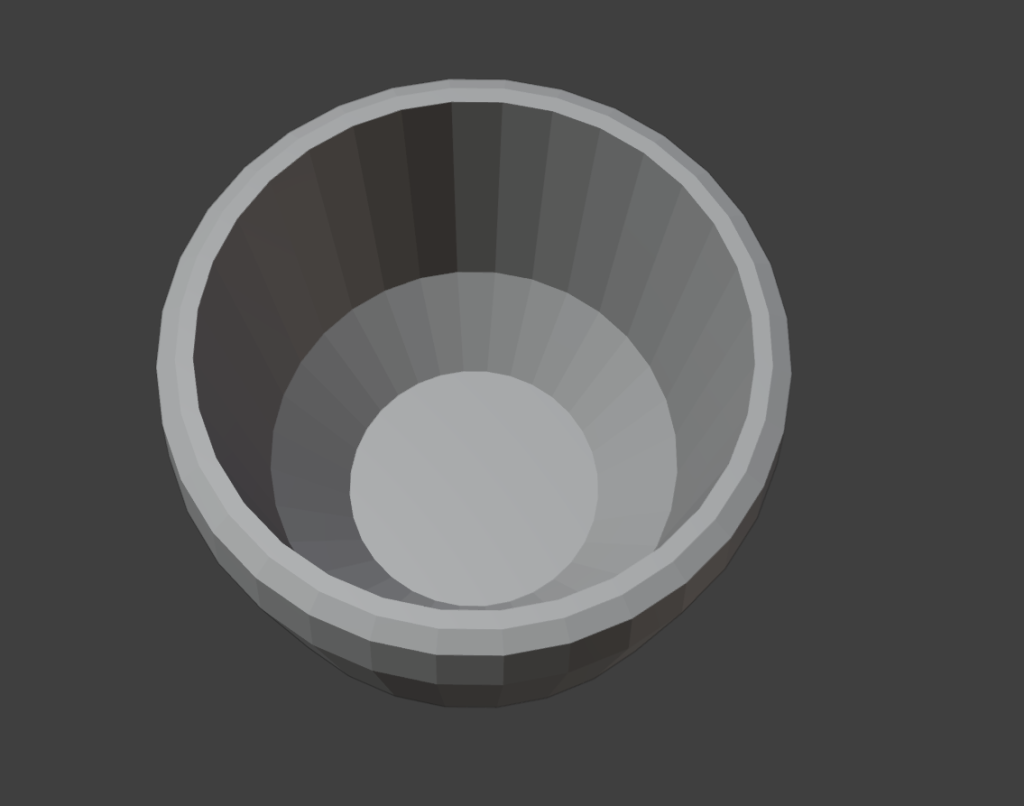
Then, I refined the shape of the cup by modifying the loop cuts, and adding a few more at the bottom to round it out more. When I was happy with the shape, I cut out a few faces at the top and bottom of one side, and created a bridge between the two for the handle. The last step was to subdivide the model to round it out even more and make it more smooth.
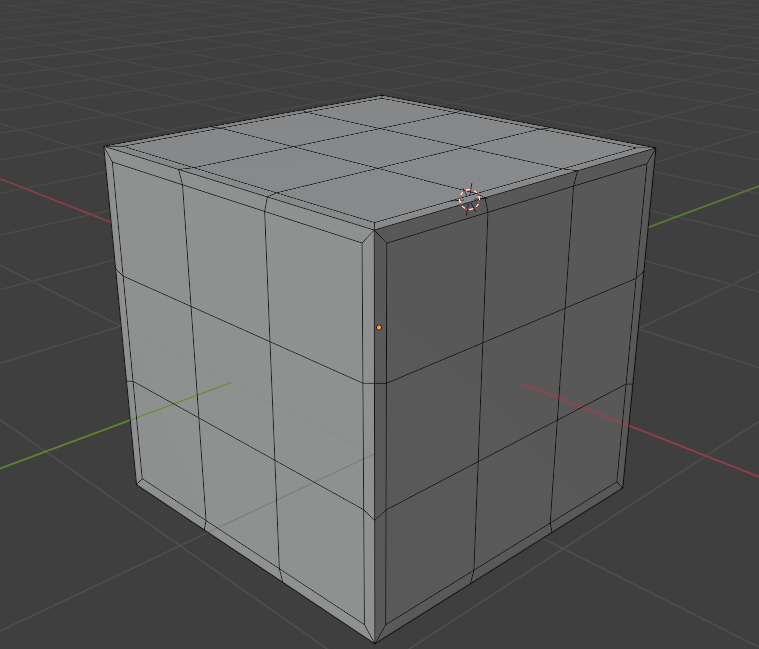
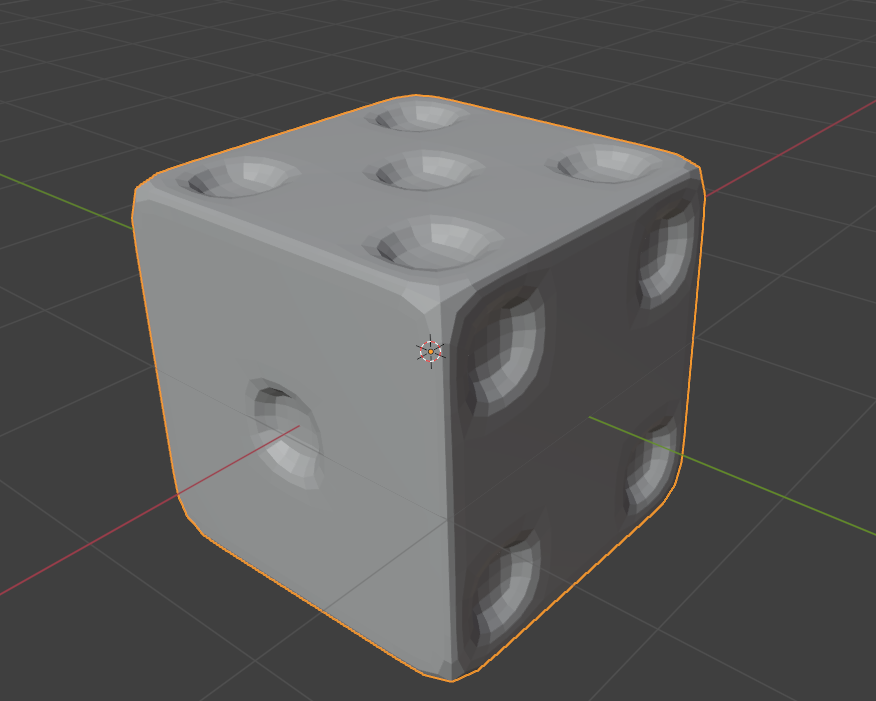
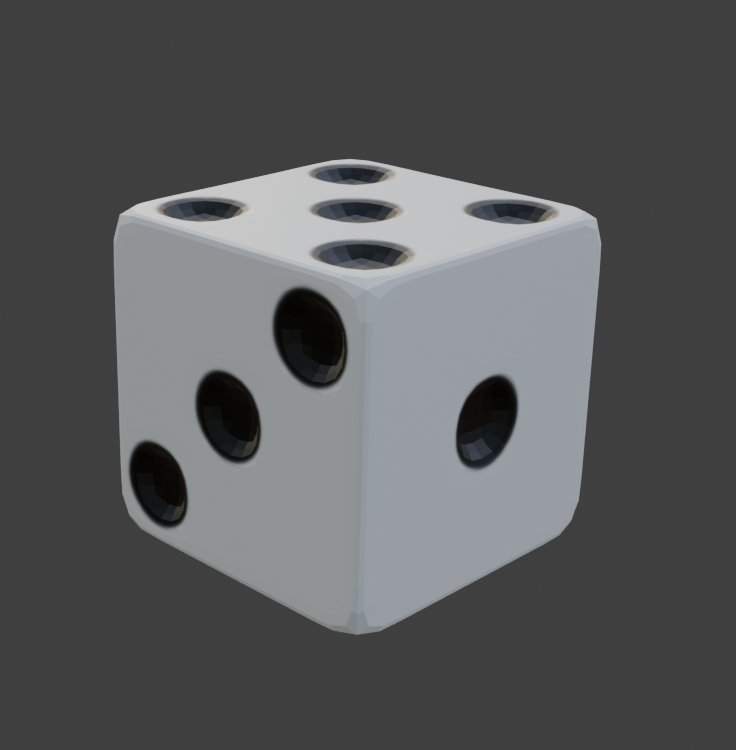
Dice
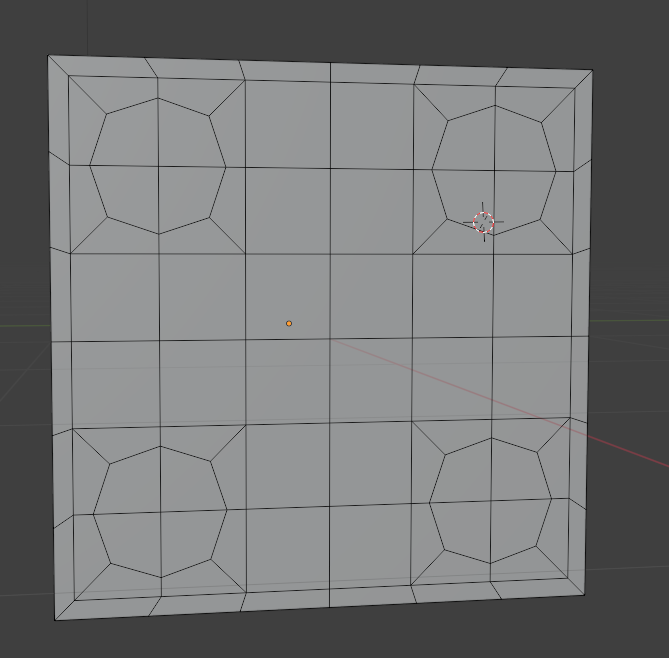
To start, I created a cube, and inserted a face into each side in order to create a small border around the outside of the cube. This meant that when I added the holes in the dice for the numbers, it wouldn’t mess with the shape of the edges when subdividing the model at the end.

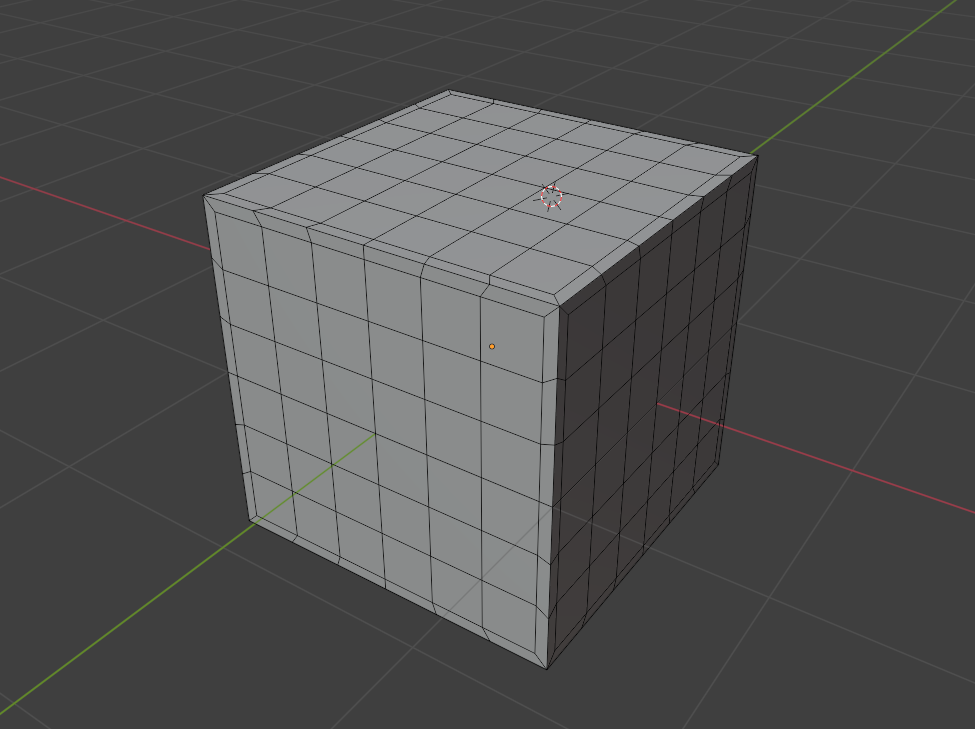
Then, I added more loop cuts in order to divide each side into 9 squares – these would be used to add the dice dots for the numbers.
Each of these squares was then further divided into four sections, to create a circular shape for the dice dots.
To start creating the dice dots, I inset faces on each side to lay out where the dots would go – represented by the squares on the dice.
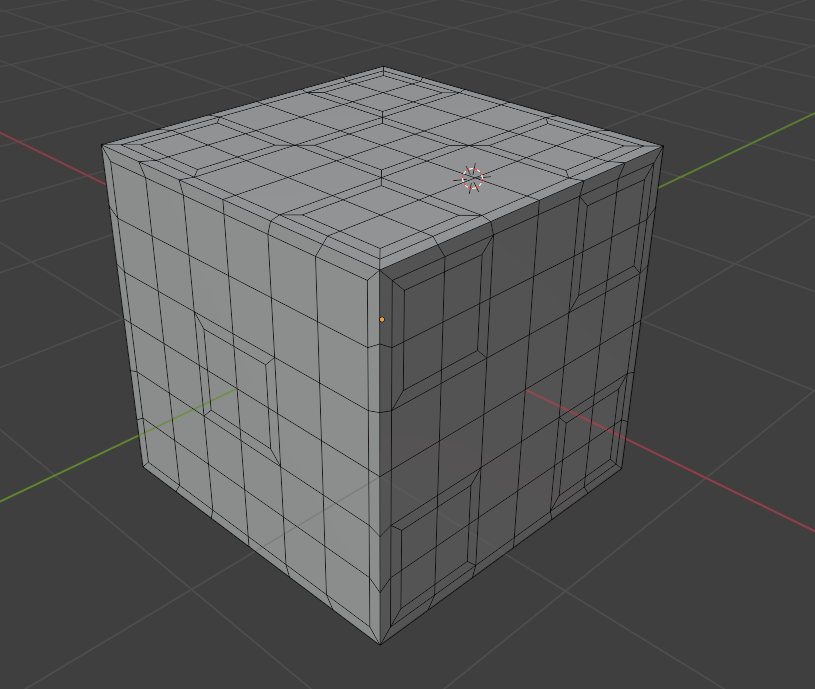
With the spots for the dots laid out, I next rounded them out by adjusting the corners of each of the dice spots to make an octagon shape. When I subdivide the model later, these will become much more rounded, and look much more like the circular dots I am trying to create.
To add depth, I then extruded each of the dots inwards slightly.
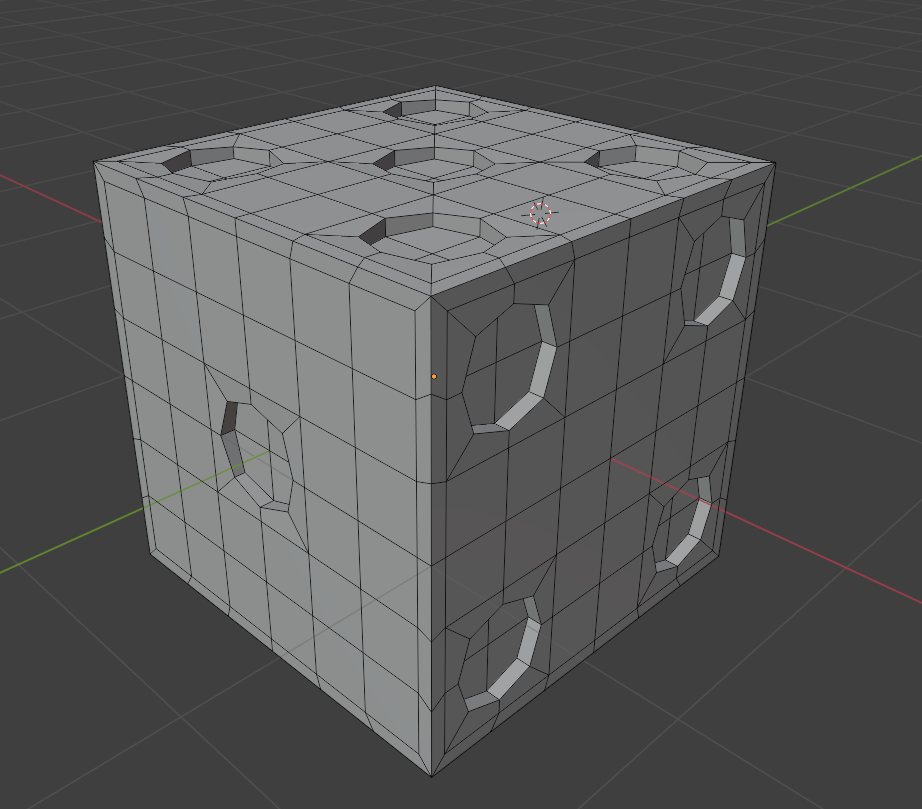
Finally, I subdivided the model to round it out.
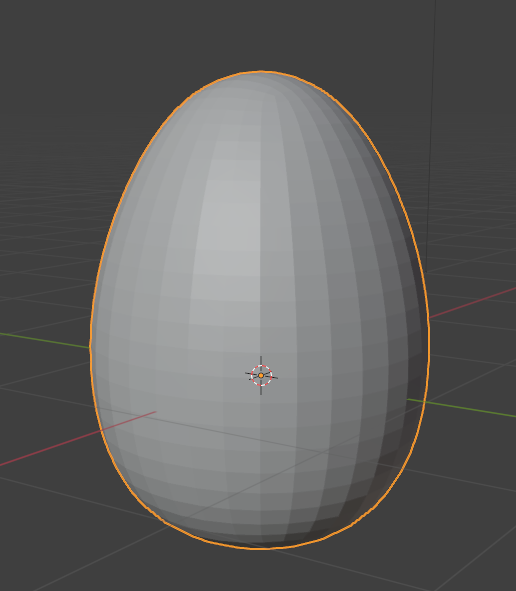
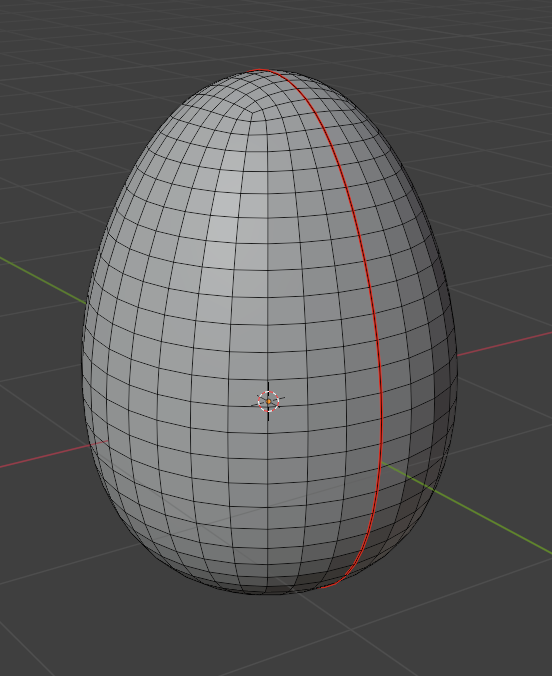
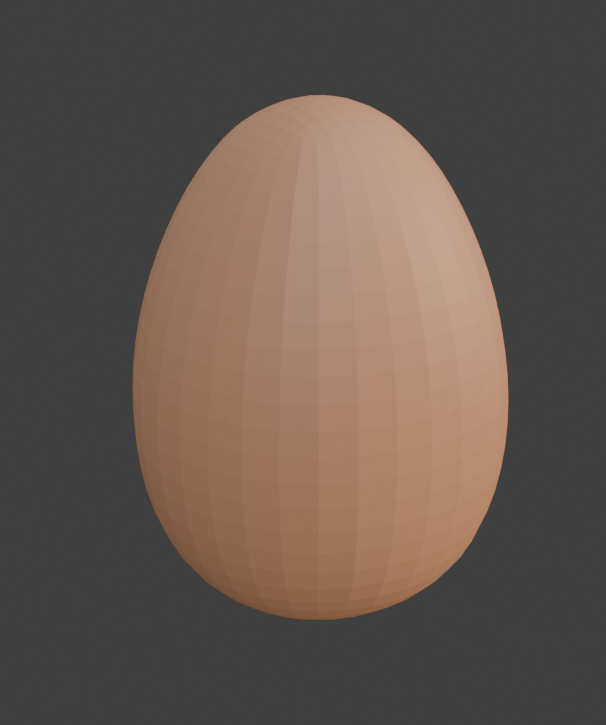
Egg
The egg was the simplest model to create. I started by making a cylinder, subdividing it, and adding a few loop cuts, adjusting them similarly to the cup model in order to make the shape of the egg.
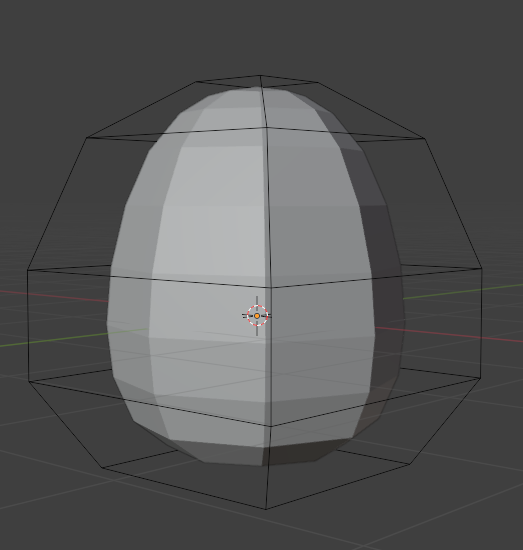
After that, all I had to do was subdivide it further to smooth it out.
Texturing
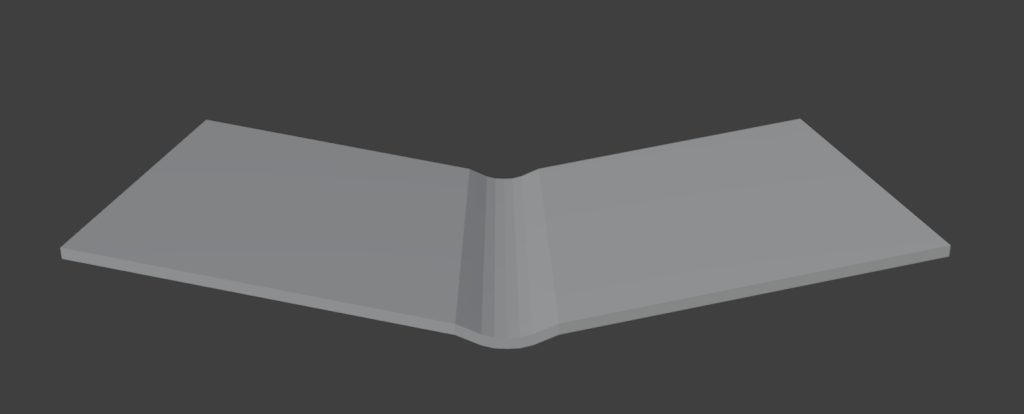
To begin texturing my models, I first needed to UV unwrap them. This would allow me to paint the textures onto the models. To do this, I added a seam around each model, so that they could be properly unwrapped.
Then, with the models unwrapped, I could start on the texturing. This involved painting the textures onto the models, allowing me to colour them in the ways I wanted. I kept the colours simple, mostly just using single colours with slight detailing, such as small spots on the apple and egg, and writing on the book.
The textures are saved as images, which I can import into Unity to add the textures back to the models.

ZapWorks Unity
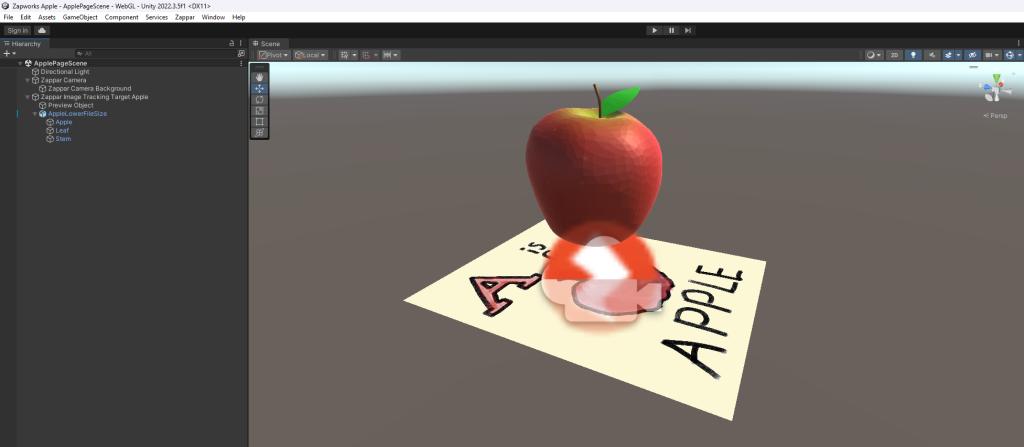
Once all of the models were completed, I started to work on setting them up in the ZapWorks Unity project.
First, I did the basic setup for ZapWorks, which I could then use for all of the models. This involved creating a Zappar Camera, and a Zappar Image Tracking Target, which would link together.
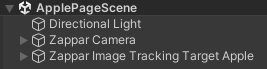
With the basic template set up, all I had to do was use the built in Zappar image trainer to add a page as an image, and then link the model to the Image Tracking Target for that page.
Next, I spent some time trying to figure out how to have multiple different AR image trackers linked to the same QR code. I tried having multiple scenes in a project, but when uploading the project to ZapWorks, only the first scene was used, while the others simply did not have any effect from the AR camera. I also experimented with having multiple image tracking targets and cameras in the same scene, but not only did this lead to strange glitches with the AR models, where different pages and models could be seen, it also made the file size too large to upload to ZapWorks when more than a couple of models were added, as ZapWorks projects can only have a project below 25mb.
After spending a while trying to find a solution, such as lowering the detail of the models and textures to reduce file size, I eventually decided to simply create a separate project and QR code for each model, as I could not find a solution to having all of them linked to the same QR code.
After making all 5 of the scenes in Unity, I uploaded each of them to the ZapWorks site as their own projects. This gave me a QR code for each, which when activated, would open an AR camera for the respective page. The last step for the project was to add these QR codes to their respective pages, to make the experience much easier and more convenient for the user. I also removed the white background from the QR codes so they would blend in better with the page, and not look too out of place.