Idea Generation
To start my design process, I began by looking through the different themes and sub-themes to try and come up with various different options for my final asset. These are some of the combinations I considered:
- Horror/Corruption – I thought about the idea of a kind of parasite monster, but quickly realized that modelling a creature like that would be much more difficult than I could likely manage.
- Horror/Beauty – An evil or dangerous plant/flower could have been an interesting option
- Fantasy/Alien – This could be chosen for something like an Aberration from Dungeons and Dragons, like a Beholder or a Mindflayer, but any of those seemed much to complex and confusing to attempt to model.
- Fantasy/Decay – Also inspired by Dungeons and Dragons, I had the idea to create a destructive scepter that is a magical item in a DnD campaign I run.
- Sci-Fi/Alien – While this seems like an obvious choice, I could not think of any particularly interesting or exciting to do with this theme.
- Sci-Fi/Decay – This made me think of some kind of zombie apocalypse setting, but I couldn’t come up with a good specific asset to create for that.
After thinking for a while about the options, I settled on the scepter for the Fantasy/Decay theme. This felt like the best option because I already know a lot about the design for it, as I created the item for my DnD campaign, and it is both simple enough to model with relative ease while still being complex enough to be an interesting design.
Research
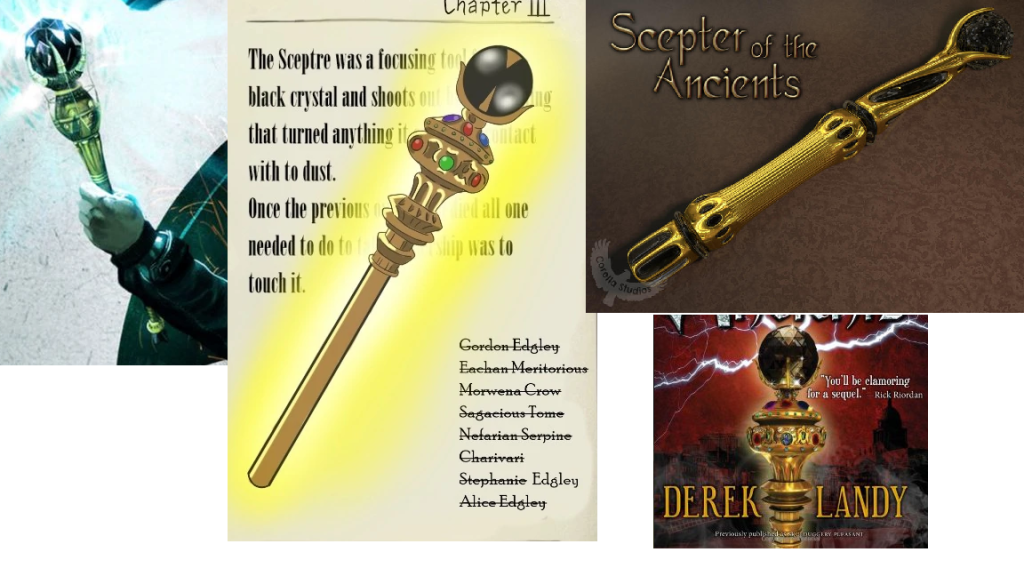
Once I’d decided on the asset I was going to make, I began looking for images online to use for inspiration and ideas. The scepter itself was originally based on the Scepter of the Ancients from the Skulduggery Pleasant book series – a golden scepter with a black crystal at the top, which could create destructive black lightning, so I started by finding some official and fan-made art of that scepter.
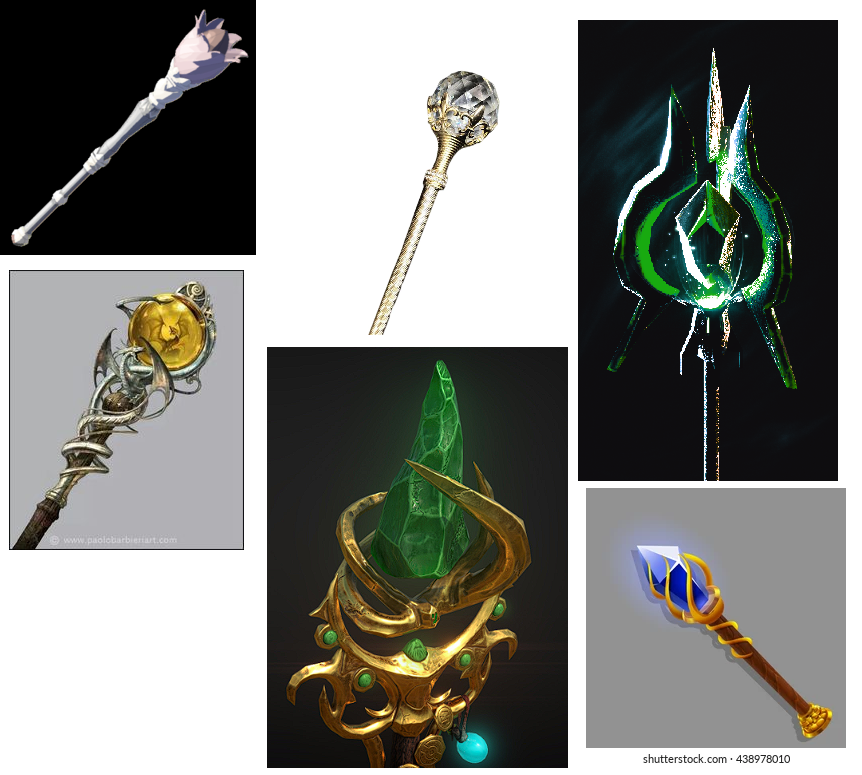
I then also found some other images of scepters for other potential designs of the shape and form of my asset.
Design
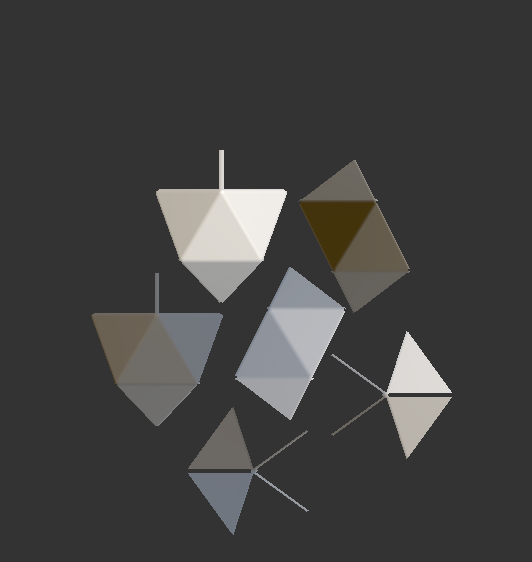
The next step was designing the basic shape of the design I was going to go with. I experimented with a few different designs before settling on the one I would go with.
I decided on the last design, where the crystal would sit in the center of the top segment. Next, for the crystal, I decided that because it is based on my DnD campaign, I would use the shape of a d20 dice. I then began to work on the final asset.
Creation
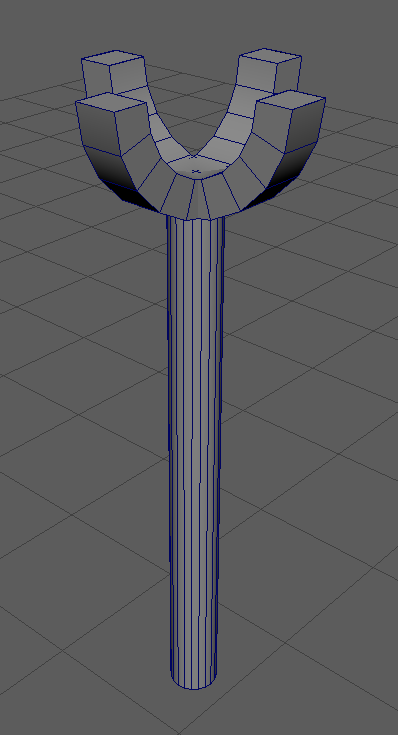
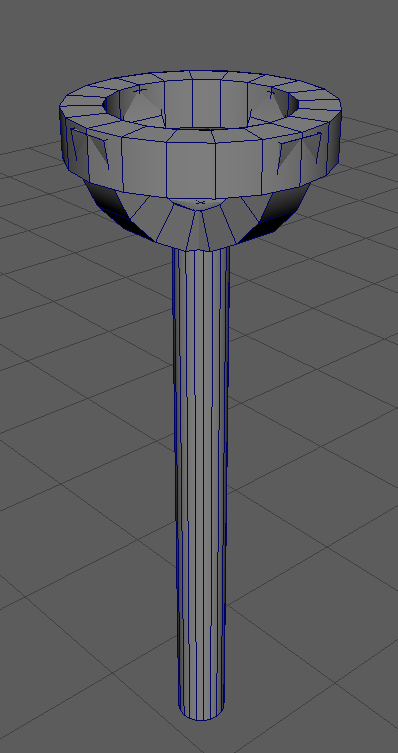
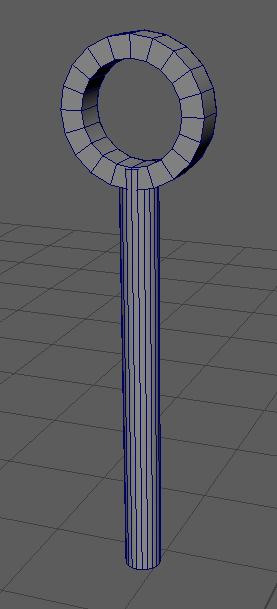
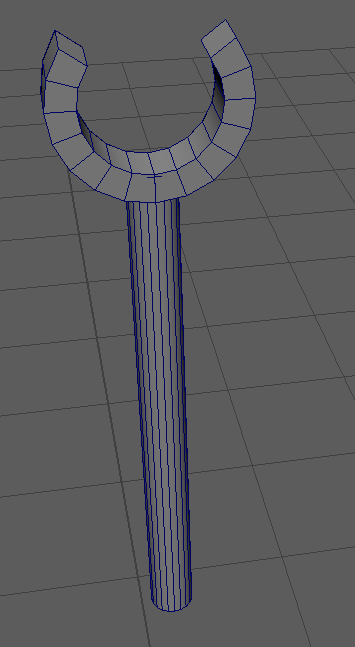
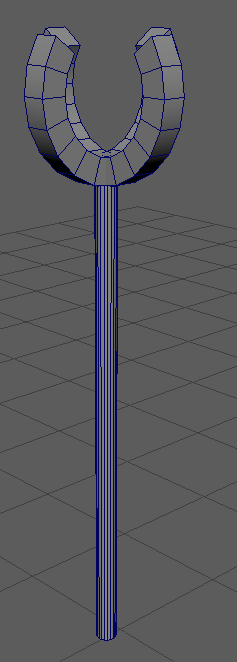
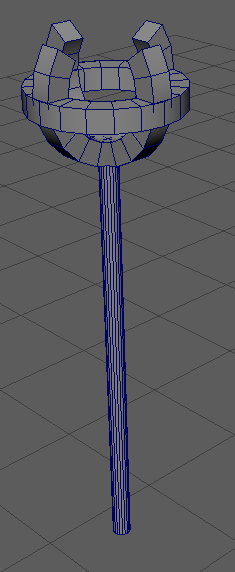
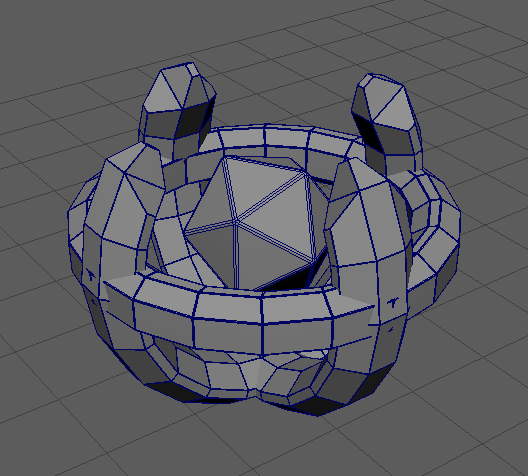
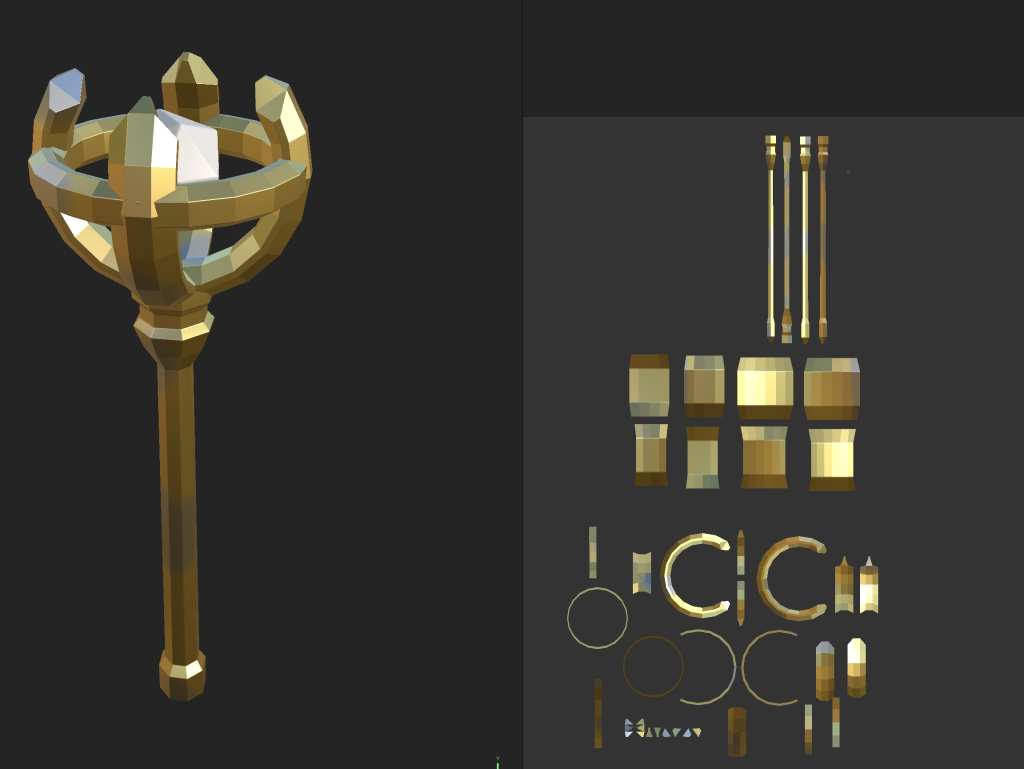
First, I worked on creating the top of the scepter, which would hold the floating crystal. I used the premade “Pipe” shape to create a hollow cylindrical shape, cut a section of the top of the ring out using the face selection tool, filled in the hole using the “Fill Holes” tool under the Mesh category, then used the “Extrude” and “Bevel” tools to flesh out the shape. Once I was happy with it, I duplicated the shape I had created and rotated it 90 degrees to create the other two arms of the crystal holder.

Next, I created another “Pipe” shape, which I resized and similarly extruded and bevelled, which I placed around the center of the arms to create a ring around them.

Next, I added the crystal using the object creation tool by selecting the “Platonic Solid” for the shape, and bevelled it to make it fit more with the rest of the asset.
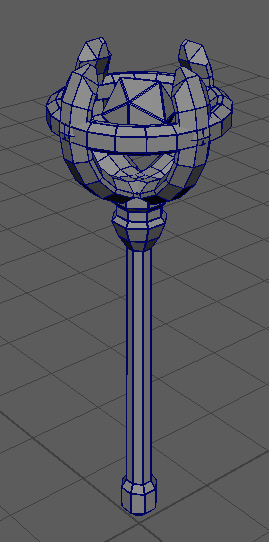
The last part to add was the handle. I made this out of one cylinder, using the extrude tool to expand it downwards as well as the bevel tool to make more segments, then bevelling again at the end to once again make it fit the rest.
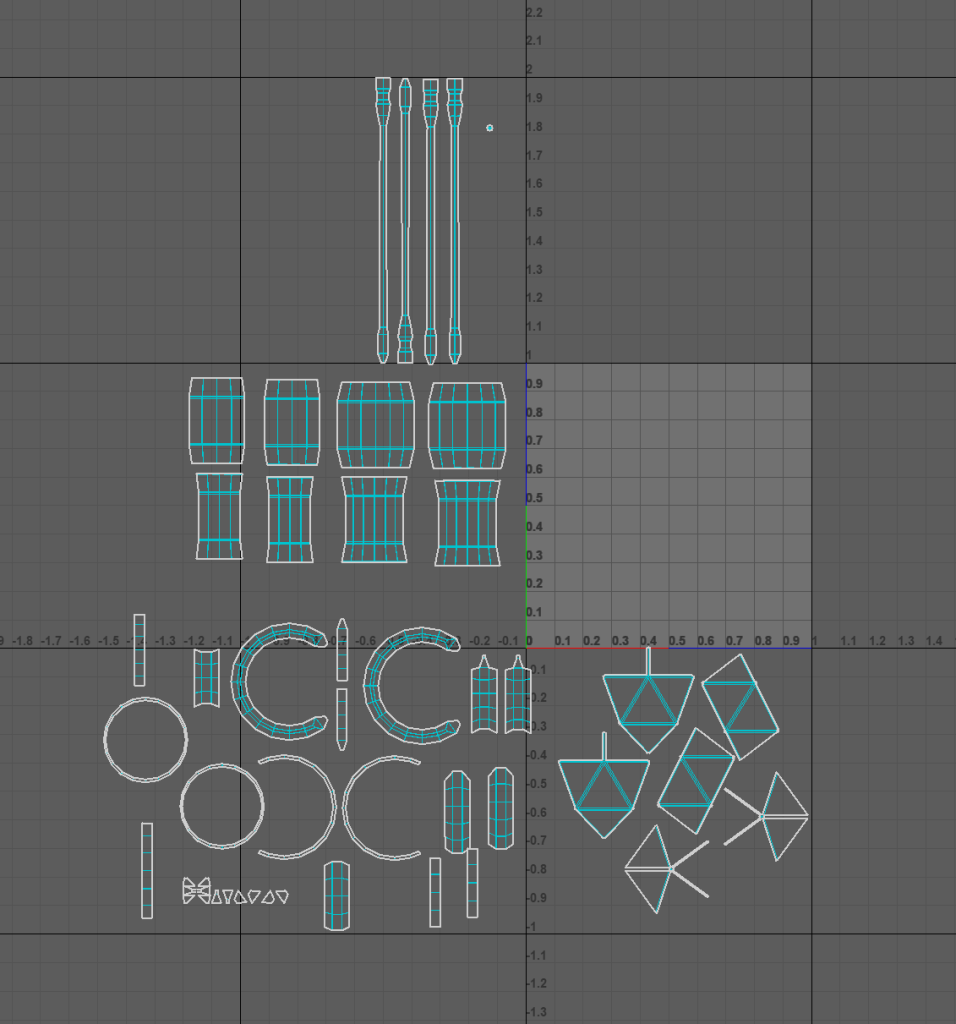
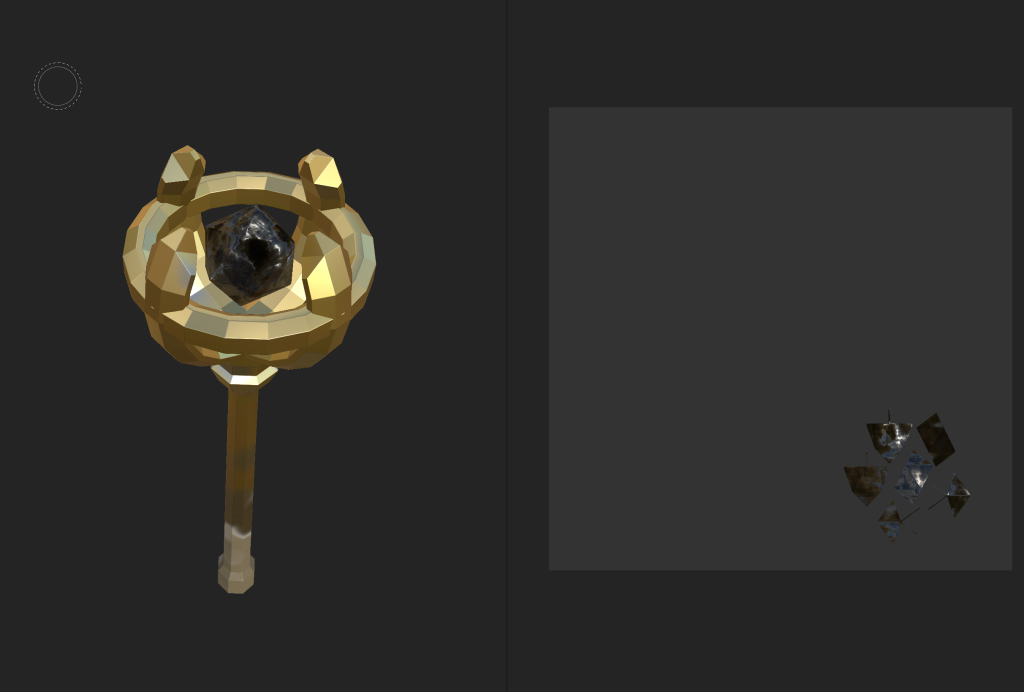
Next I needed to add textures and colour to the asset. To start with, I sorted the UV’s of the asset so I would be able to see them when exported into substance painter.
Then I imported the asset into substance painter, where I began to paint the asset.
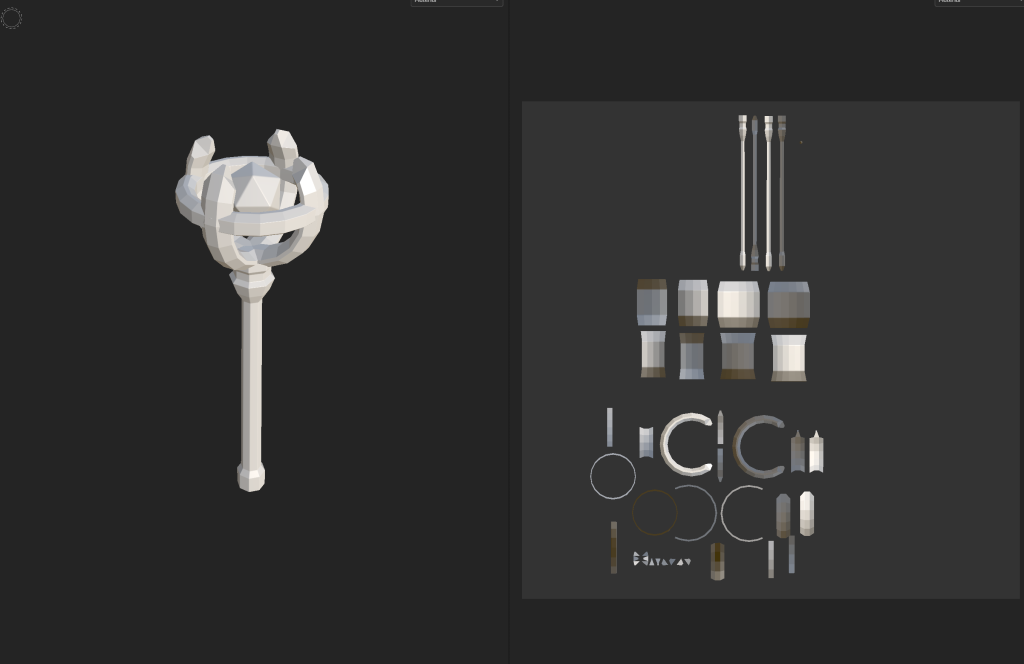
I started by painting the main part of the scepter with the gold texture, then added some patches of the brass and coated metal textures to add variety and make it seem slightly more old and worn-down.
I then painted the crystal with the carbon fiber material, but made it slightly transparent to make it seem more like a crystal rather than just a floating object.
Then I exported the texture back into Maya and applied the materials to the scepter.
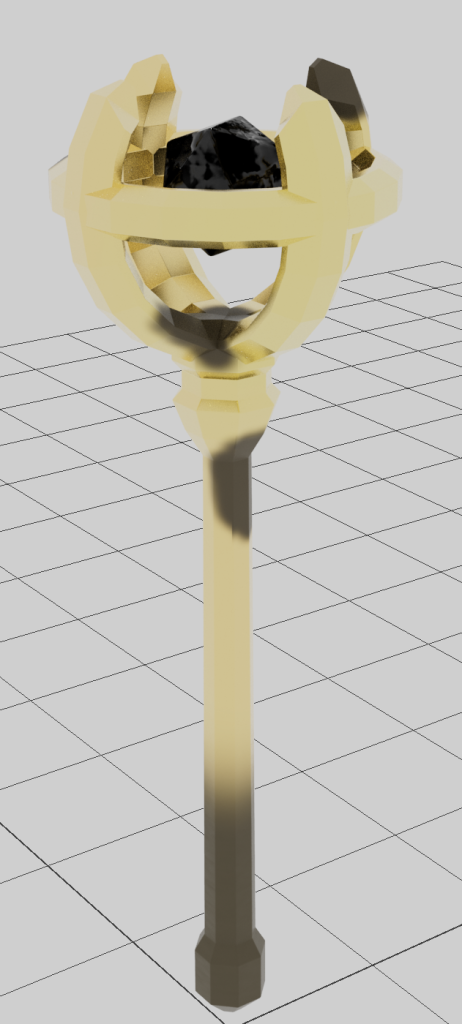
Finally, I worked on animating the scepter for the final display video. I made it rotate around slowly to show the entire thing, and made the crystal within slowly move up and down while rotating slightly faster. The transparency of the crystal did not seem to show up in the video, but it did not affect the overall appearance very much, and looked good enough that I did not feel like it needed to be changed.