Idea Generation
To start my design process, I began by looking through the different themes and sub-themes to try and come up with various different options for my environment. These are some of the combinations I considered:
- Horror/
- Fantasy/Decay – I came up with this combination for an idea for an asset, based on a magical item from a Dungeons and Dragons campaign I run, so I already have an idea of the environment around it, which is some ruins on top of a mountain.
- Sci-Fi/Dystopia – This theme could be used for some kind of dictator’s office in a sci-fi world, such as the empire from Star Wars.
- Sci-Fi/Decay – I thought about zombie apocalypse environment for this option, such as an abandoned building or camp.
After thinking for a while about the options, I settled on the mountains and ruins for the Fantasy/Decay theme. This felt like the best option because I already know a lot about the design for it, as I came up with it for my DnD campaign – however, I would also need to add an interior area to fit the assignment, so I decided I would add a cave with a small campsite within it.
Research
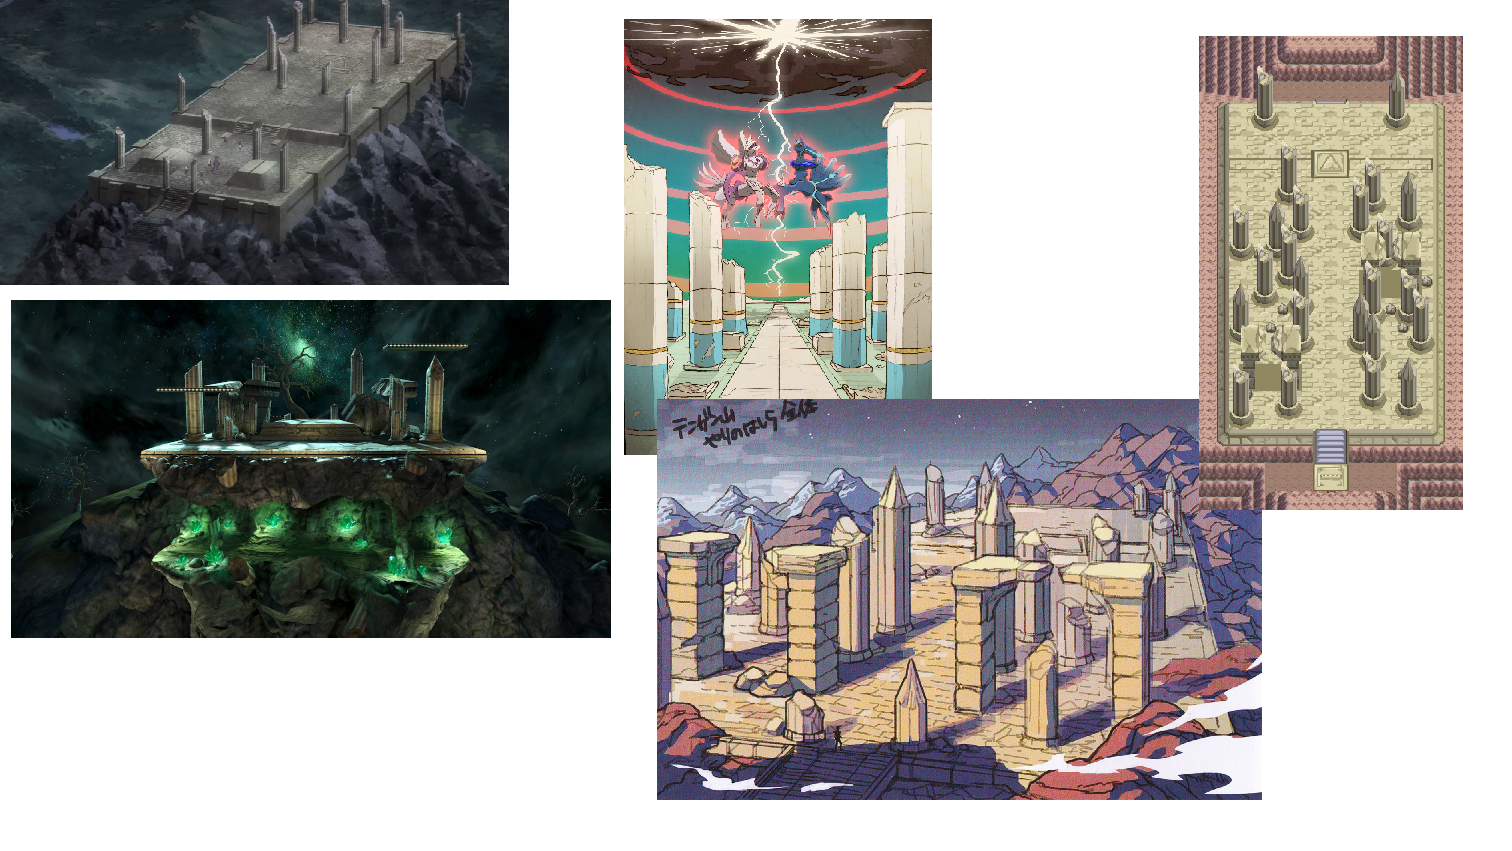
Once I’d decided on the environment I was going to be creating, I went online to search for images and ideas that could help me get a better idea of what I wanted the final piece to look like. I started by looking at images and artwork of Spear Pillar from Pokemon Diamond/Pearl/Platinum, as that is what I am planning to base the design of the ruins on.
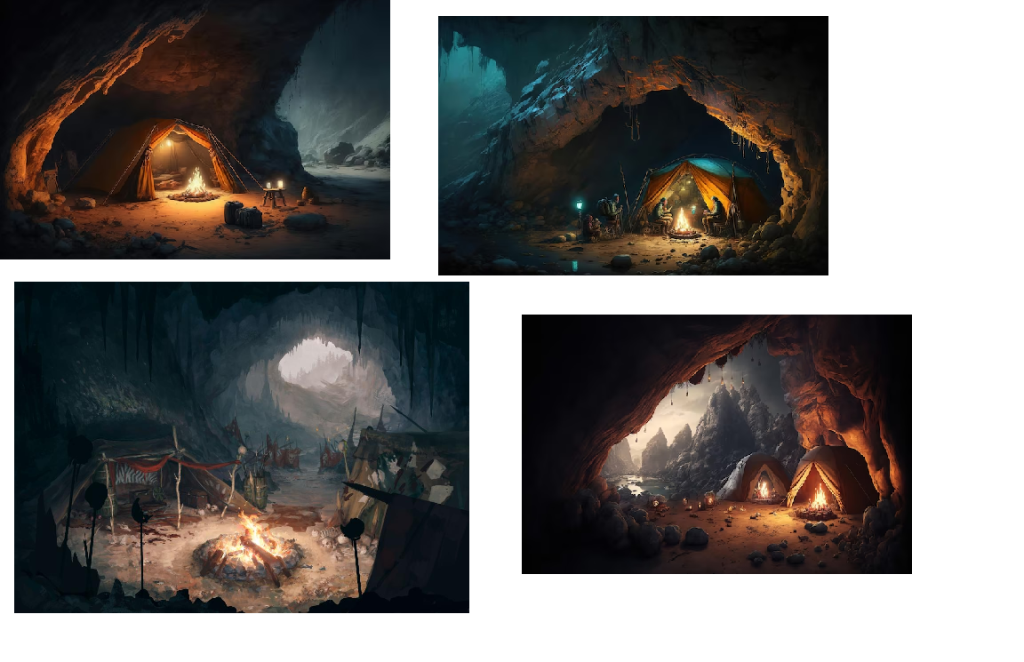
I also gathered some images of fantasy-style campsites in caves for more inspiration.
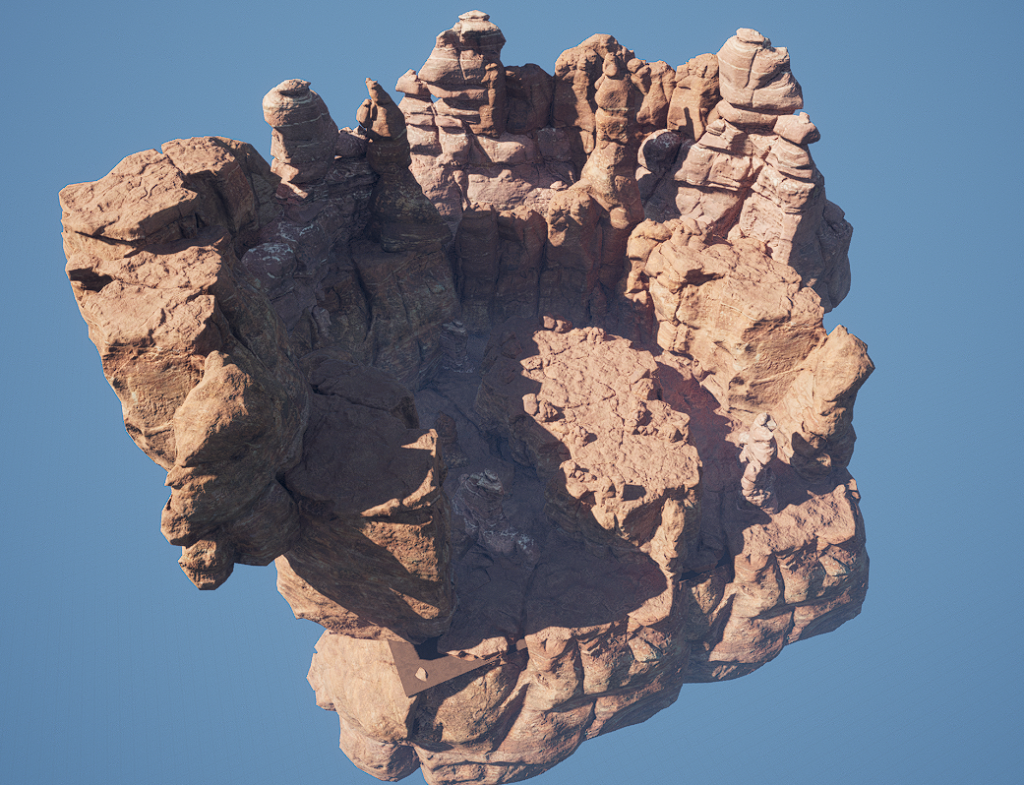
Now that I had found enough inspiration and come up with my idea, I went into Unreal to begin creating my environment. First, I created a basic landscape, adding in the different lights and visual effects needed – a directional light, a sky atmosphere, a sky light, a volumetric cloud, a exponential height fog, and a post process volume – all used to properly light the scene and ensure it doesn’t look out of place or like it’s floating in a void. Then, I created a material instance of the sandstone material in Unreal’s starter content pack, which I then modified the colour of to make it slightly redder and darker to fit the way I pictured my environment looking. After applying that to my landscape, I could begin to sculpt the shape of the mountaintop where my environment would focus on.
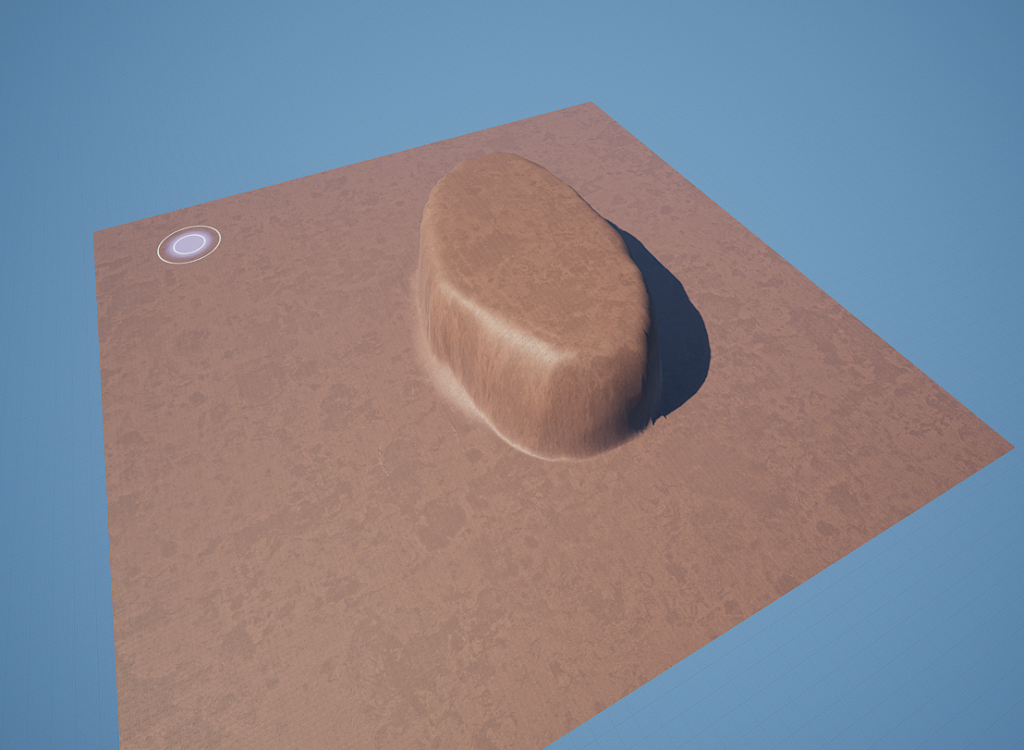
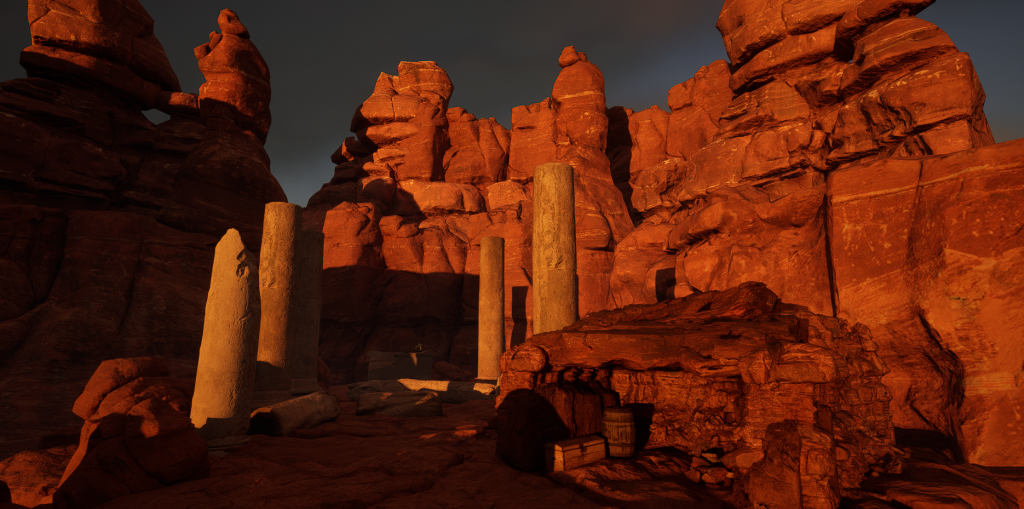
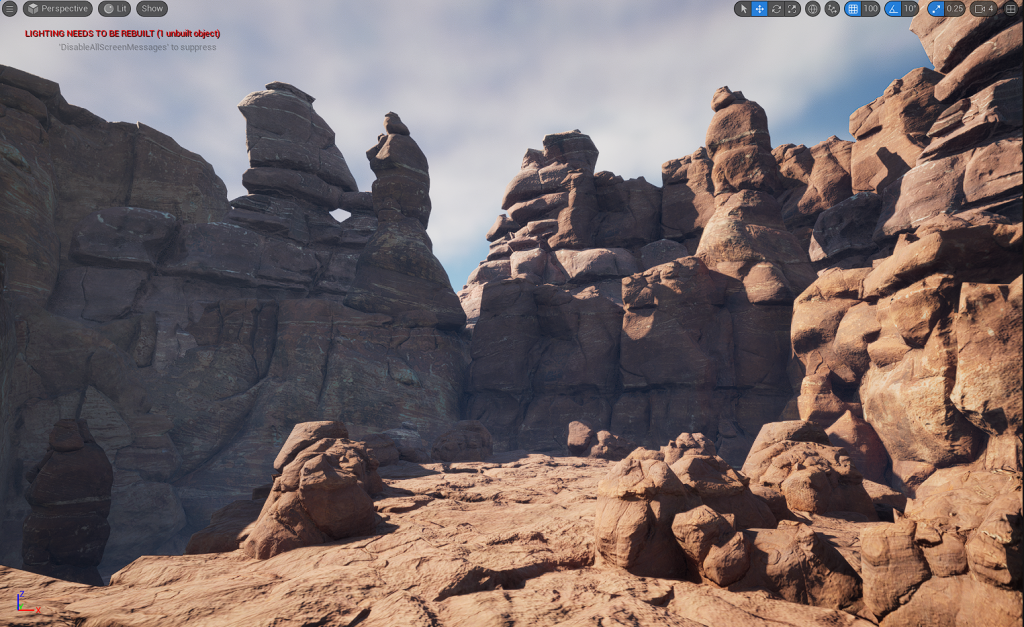
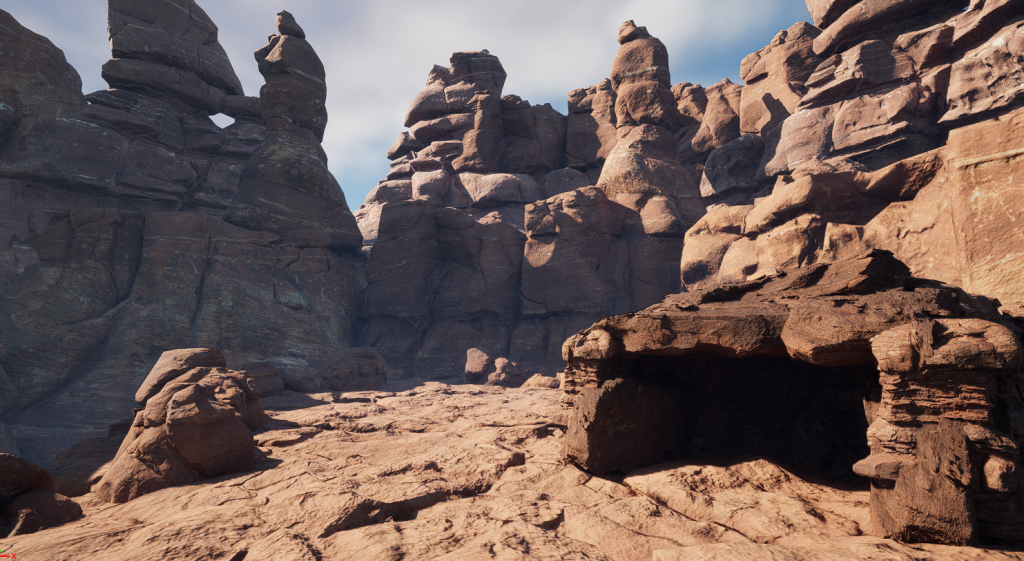
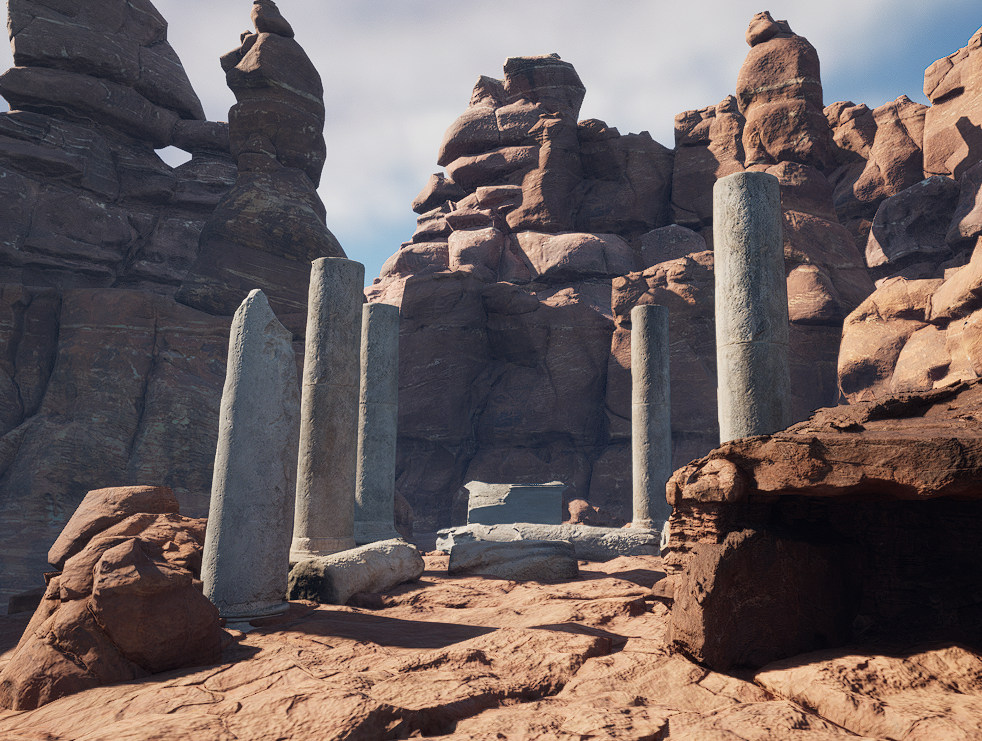
After considering for a while about how to design the environment around the focus point, I decided that the best way to do it would be to surround it with giant cliff walls, which would hide the background to cover the large flat plane below. I used Quixel Bridge to find some canyon cliff assets that would fit the style and material of the landscape, which I found in the “Canyons of Utah” section, and added them around the section I had sculpted. I only added them around three of the sides, as the way I was presenting my environment would be showing it from only the one angle, due to the layout I had planned.
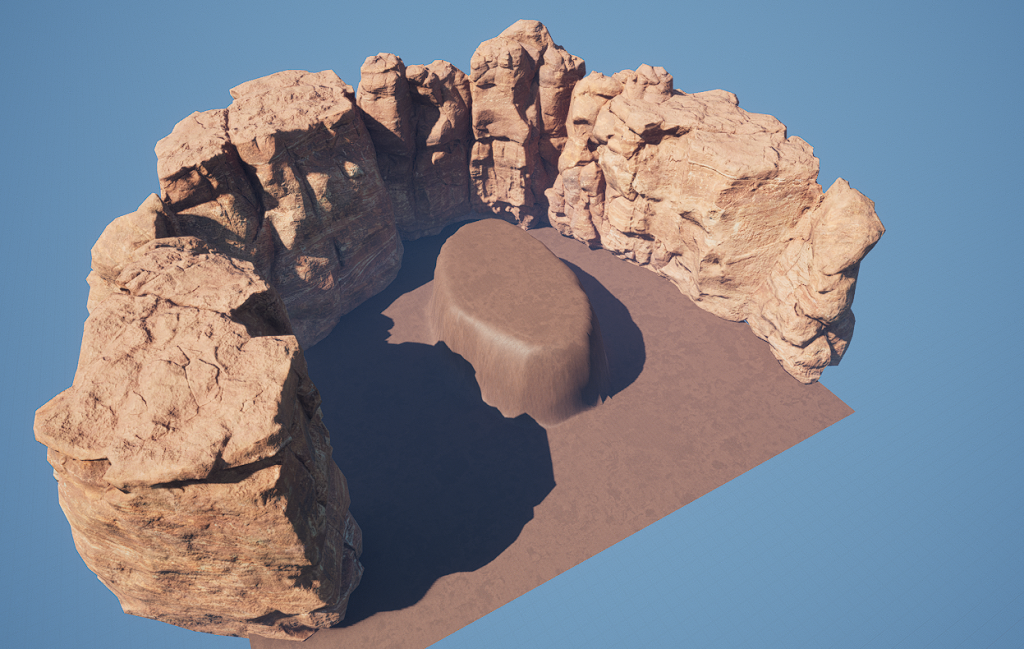
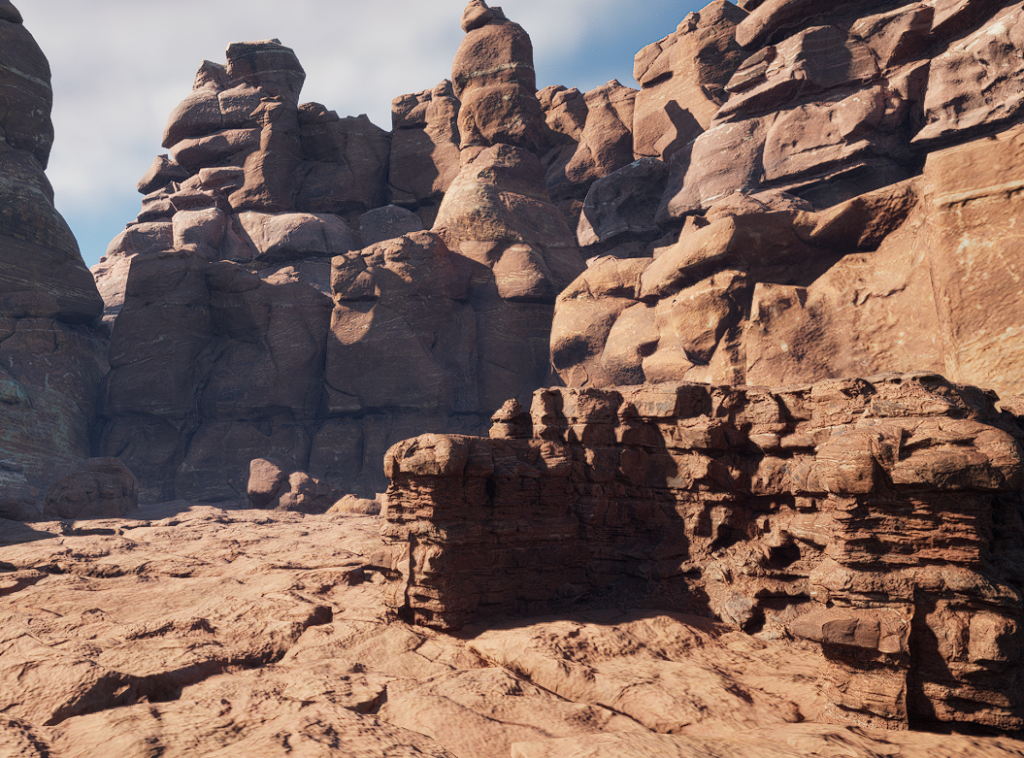
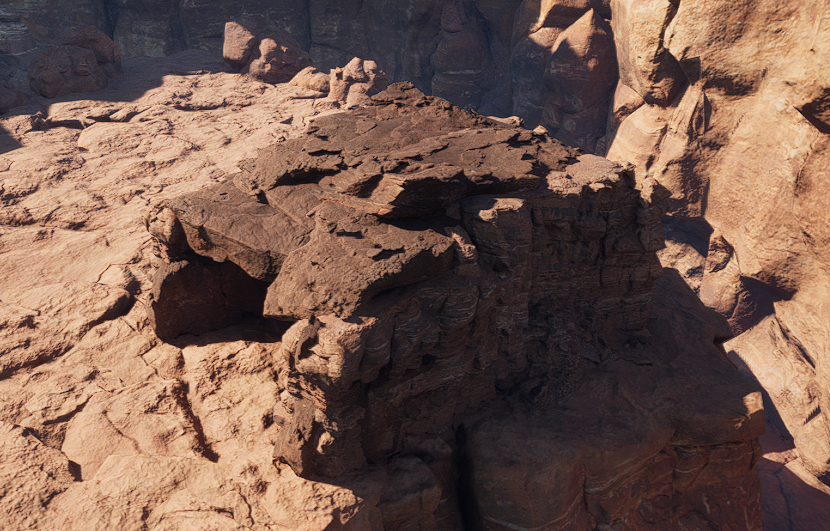
Next, I worked on making the main section look more high quality, as currently it just seemed like a flat lump. Using the same canyon assets I had found on Quixel Bridge, I placed them all around the edges of the main part, as well as covering the top, extending it slightly as well, in order to make it much more detailed and interesting than just a flat platform. I also covered the flat ground below, which would likely not be visible in the majority of the environment display, but I felt it was best to at least cover it so if it was visible, it wouldn’t look out of place.
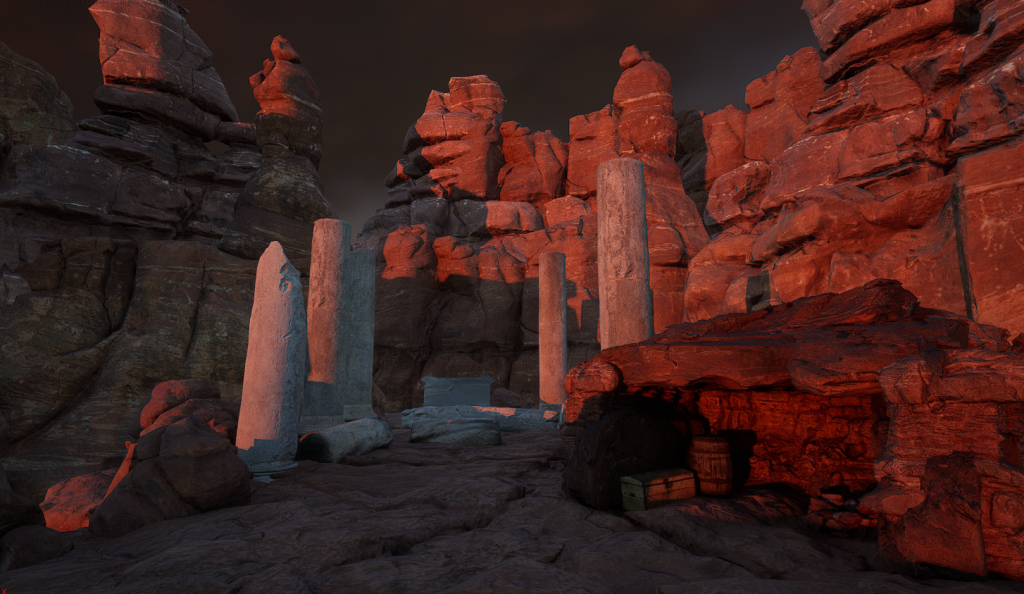
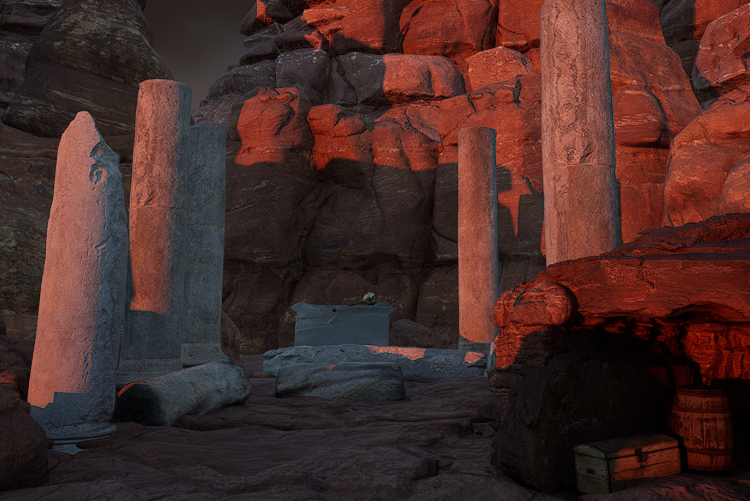
Once I was happy with the way it looked, I began to plan out where the cave would be for my interior. I felt that the section on the left of the second image would make a good place, as there was already a small rock formation that could be modified to start to make the base of a cave area.
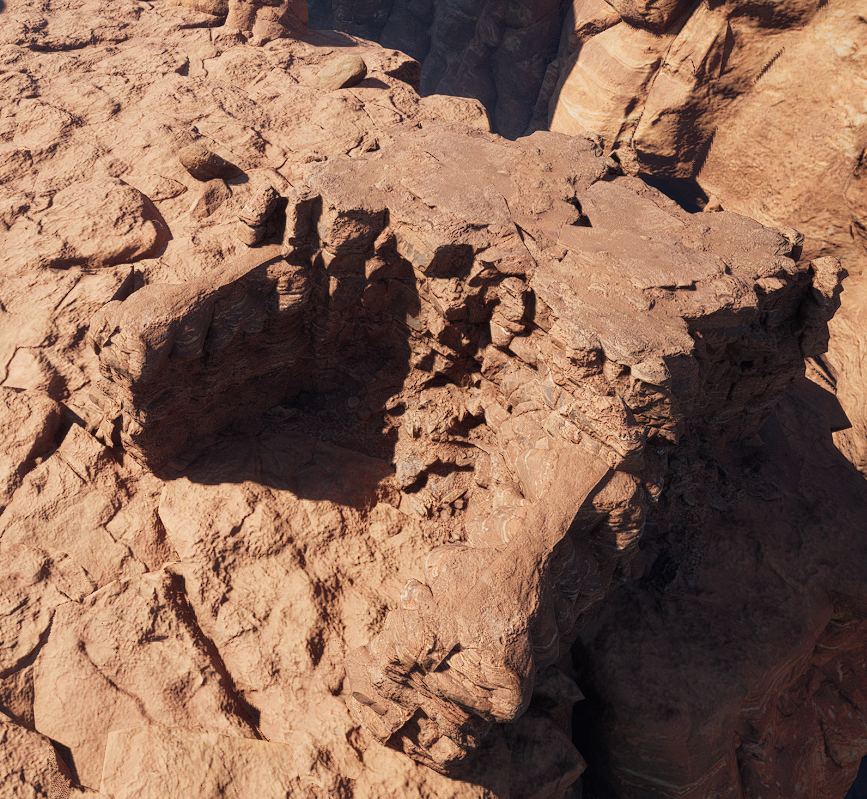
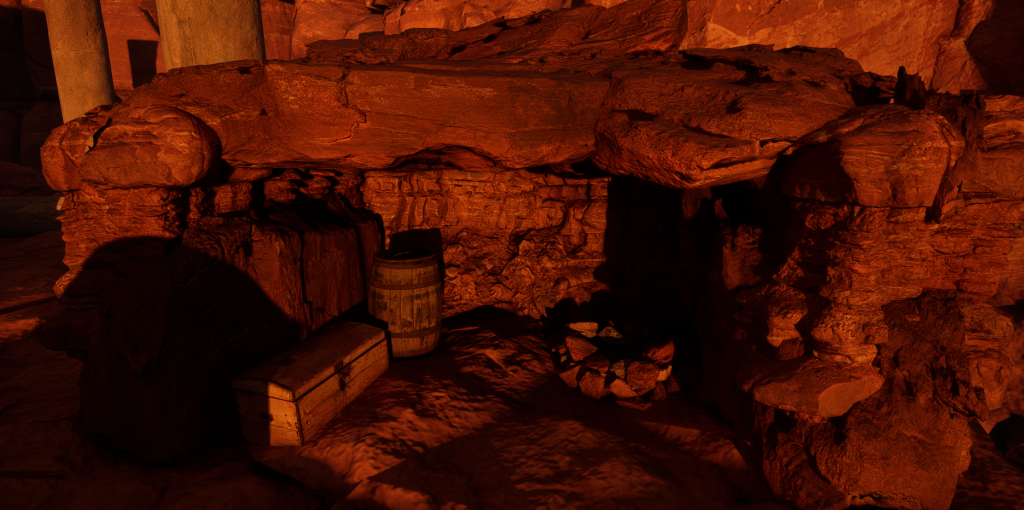
Then I needed to find a rock asset that could be placed on top of the part I had made to make a roof for the cave. Many of the “Canyons of Utah” assets did not have a back or bottom to them, which made it a little difficult to find one that worked, but I eventually found a working asset, which I added to make the roof of the cave.
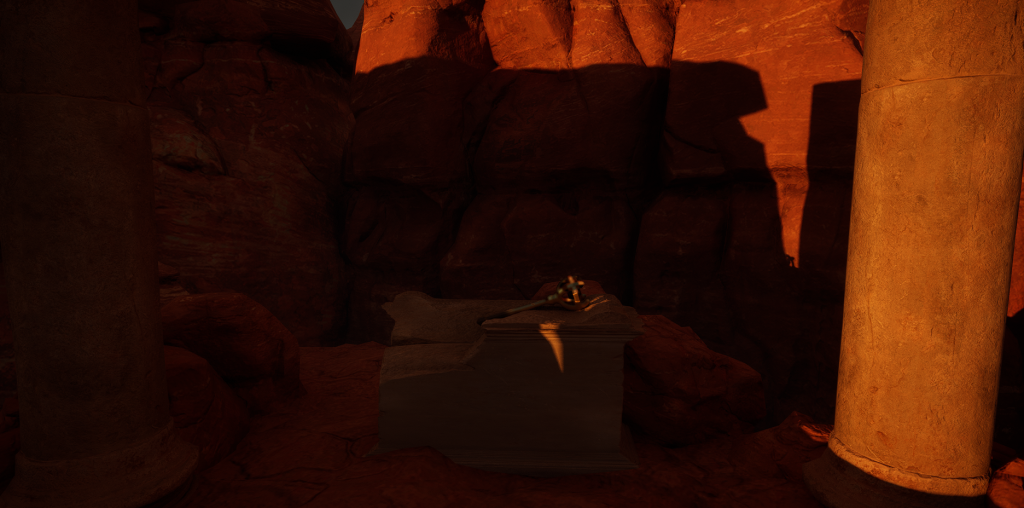
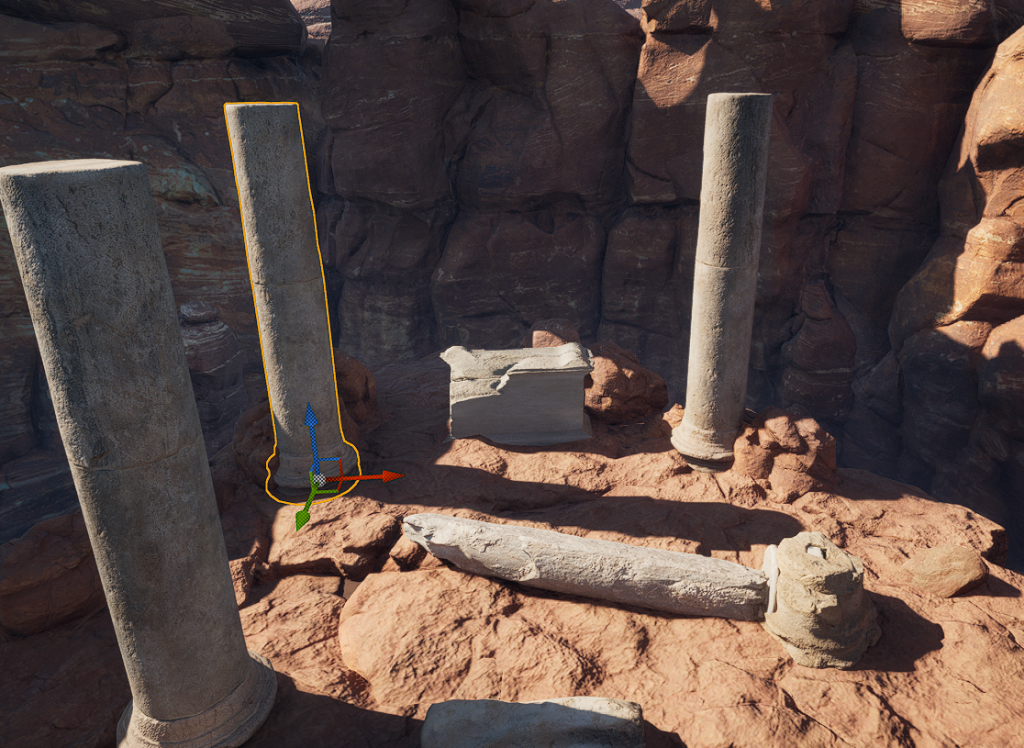
The next step I wanted to work on was the ruins, as they would be the main focus of the environment, so it was important to get them right. I started with the pillars, using Quixel Bridge assets from the “Roman Empire” section, making two of them broken to emphasise the decay aspect of the environment. The pillars themselves are a different style and stone to the environment around them, which is intended – I wanted them to seem out-of-place to make the viewer wonder where they had come from and why they were there.
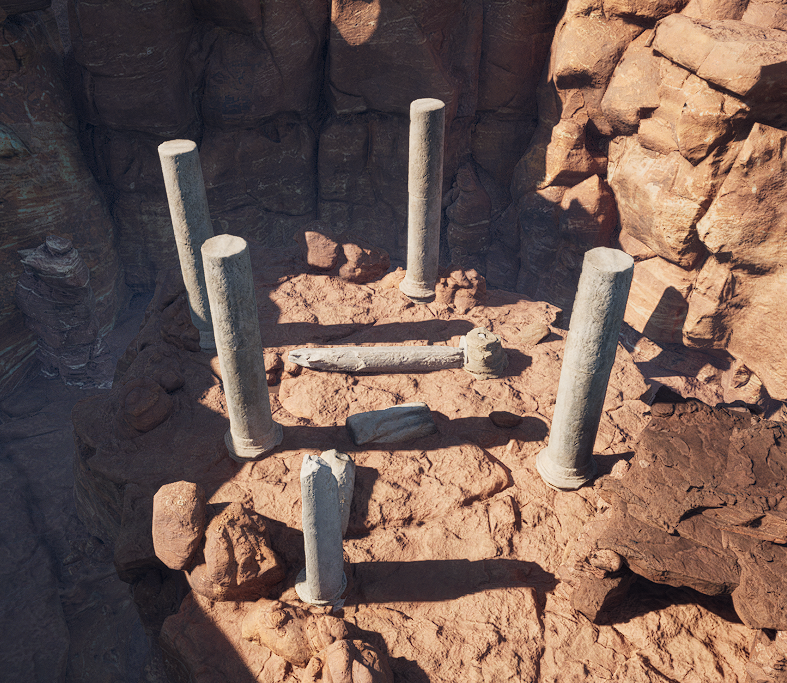
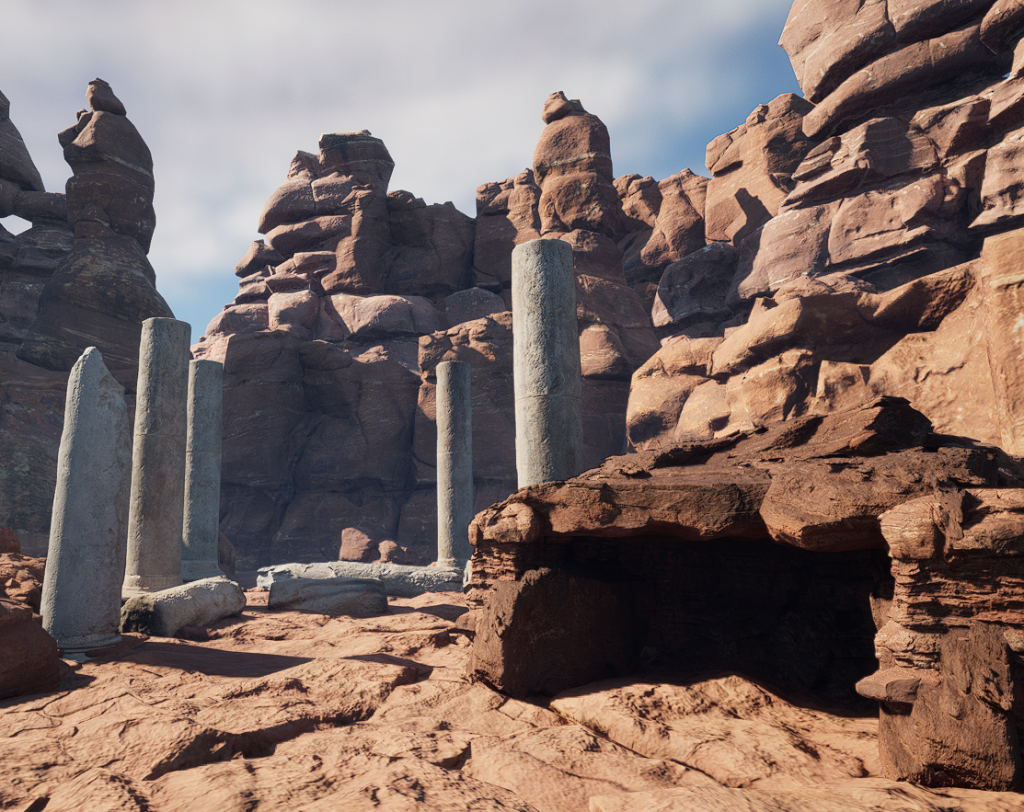
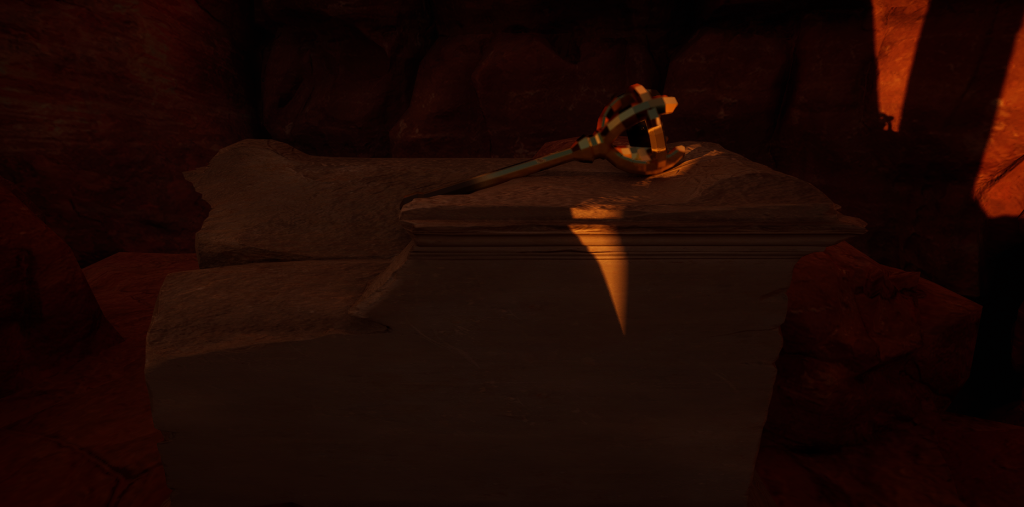
Once I was happy with the pillars, I then found a plinth, similarly from the “Roman Empire” section to fit in with the pillars, which would hold my asset I had designed previously.
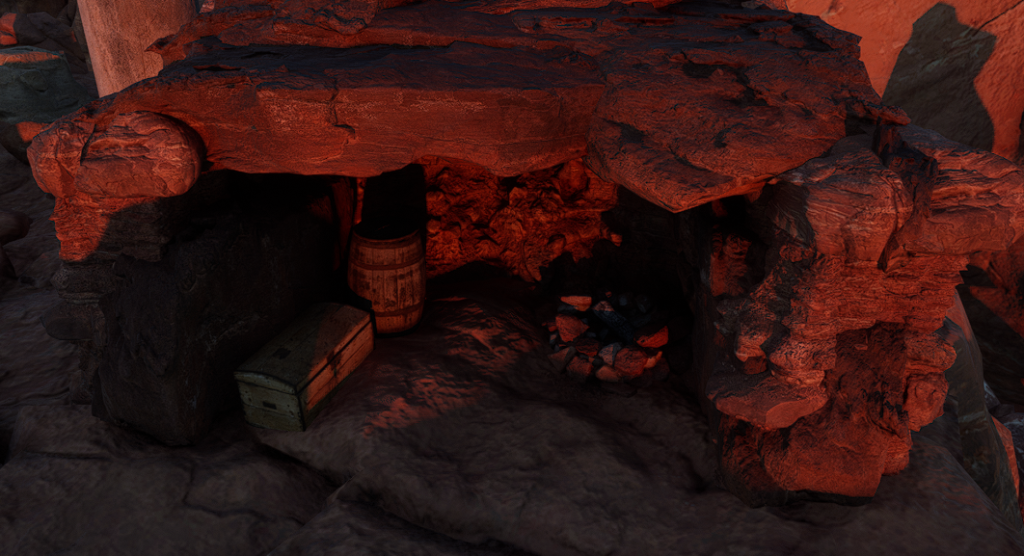
The last things to add were the campsite, and my scepter asset. I started with the campsite. Instead of making it exactly like the example assets I used, I wanted it to seem empty and old, once again showing the decay theme. I added an unlit campfire, and some storage objects to show that it had once been used, but no bedroll or similar things so it seemed more empty and not lived in. I also adjusted the directional light to make the light shine into the cave, and also appear to be more of a sunrise or sunset, making the whole scene darker and adding a reddish glow to add to the atmosphere.
Finally, I added in the scepter asset. I imported it from Maya, applied the materials, and placed it onto the plinth I made earlier.

All that was left was to make some finishing touches to the lighting to get the tone and atmosphere to be as good as it could be, and with that my environment was complete.